Customizing products in POS
After creating your product customization fields, you can begin customizing products in Shopify POS. The video guide below outlines how to customize products with POSify.
Selecting a product to customize in POS
Ensure that you've correctly setup POSify in Shopify POS.
The following three methods can be used to select a product to customize with POSify:
1. POS smart grid tile
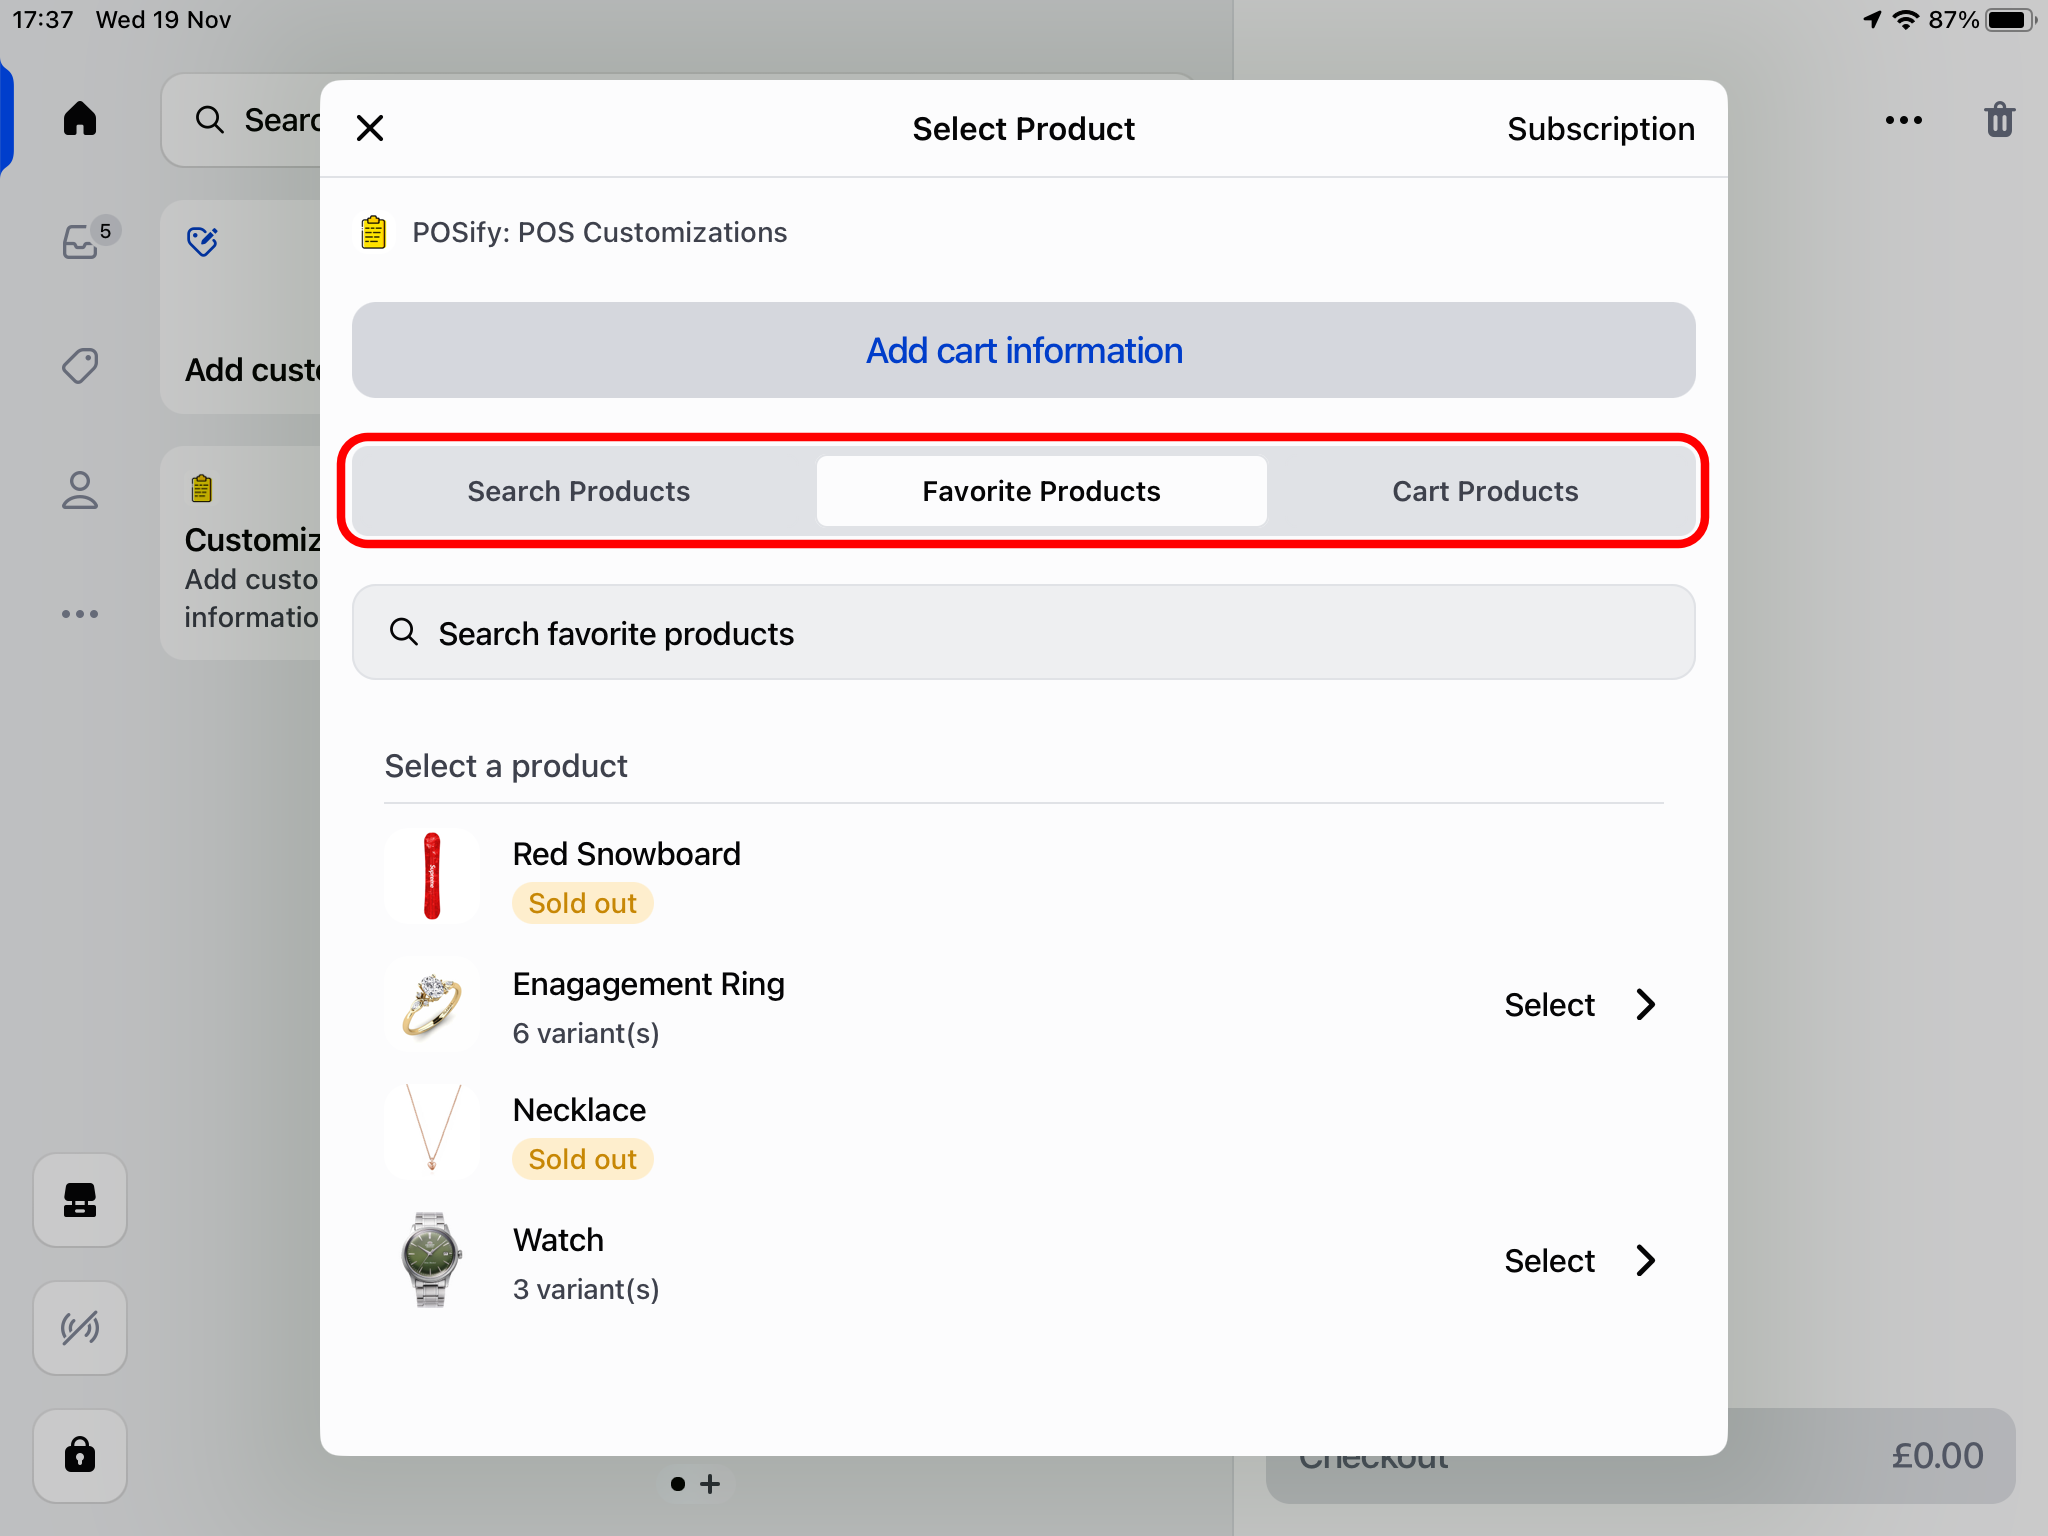
Simply tap the POSify app tile - you can then select a product from one of the following tabs:
- Search Tab: Enter a product/variant name in the search bar and select it from the list
- Favorites Tab: Select one of your pre-favorited products from the list
- Cart Tab: Select a product that has already been added to the POS cart
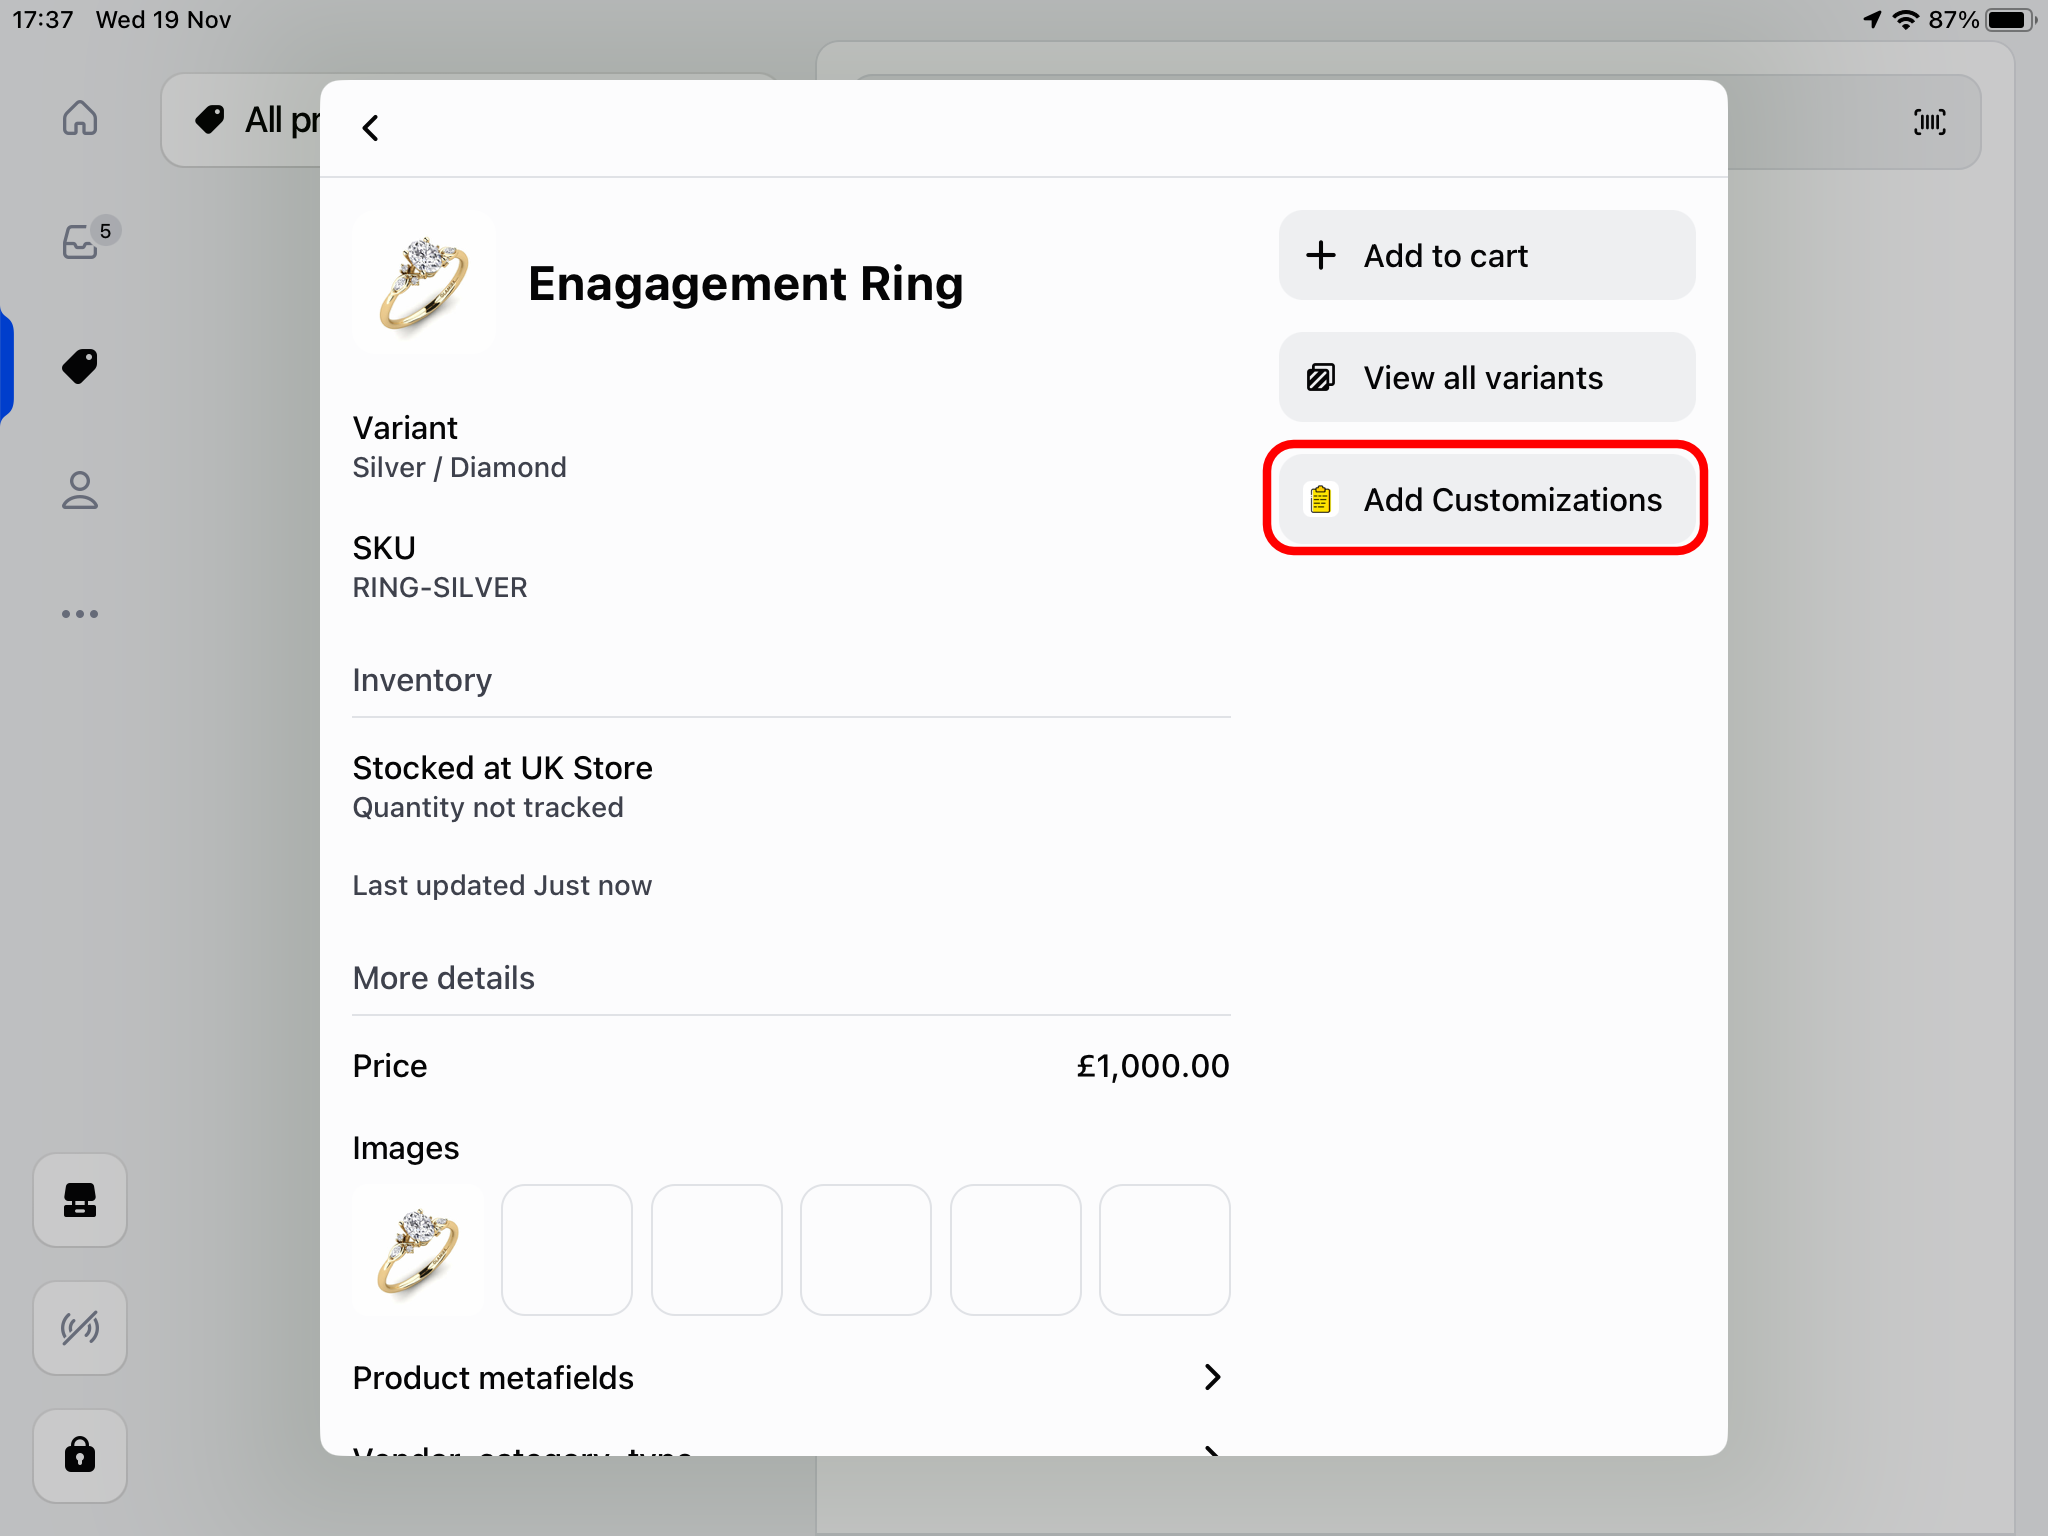
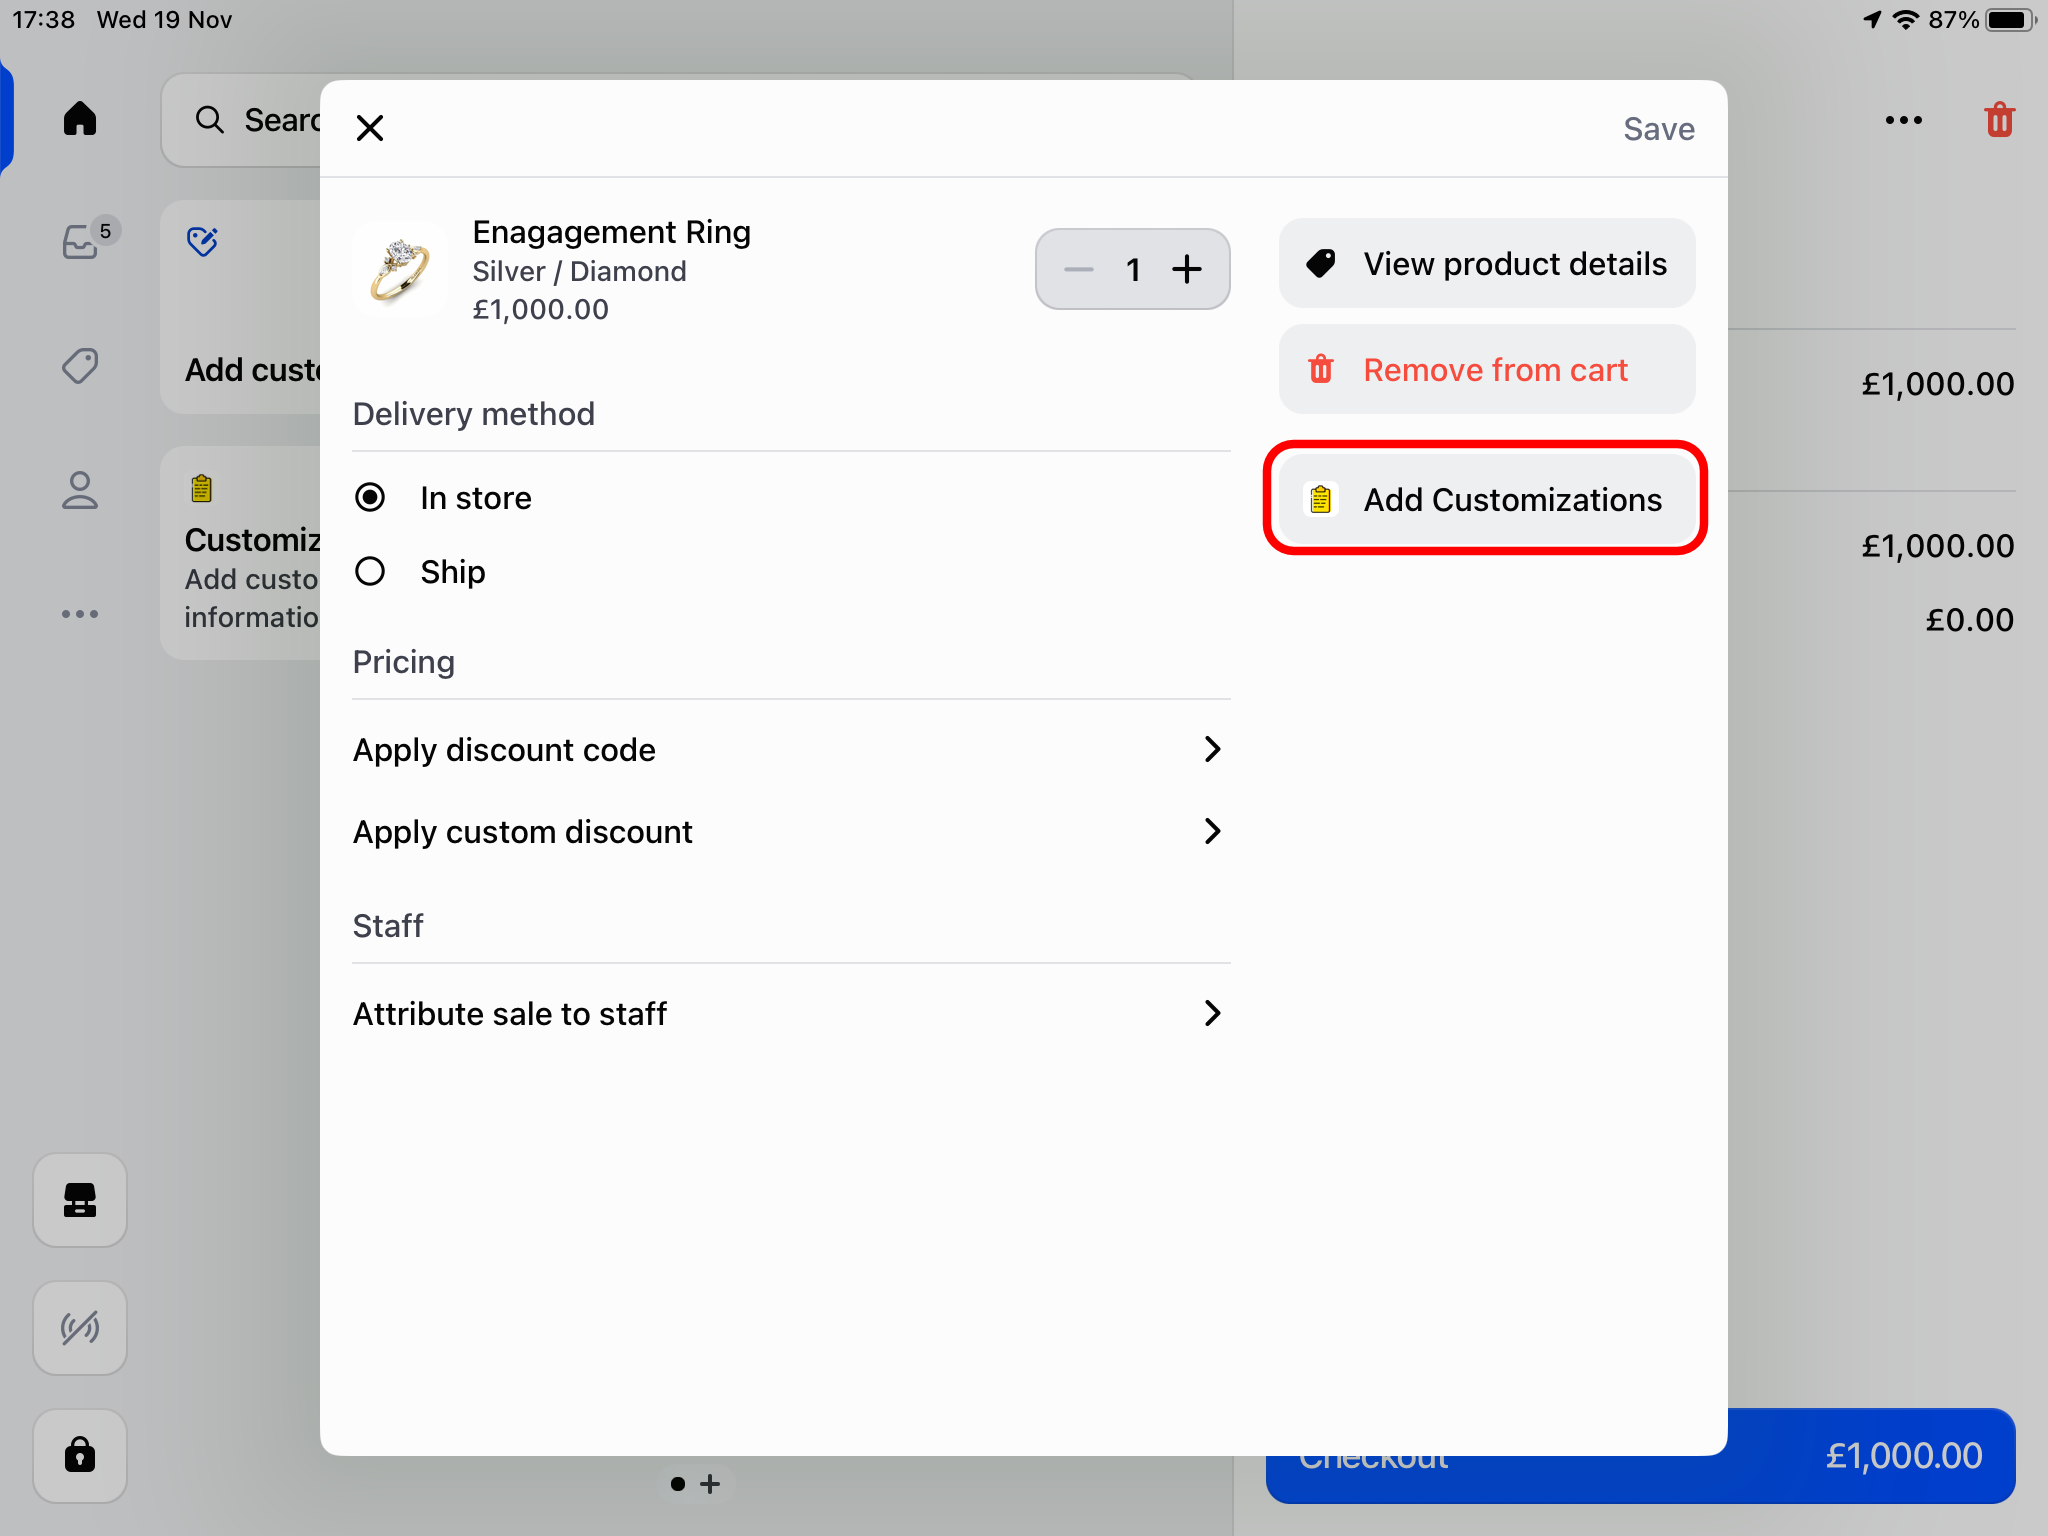
2. Product details menu
Select a product in the Shopify POS products menu and click the 'Add Customizations' button in the action menu:
3. Cart product list
Add a product to the POS cart through the products menu, or using a barcode scanner, select the product in the cart, and click the 'Add Customizations' button in the action menu:
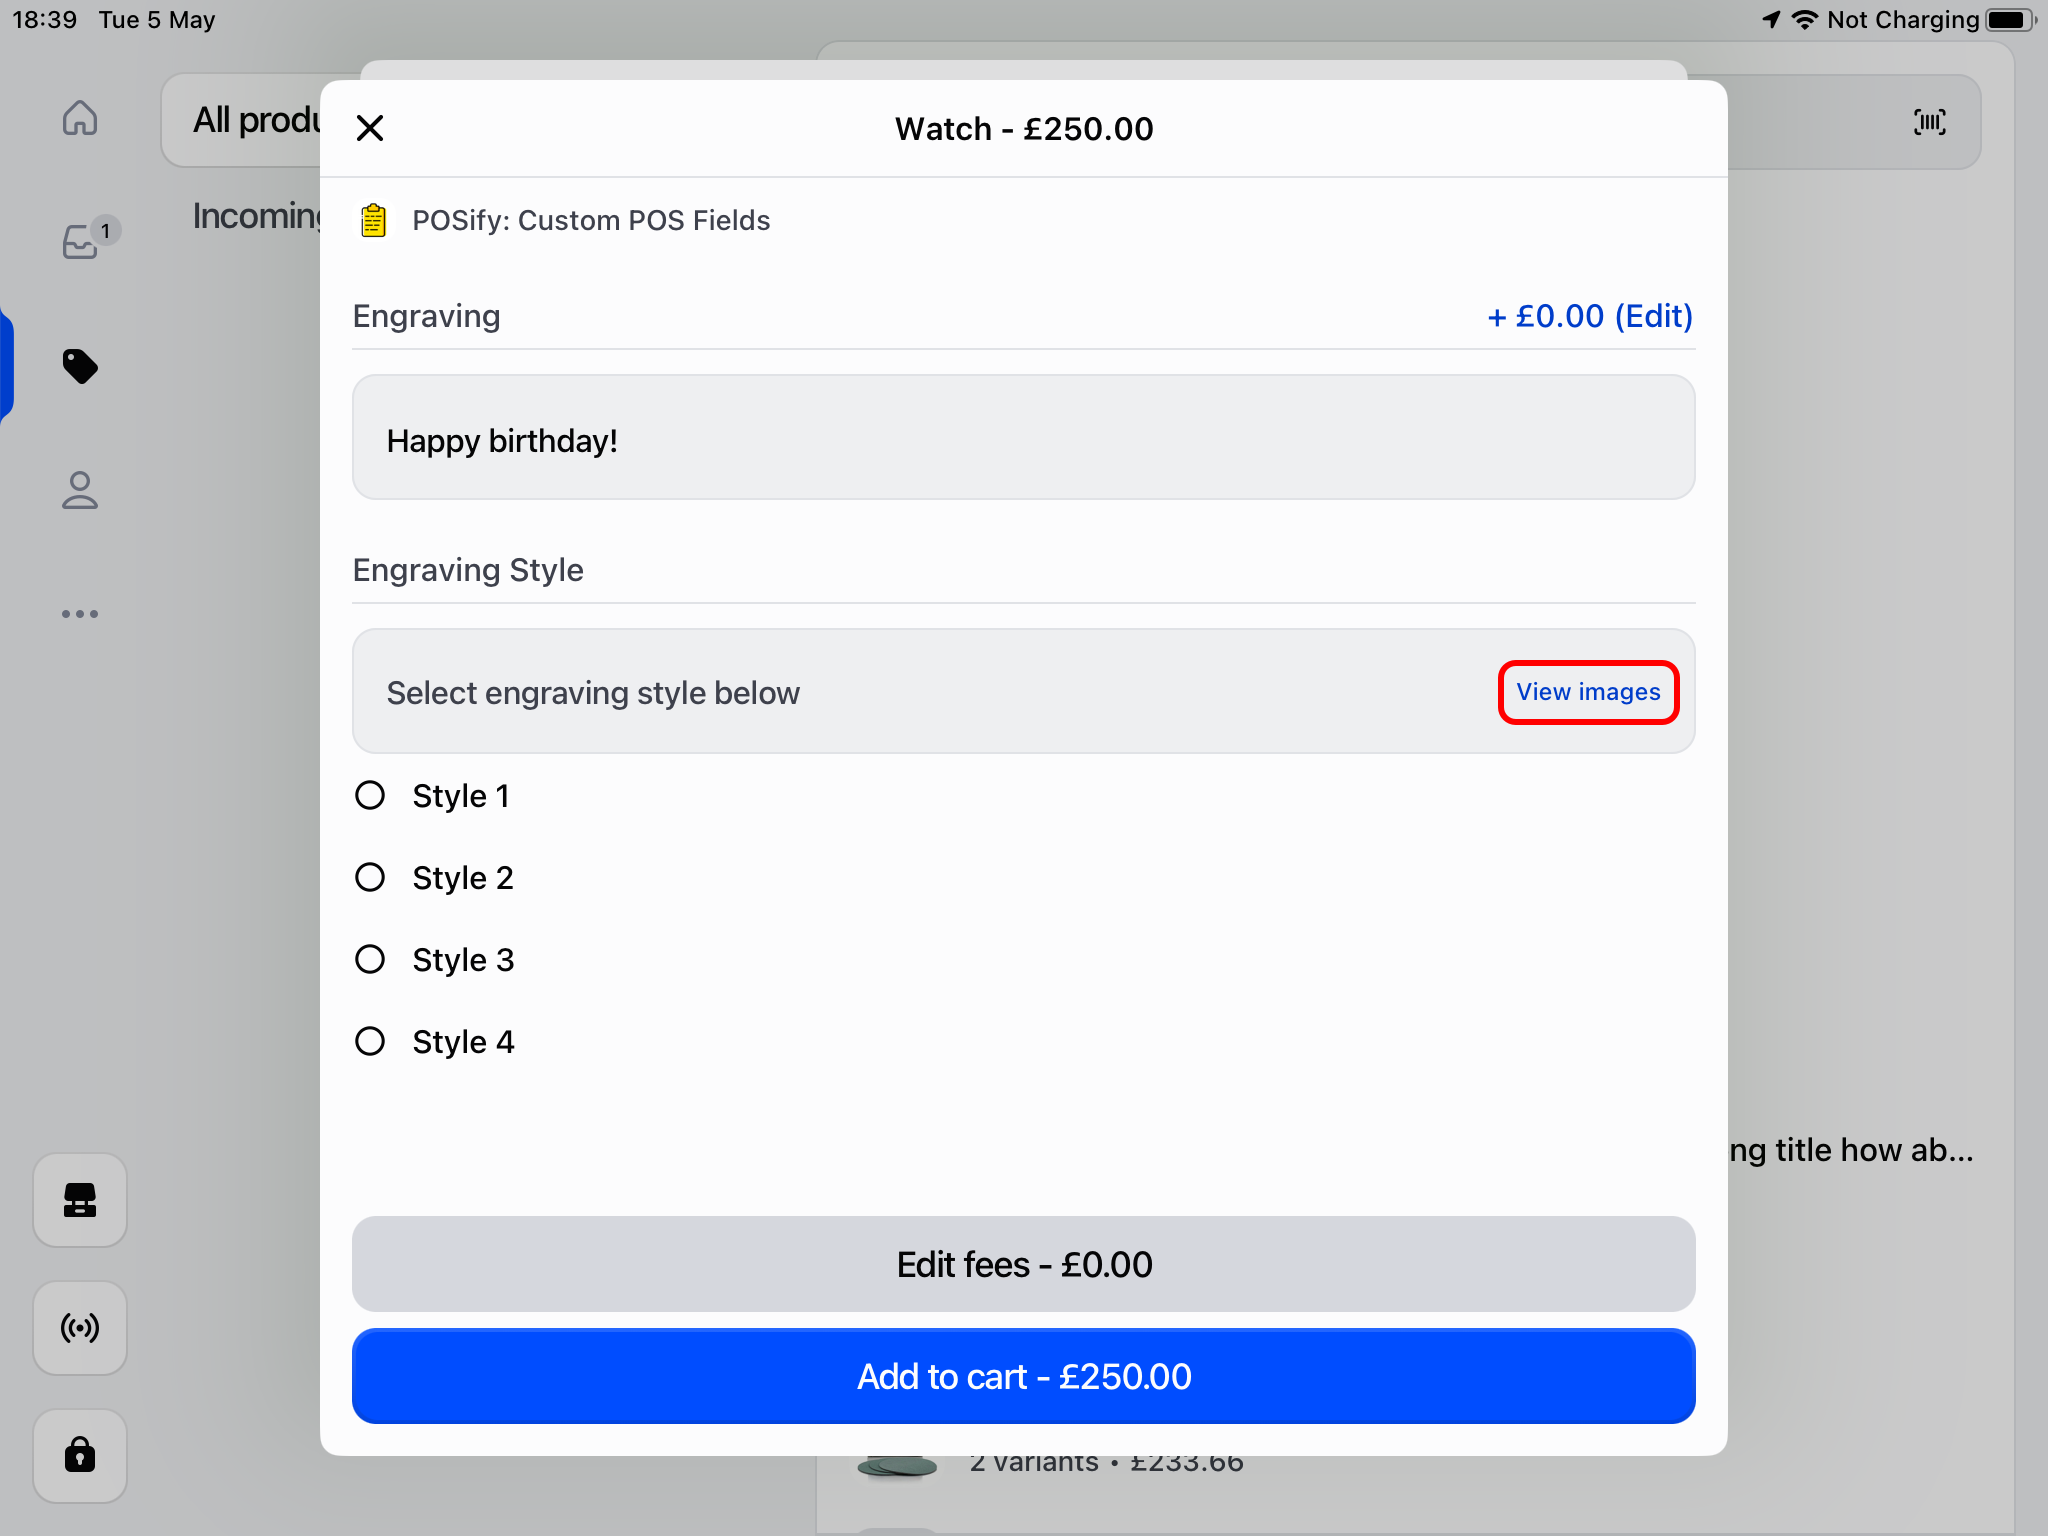
Adding product customizations
Once you have selected a product/variant, you can begin filling in your pre-defined customization fields in the POSify POS app:
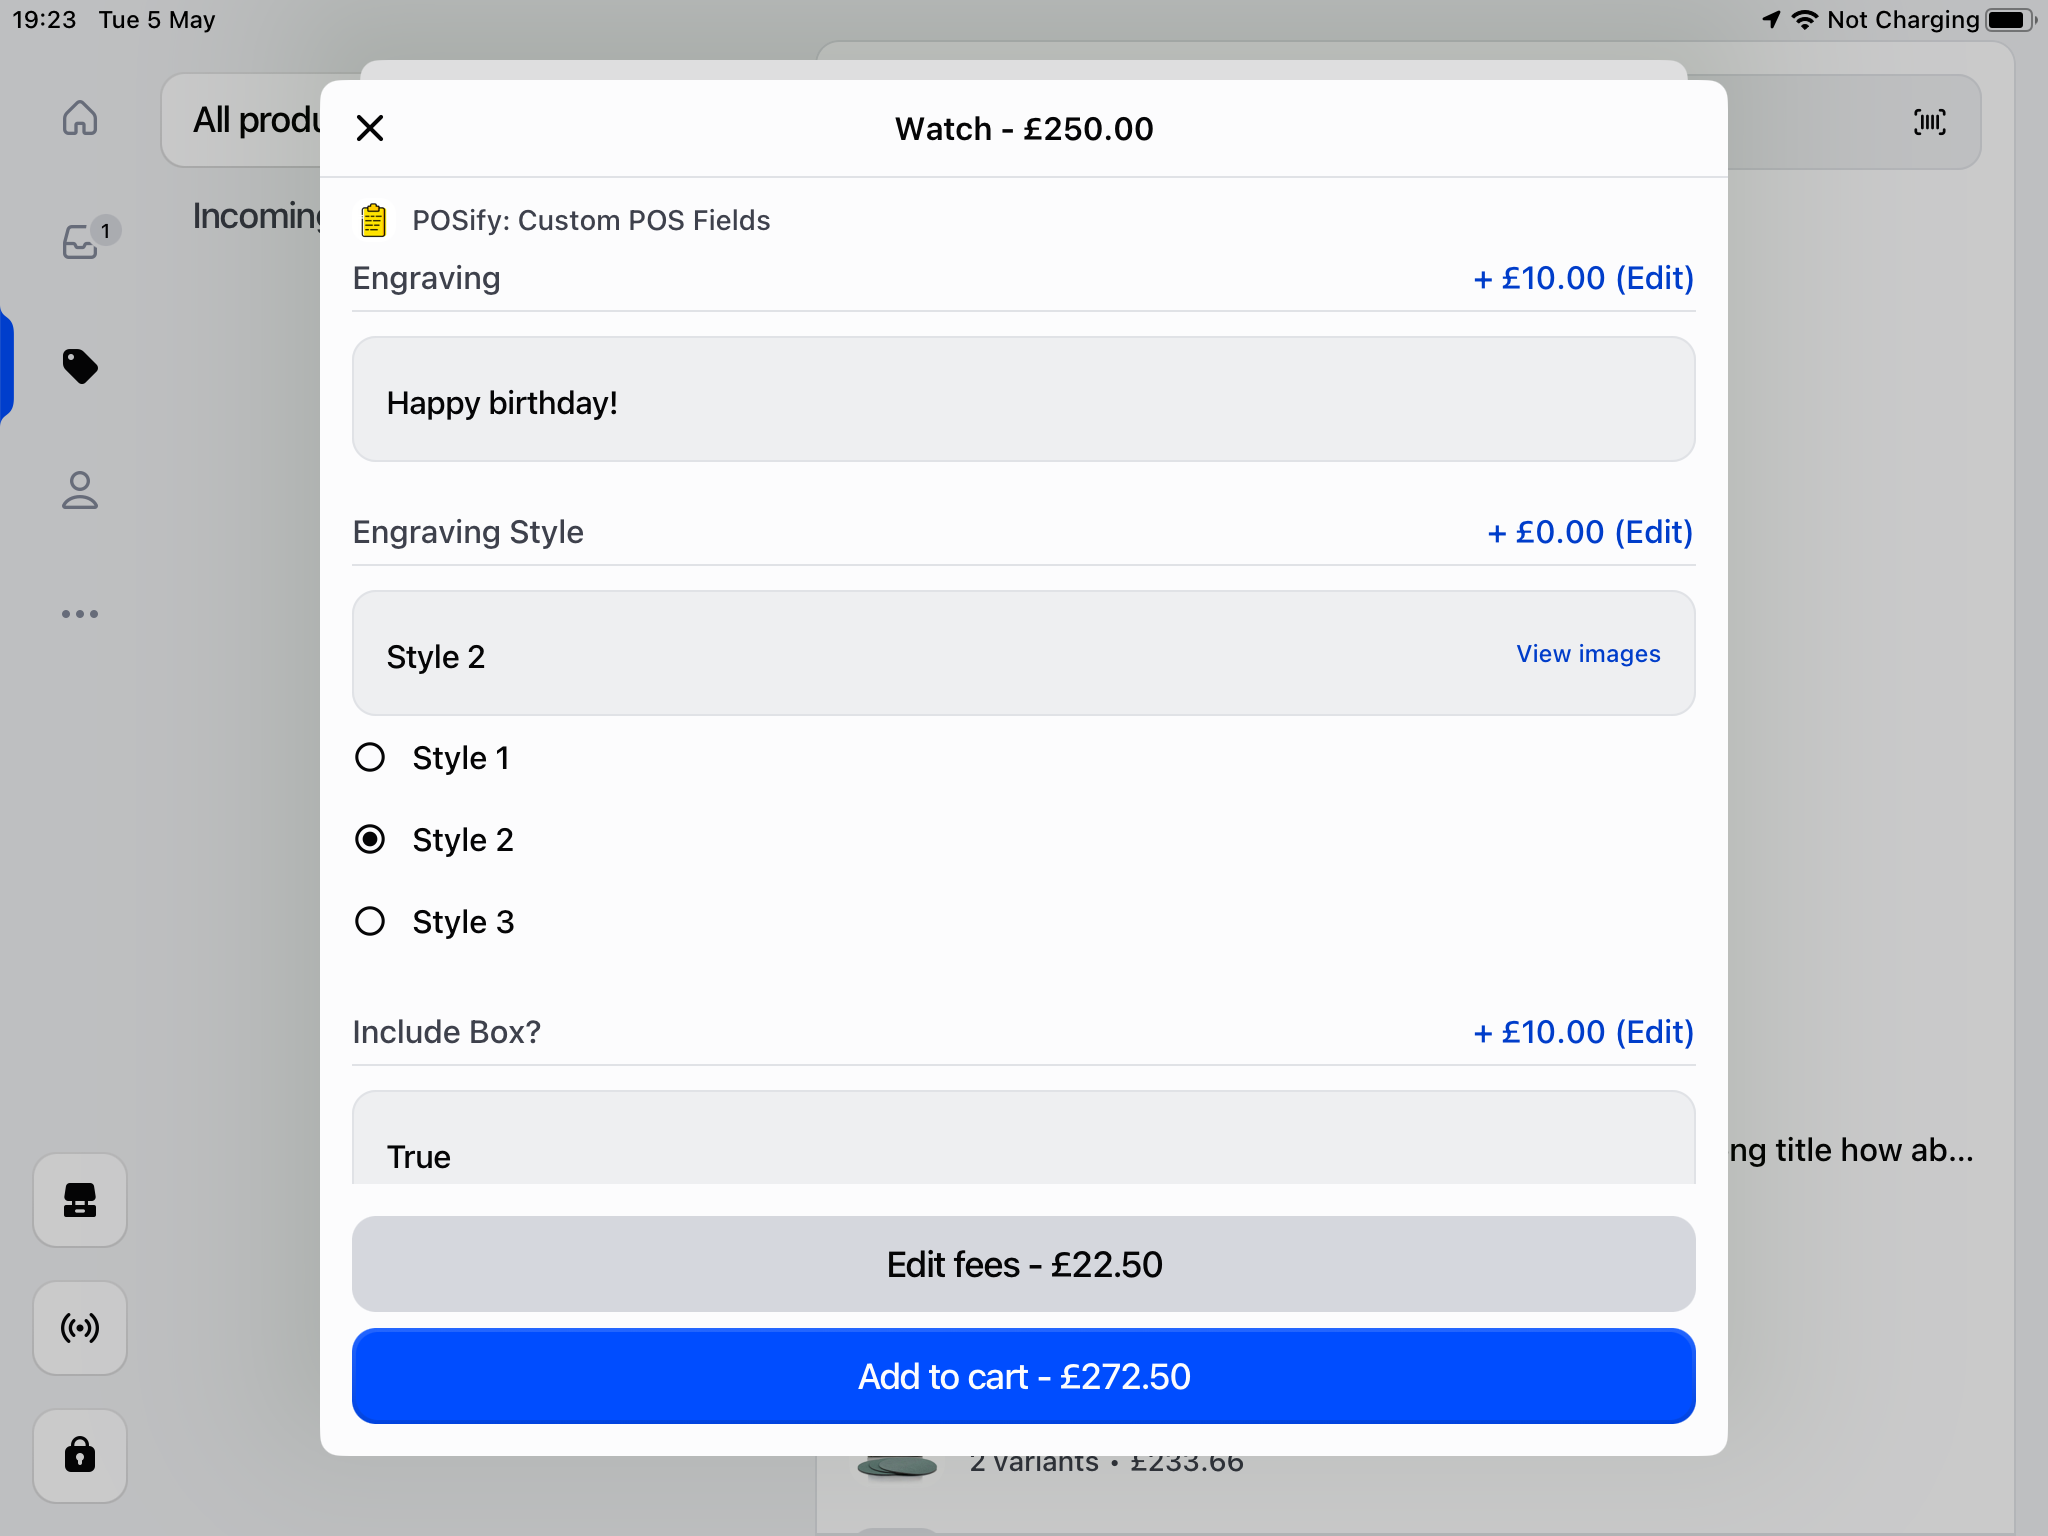
Finally, click the Add to cart button - the product, along with any customizations, will then be added to the POS cart:
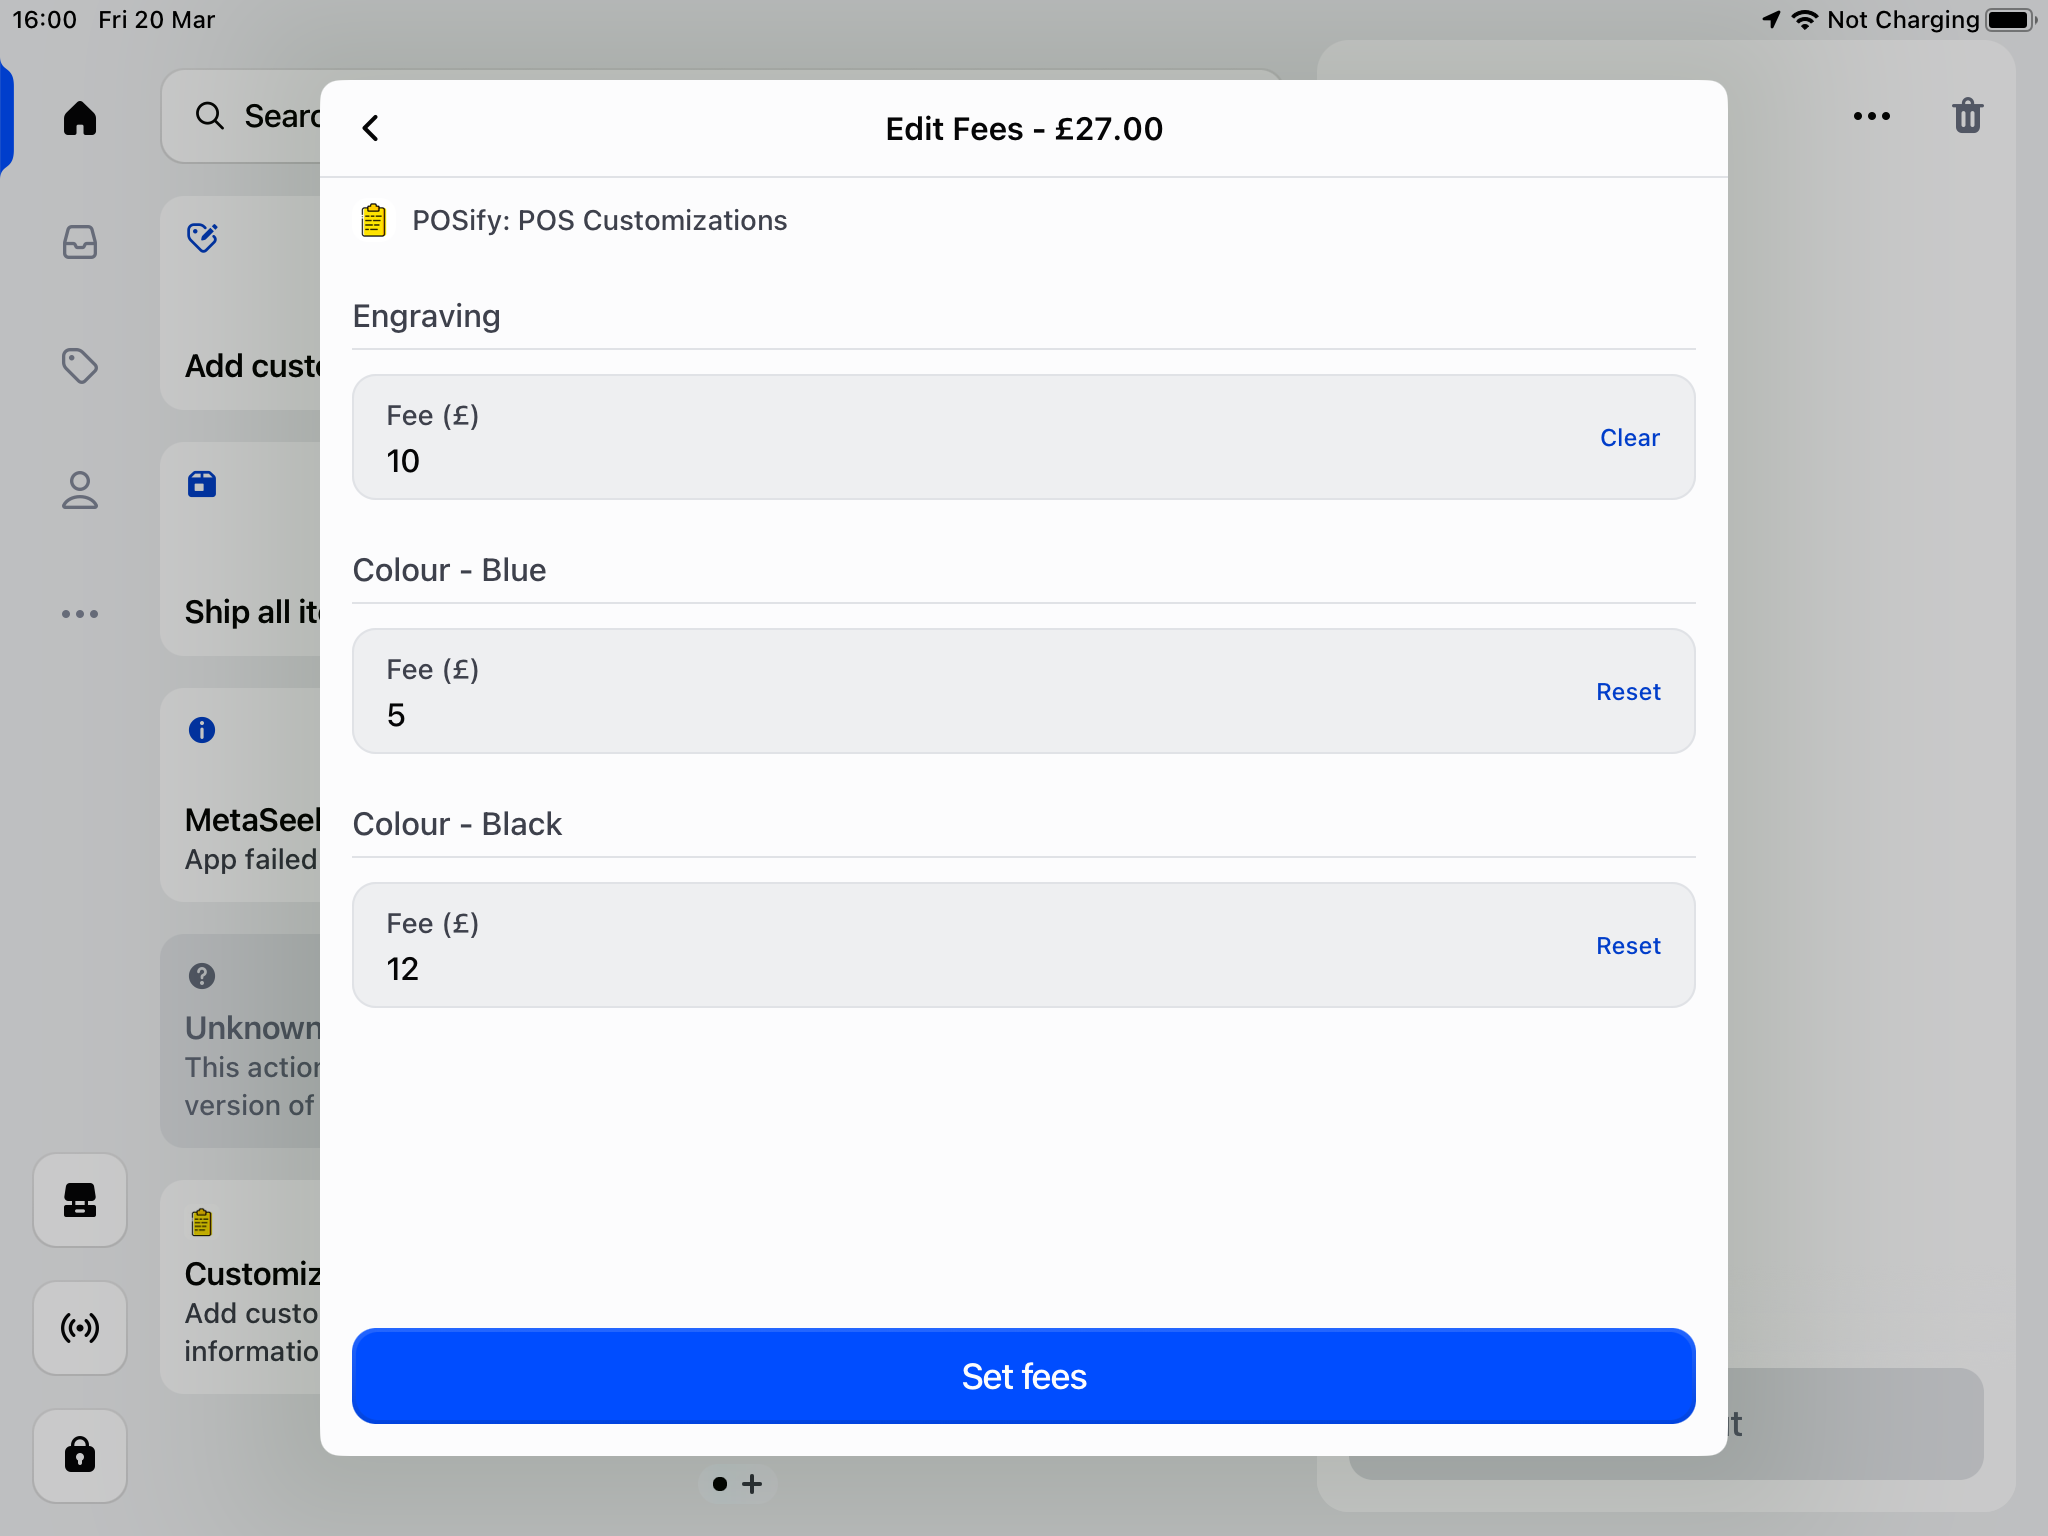
Adding fees to products
In the POS app, when you add a value to a product customization field with a fee, the fee becomes active:
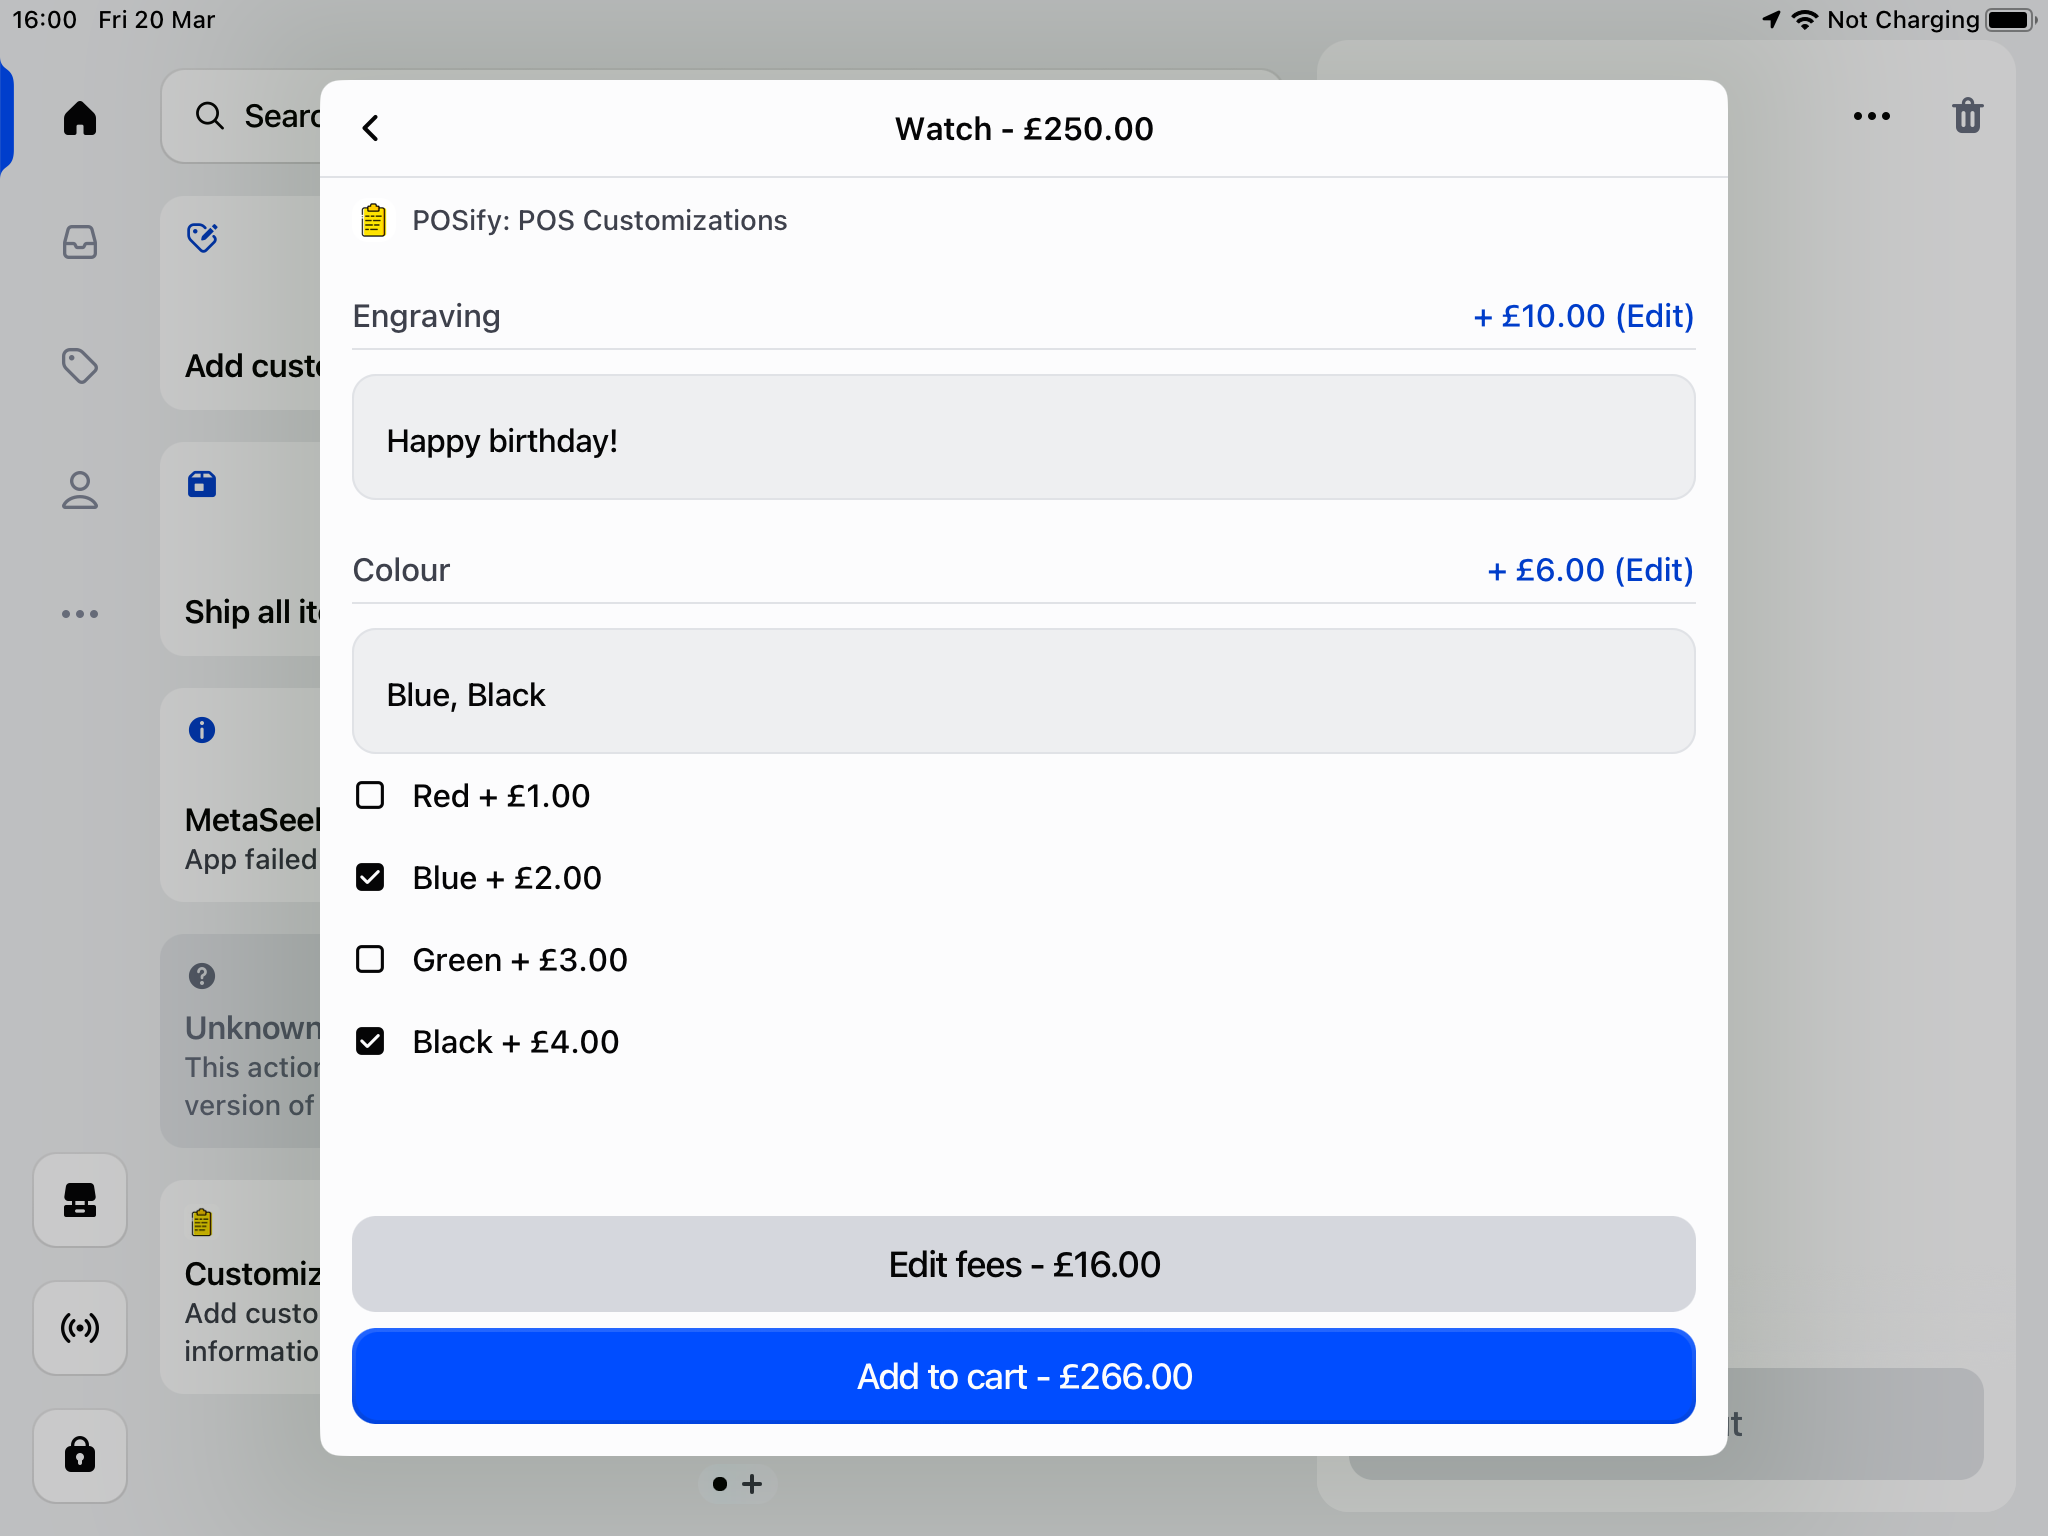
You can edit the fee in real time, by click the the Edit button next to the fee. Alternatively, click the Edit fees button to edit all of the fees:
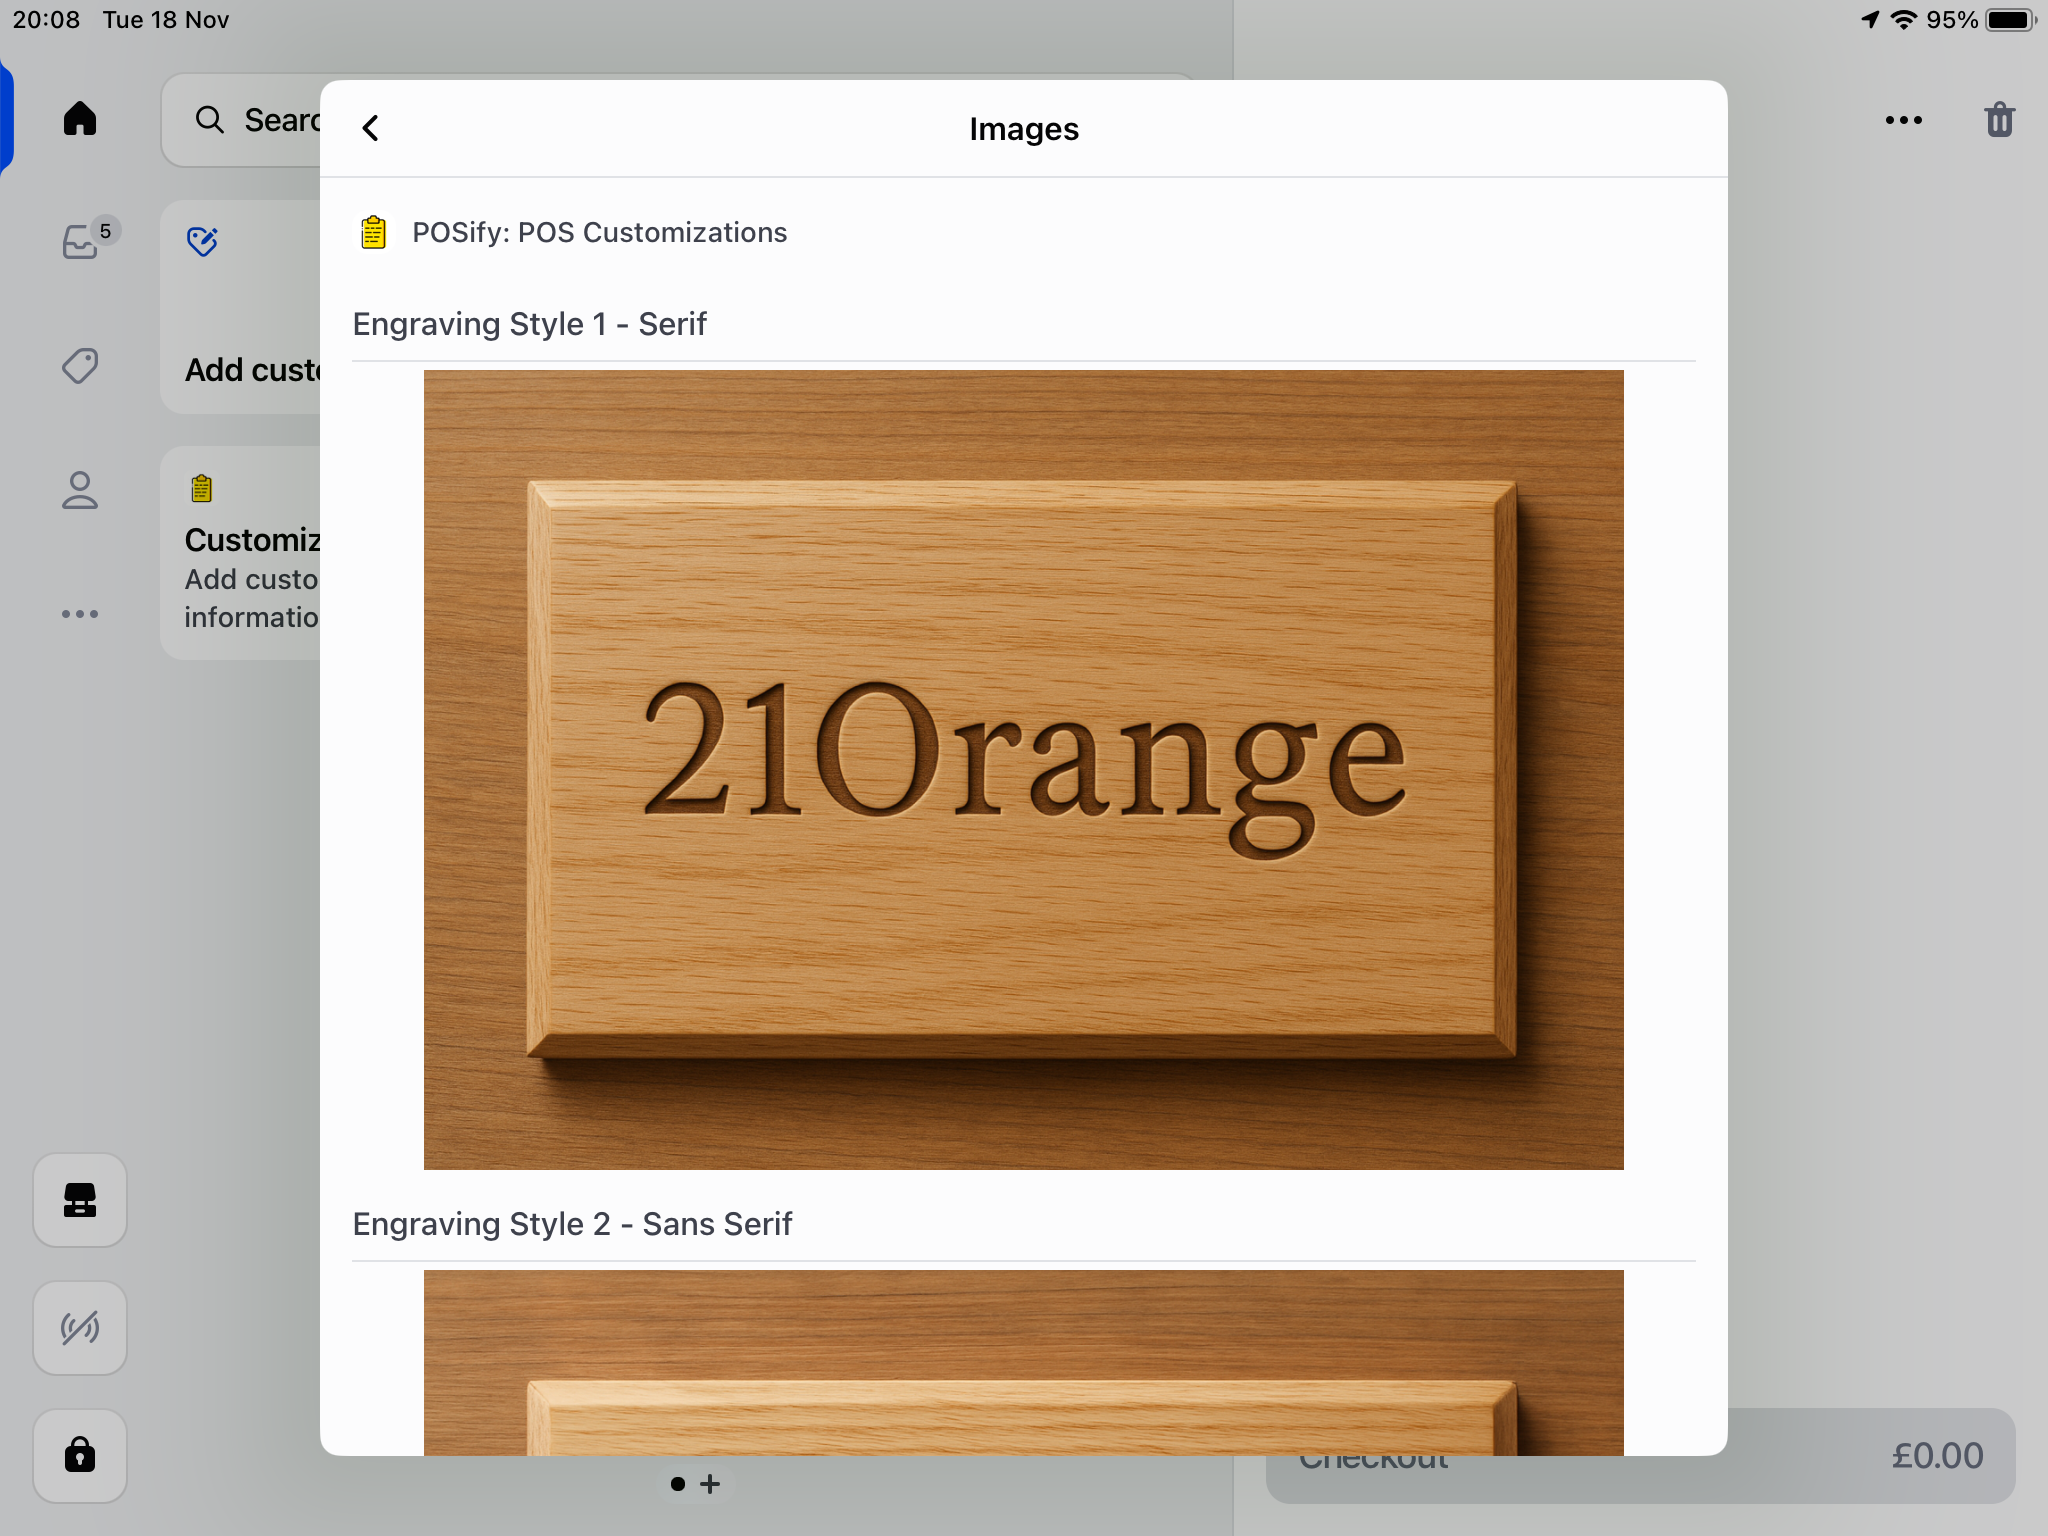
Viewing reference images
In the POS app, to view a product's reference images, simply click the View images button, inside the field:
A new screen will be displayed, listing the images in alphabetical order, based on each image's filename:
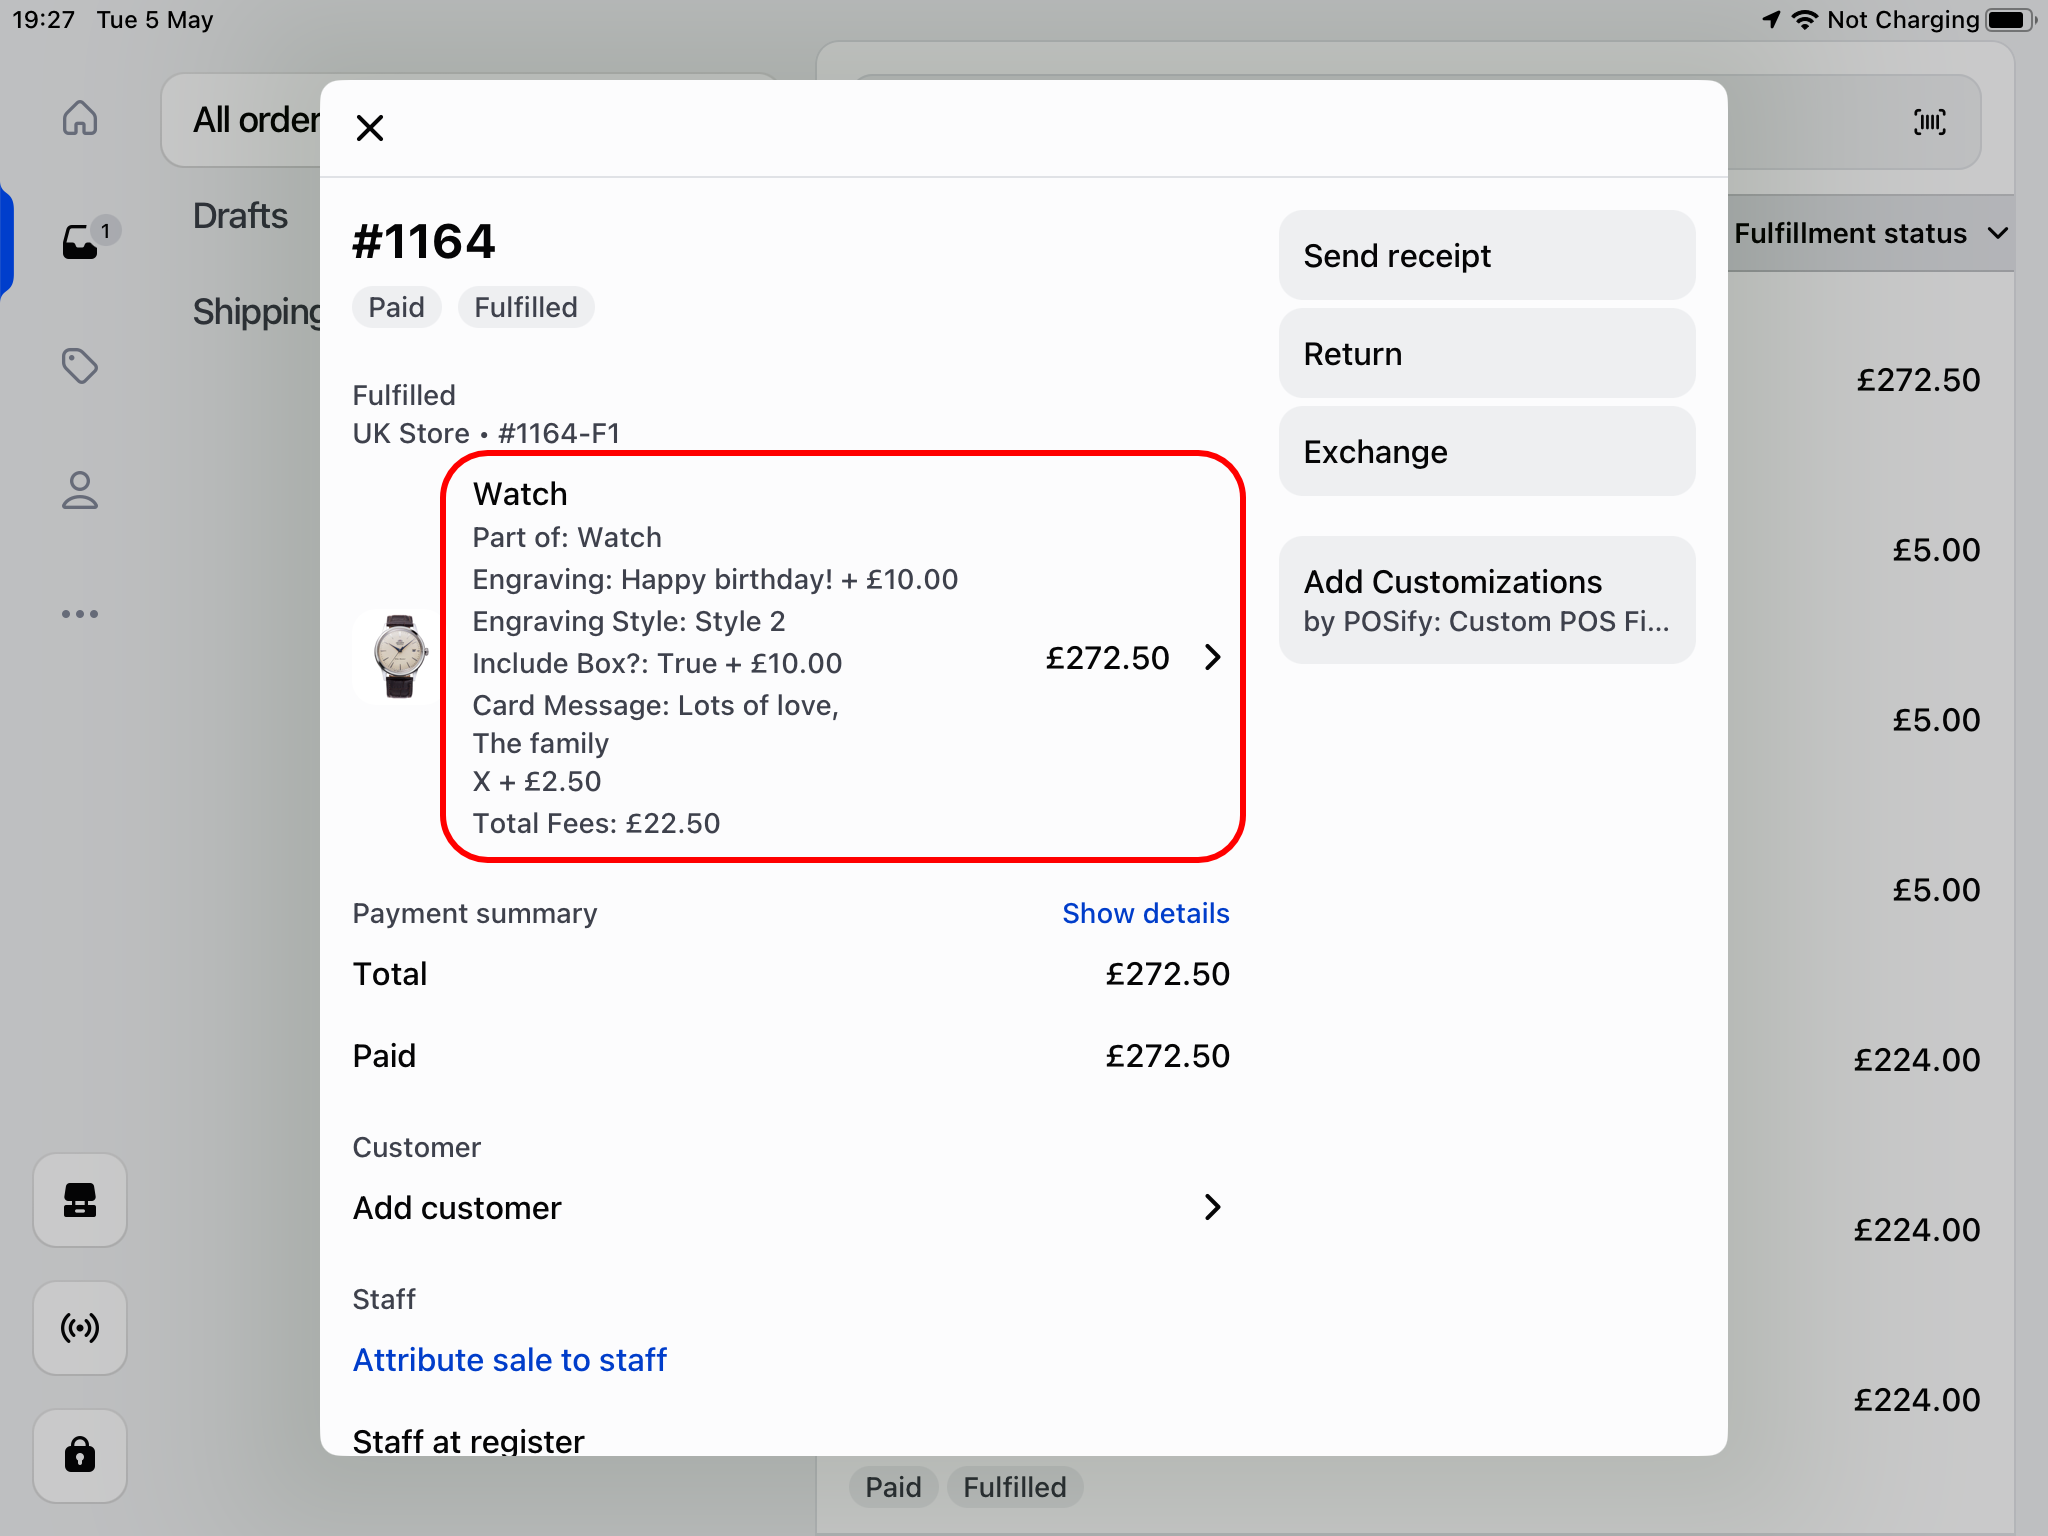
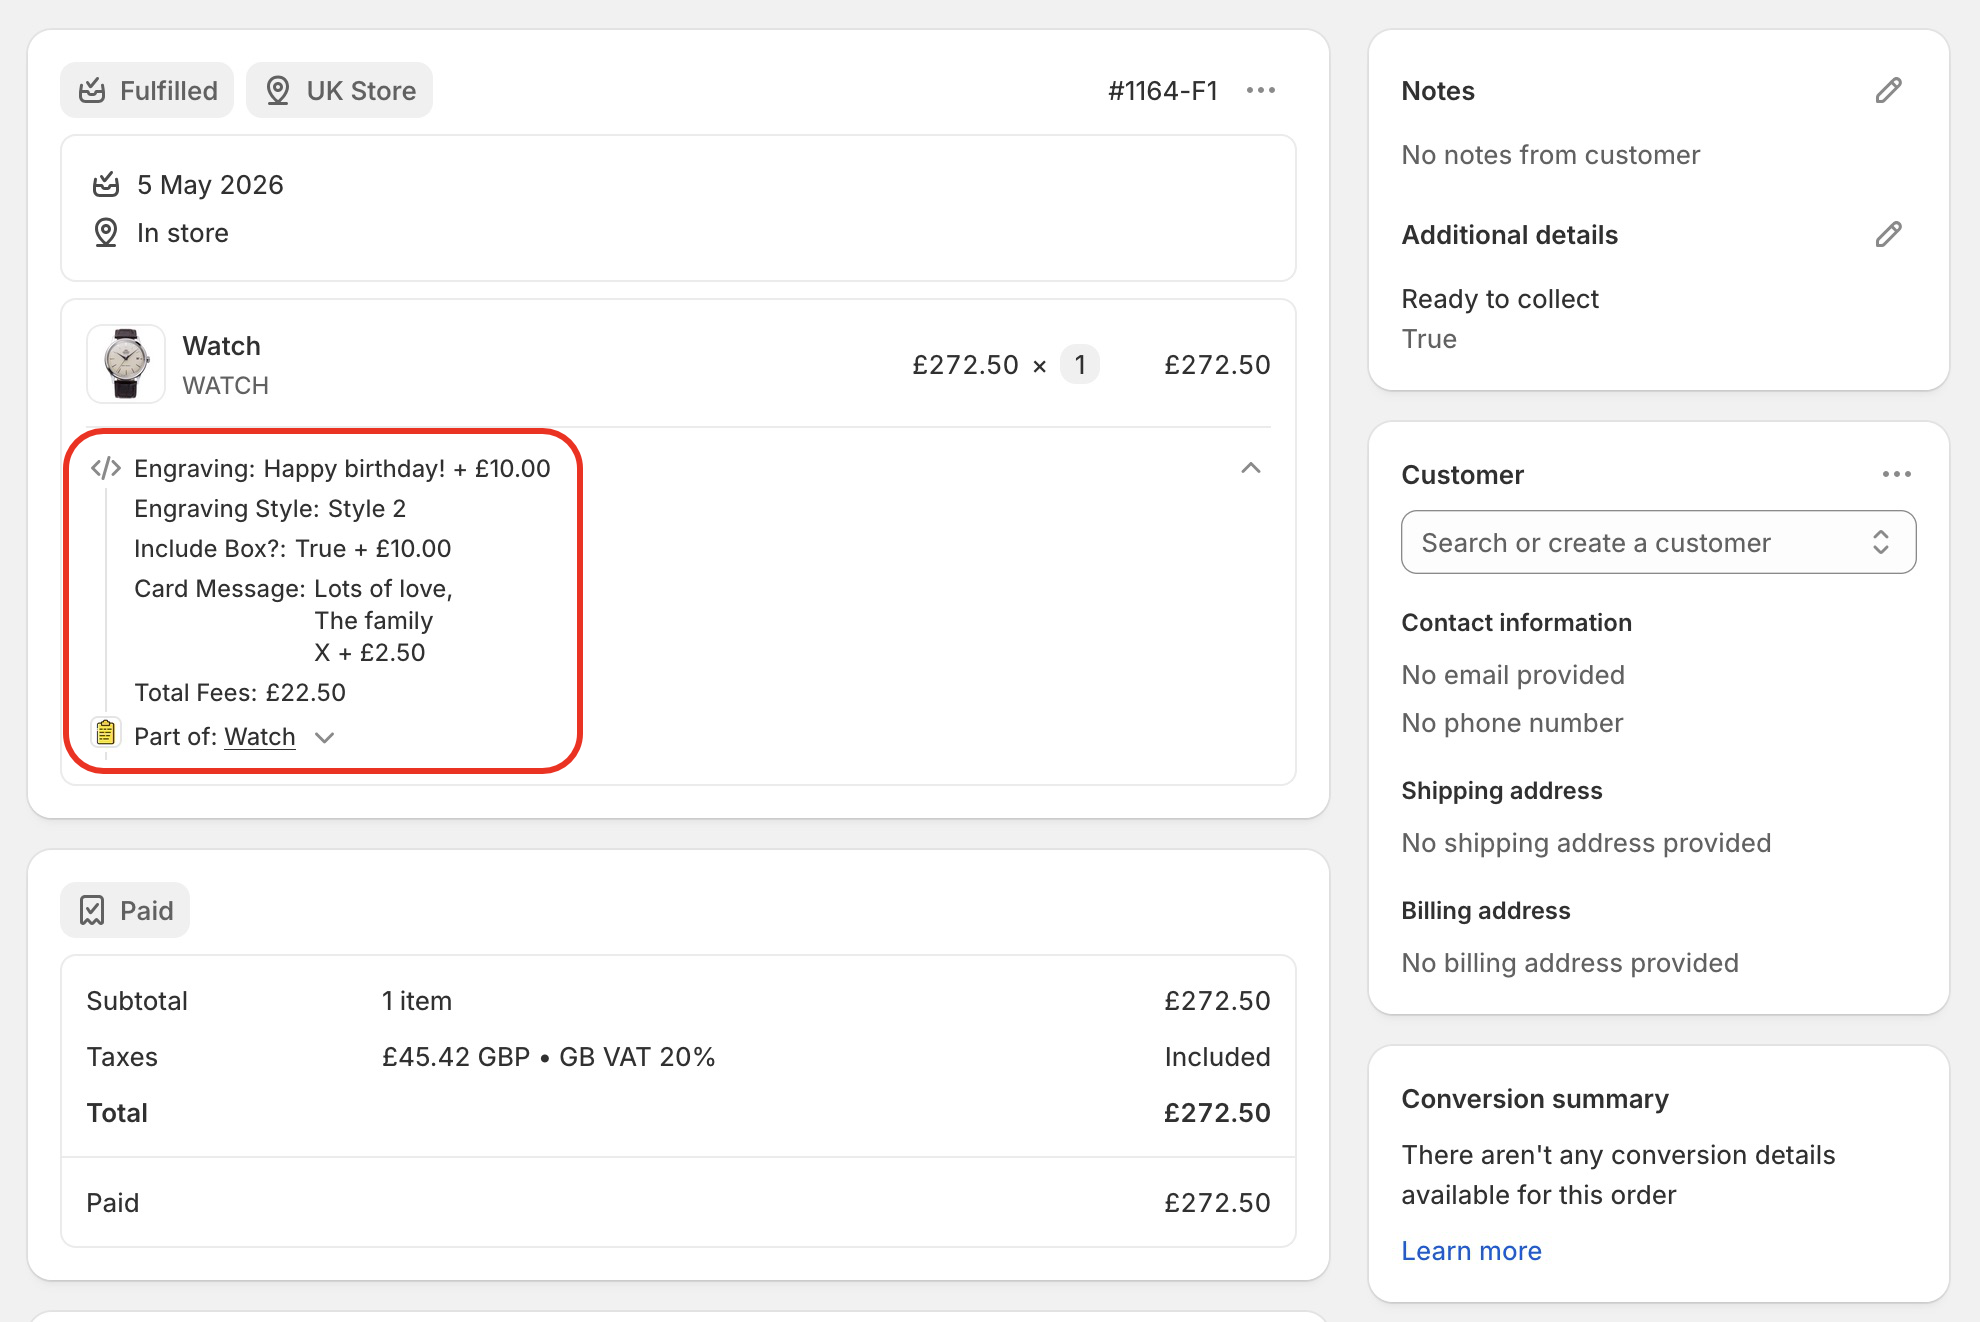
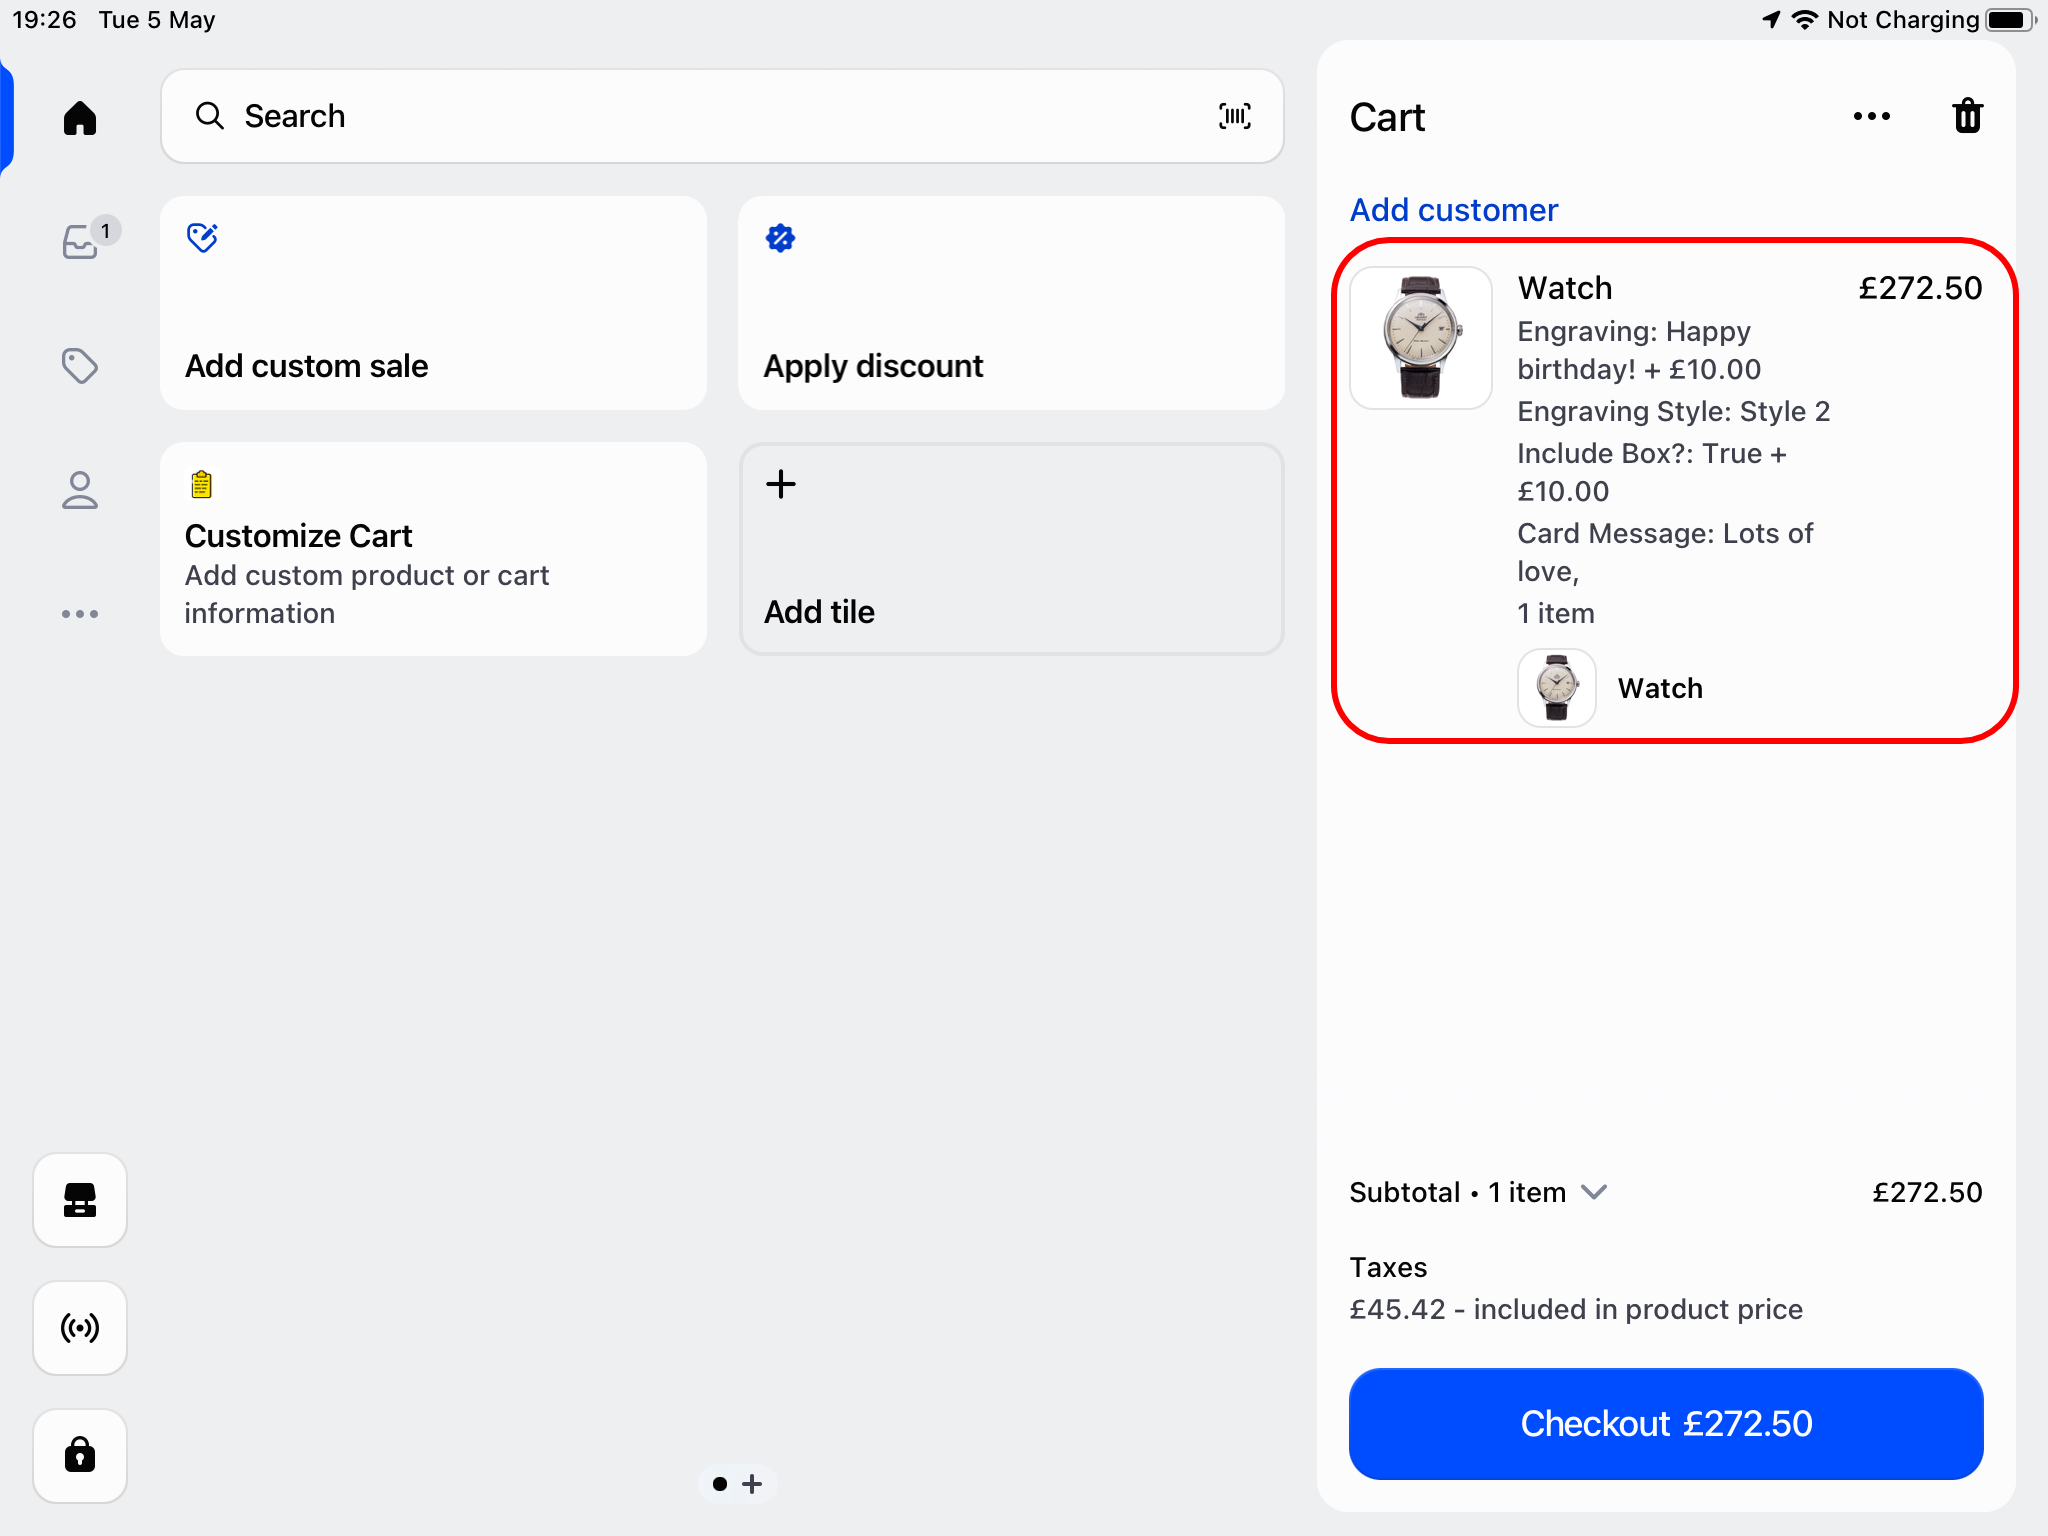
Accessing the values in Shopify Admin & POS
The value of each field is stored as a product property. These can be seen in both the POS app, and in Shopify Admin: