Customizing products in POS
After creating your product customization fields, you can begin customizing products. The video guide below outlines how to customize products with POSify, within Shopify POS.
Customizing products in Shopify POS
Ensure that you've correctly setup POSify in Shopify POS.
The following three methods can be used to customize products with POSify within Shopify POS:
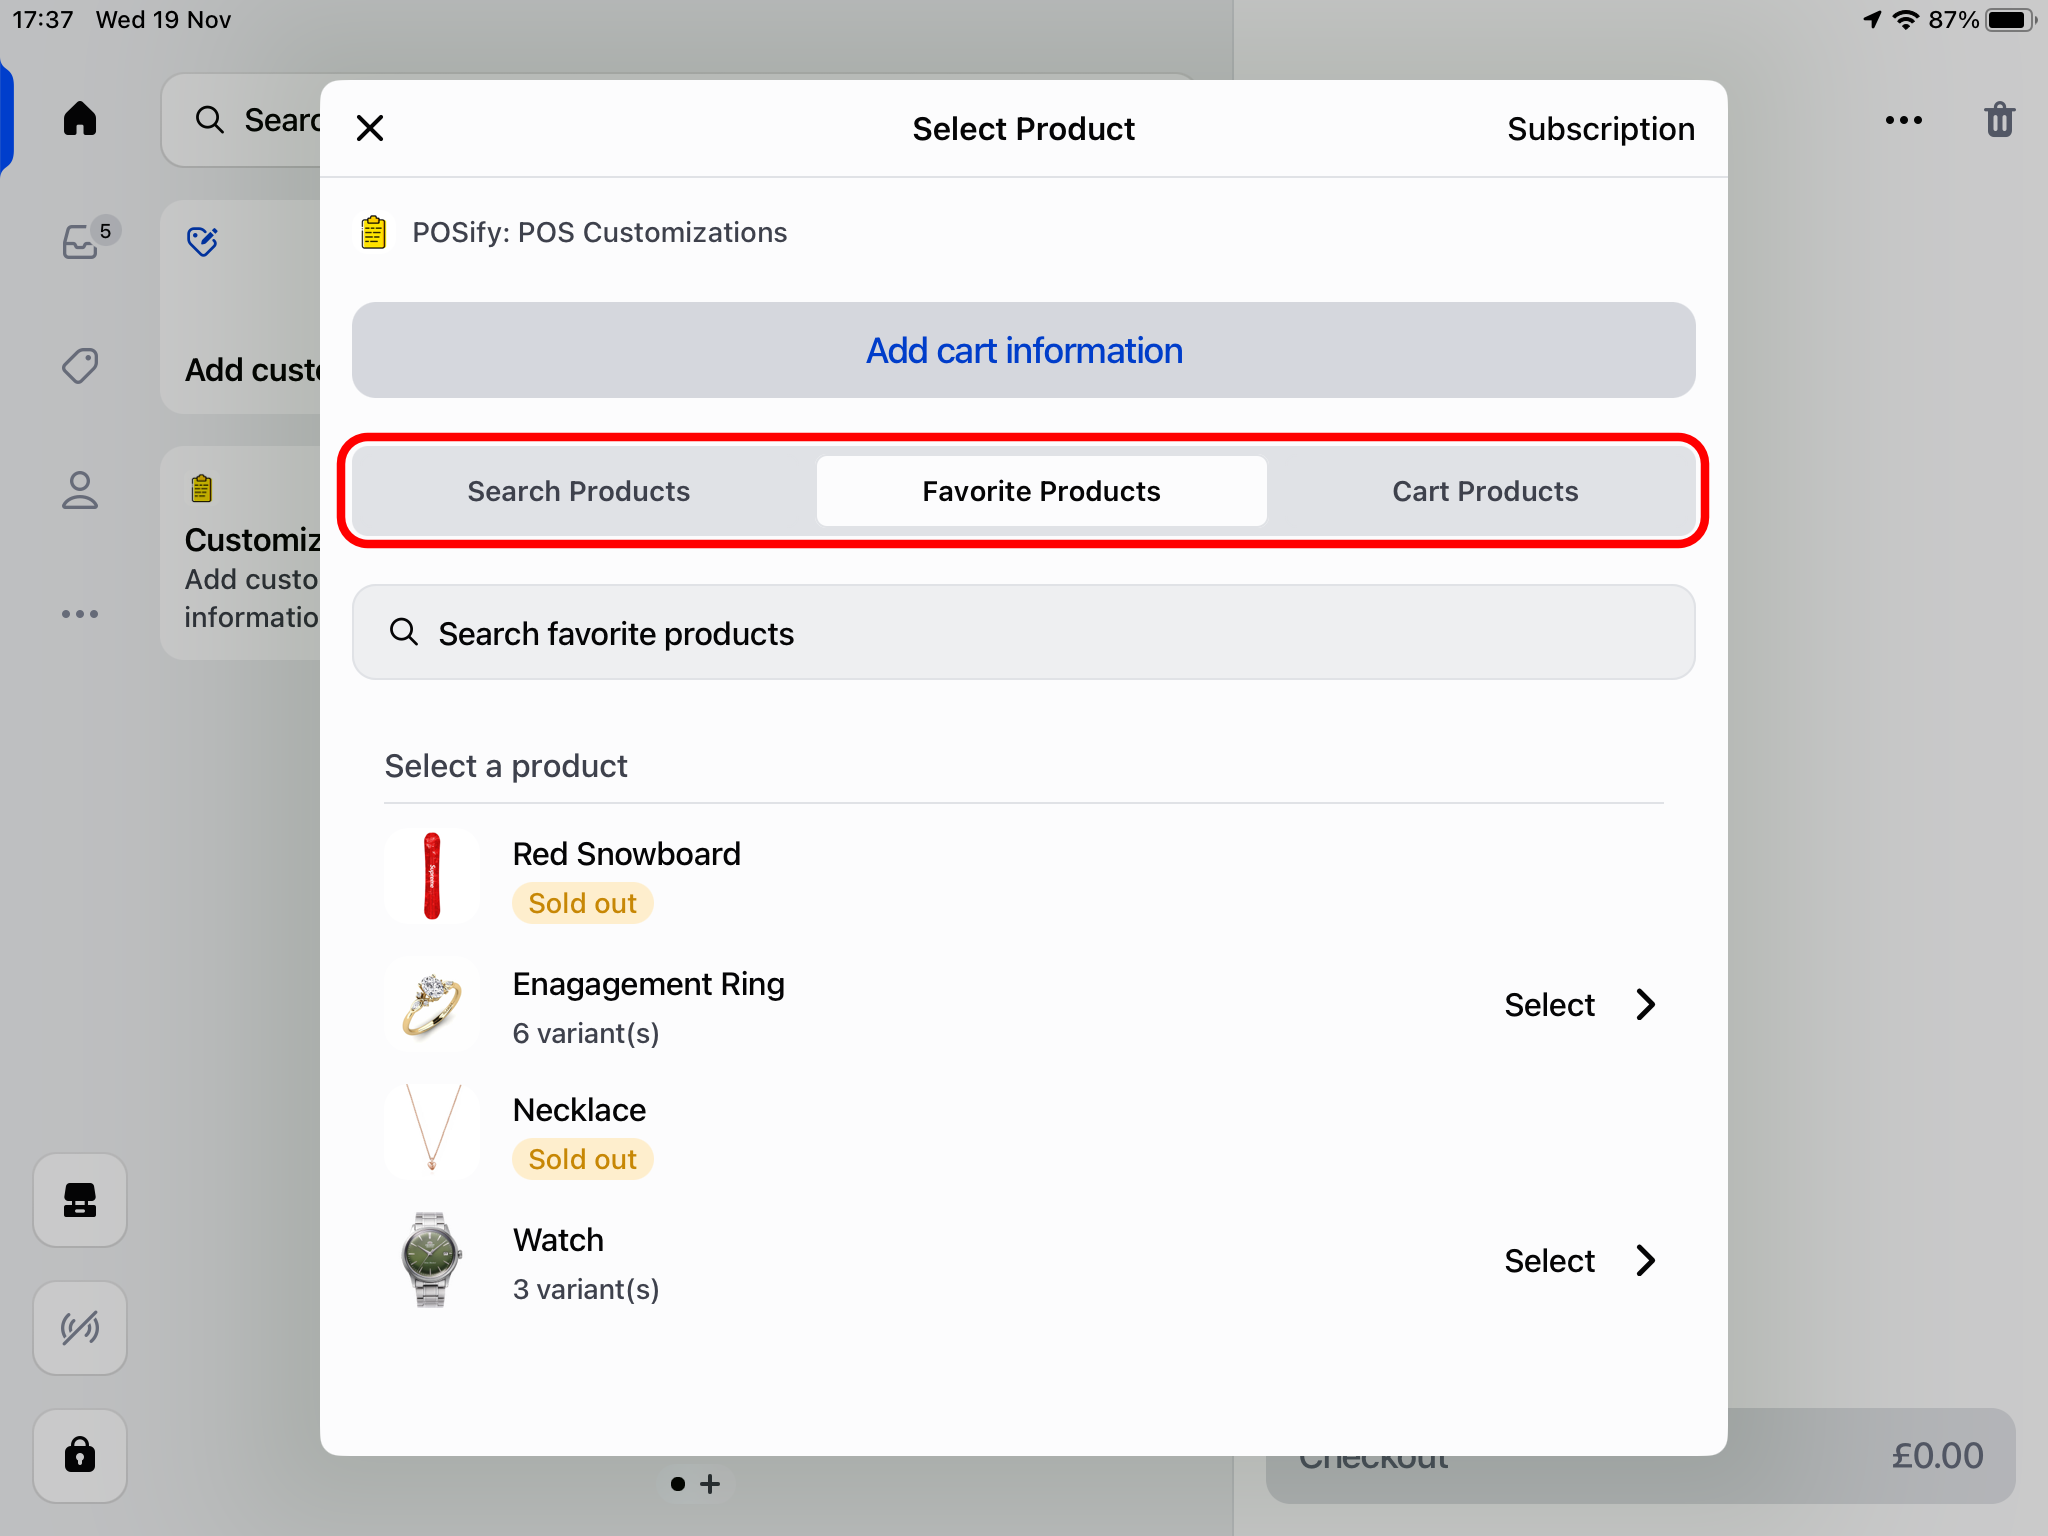
1. POS smart grid tile
- Search Tab: Select the search tab in the POSify POS app, search for and select the product you'd like to customize, enter the custom information and add the product to the cart
- Favorites Tab: Pre-select your favorite products in Shopify Admin, open the POSify POS app and select the favorites tab, select the product you'd like to customize, enter the custom information and add the product to the cart
- Cart Tab: Add your product to the POS cart, open the POSify POS app and select the cart tab, select the product you'd like to customize, enter the custom information and save the product
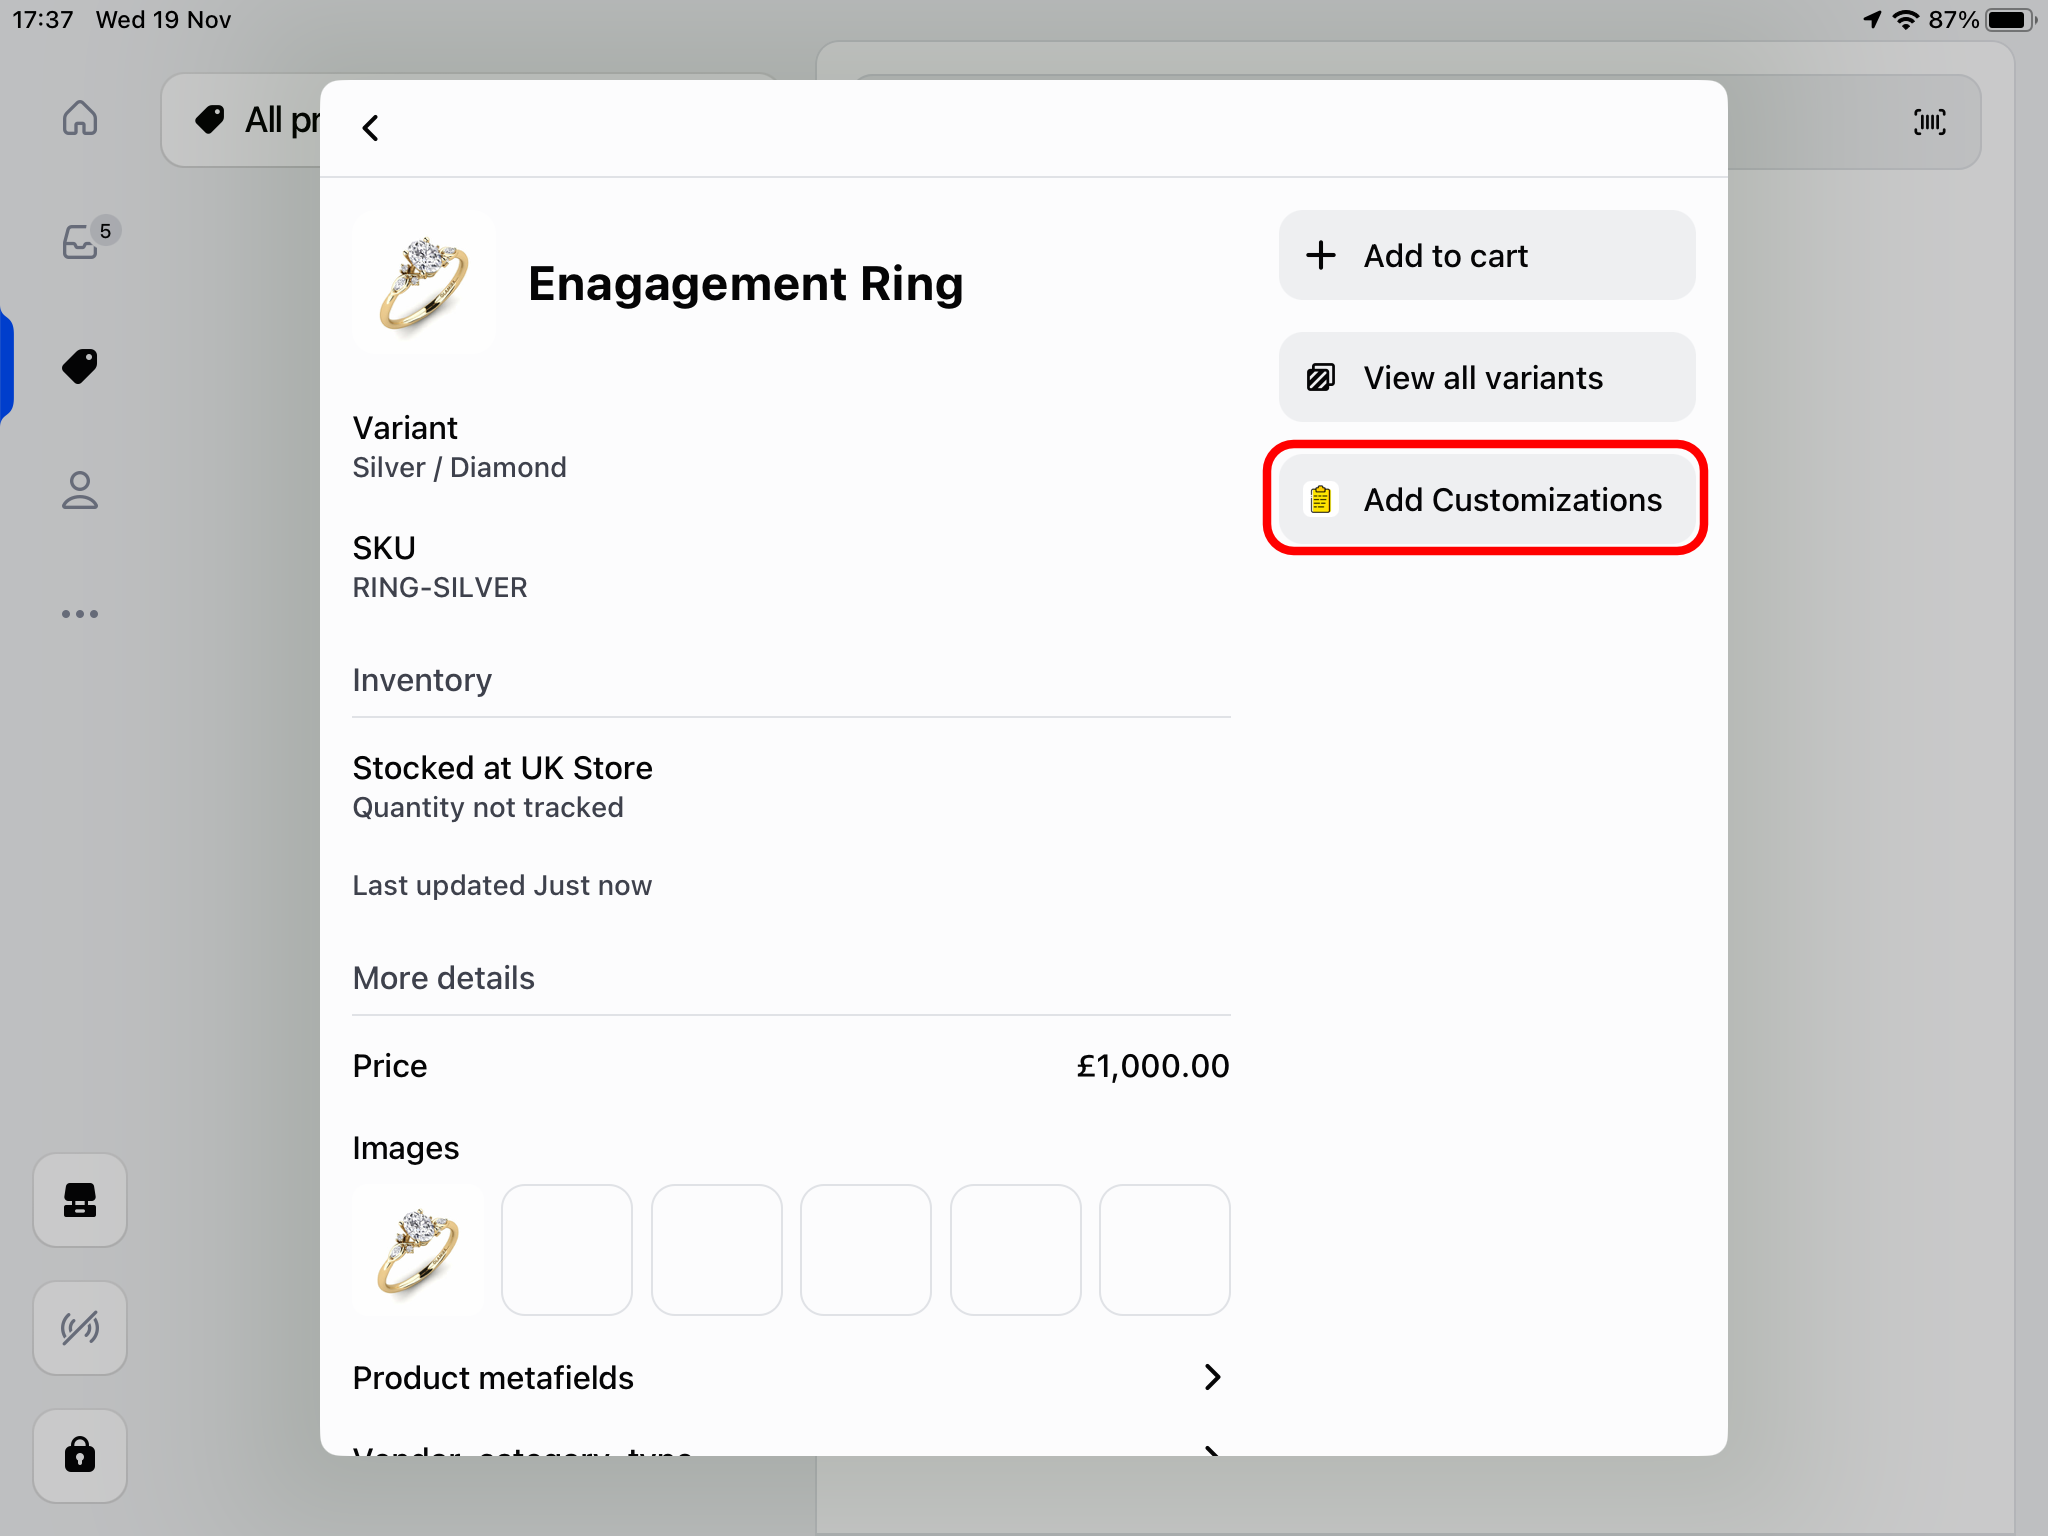
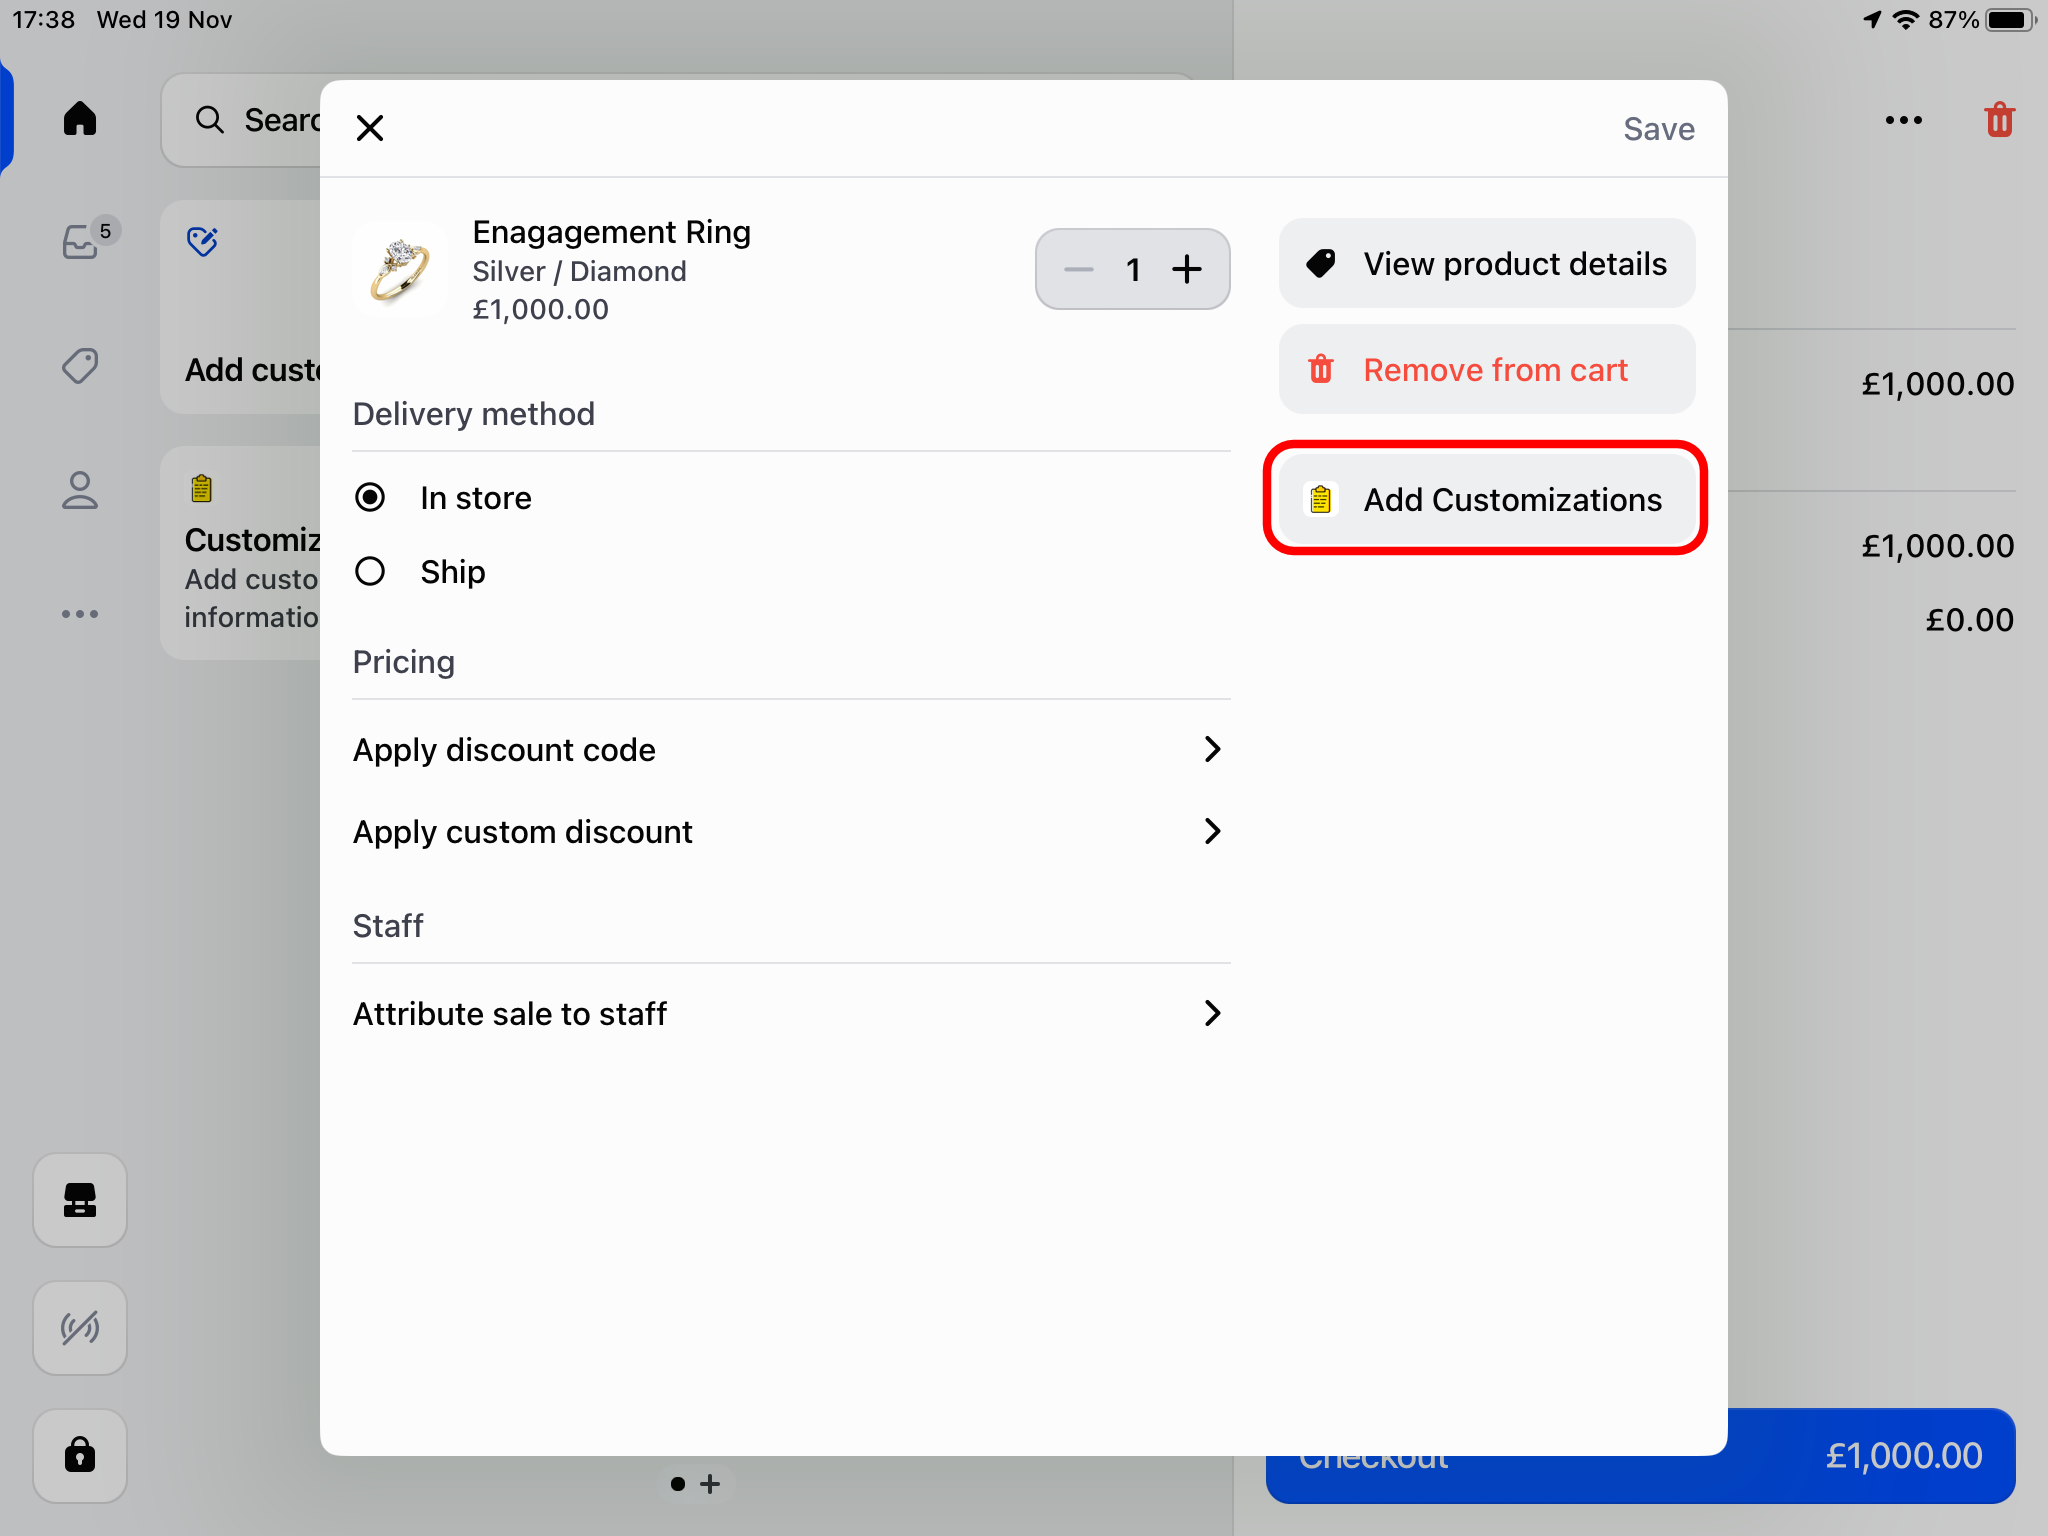
2. Product details menu
Select a product in the POS products menu, click the 'Add Customizations' button in the action menu, enter the custom information and add the product to the cart
3. Cart product list
Add a product to the POS cart through the products menu, or using a barcode scanner, select the product in the cart, click the 'Add Customizations' button in the action menu, enter the custom information and save the product
Adding customizations
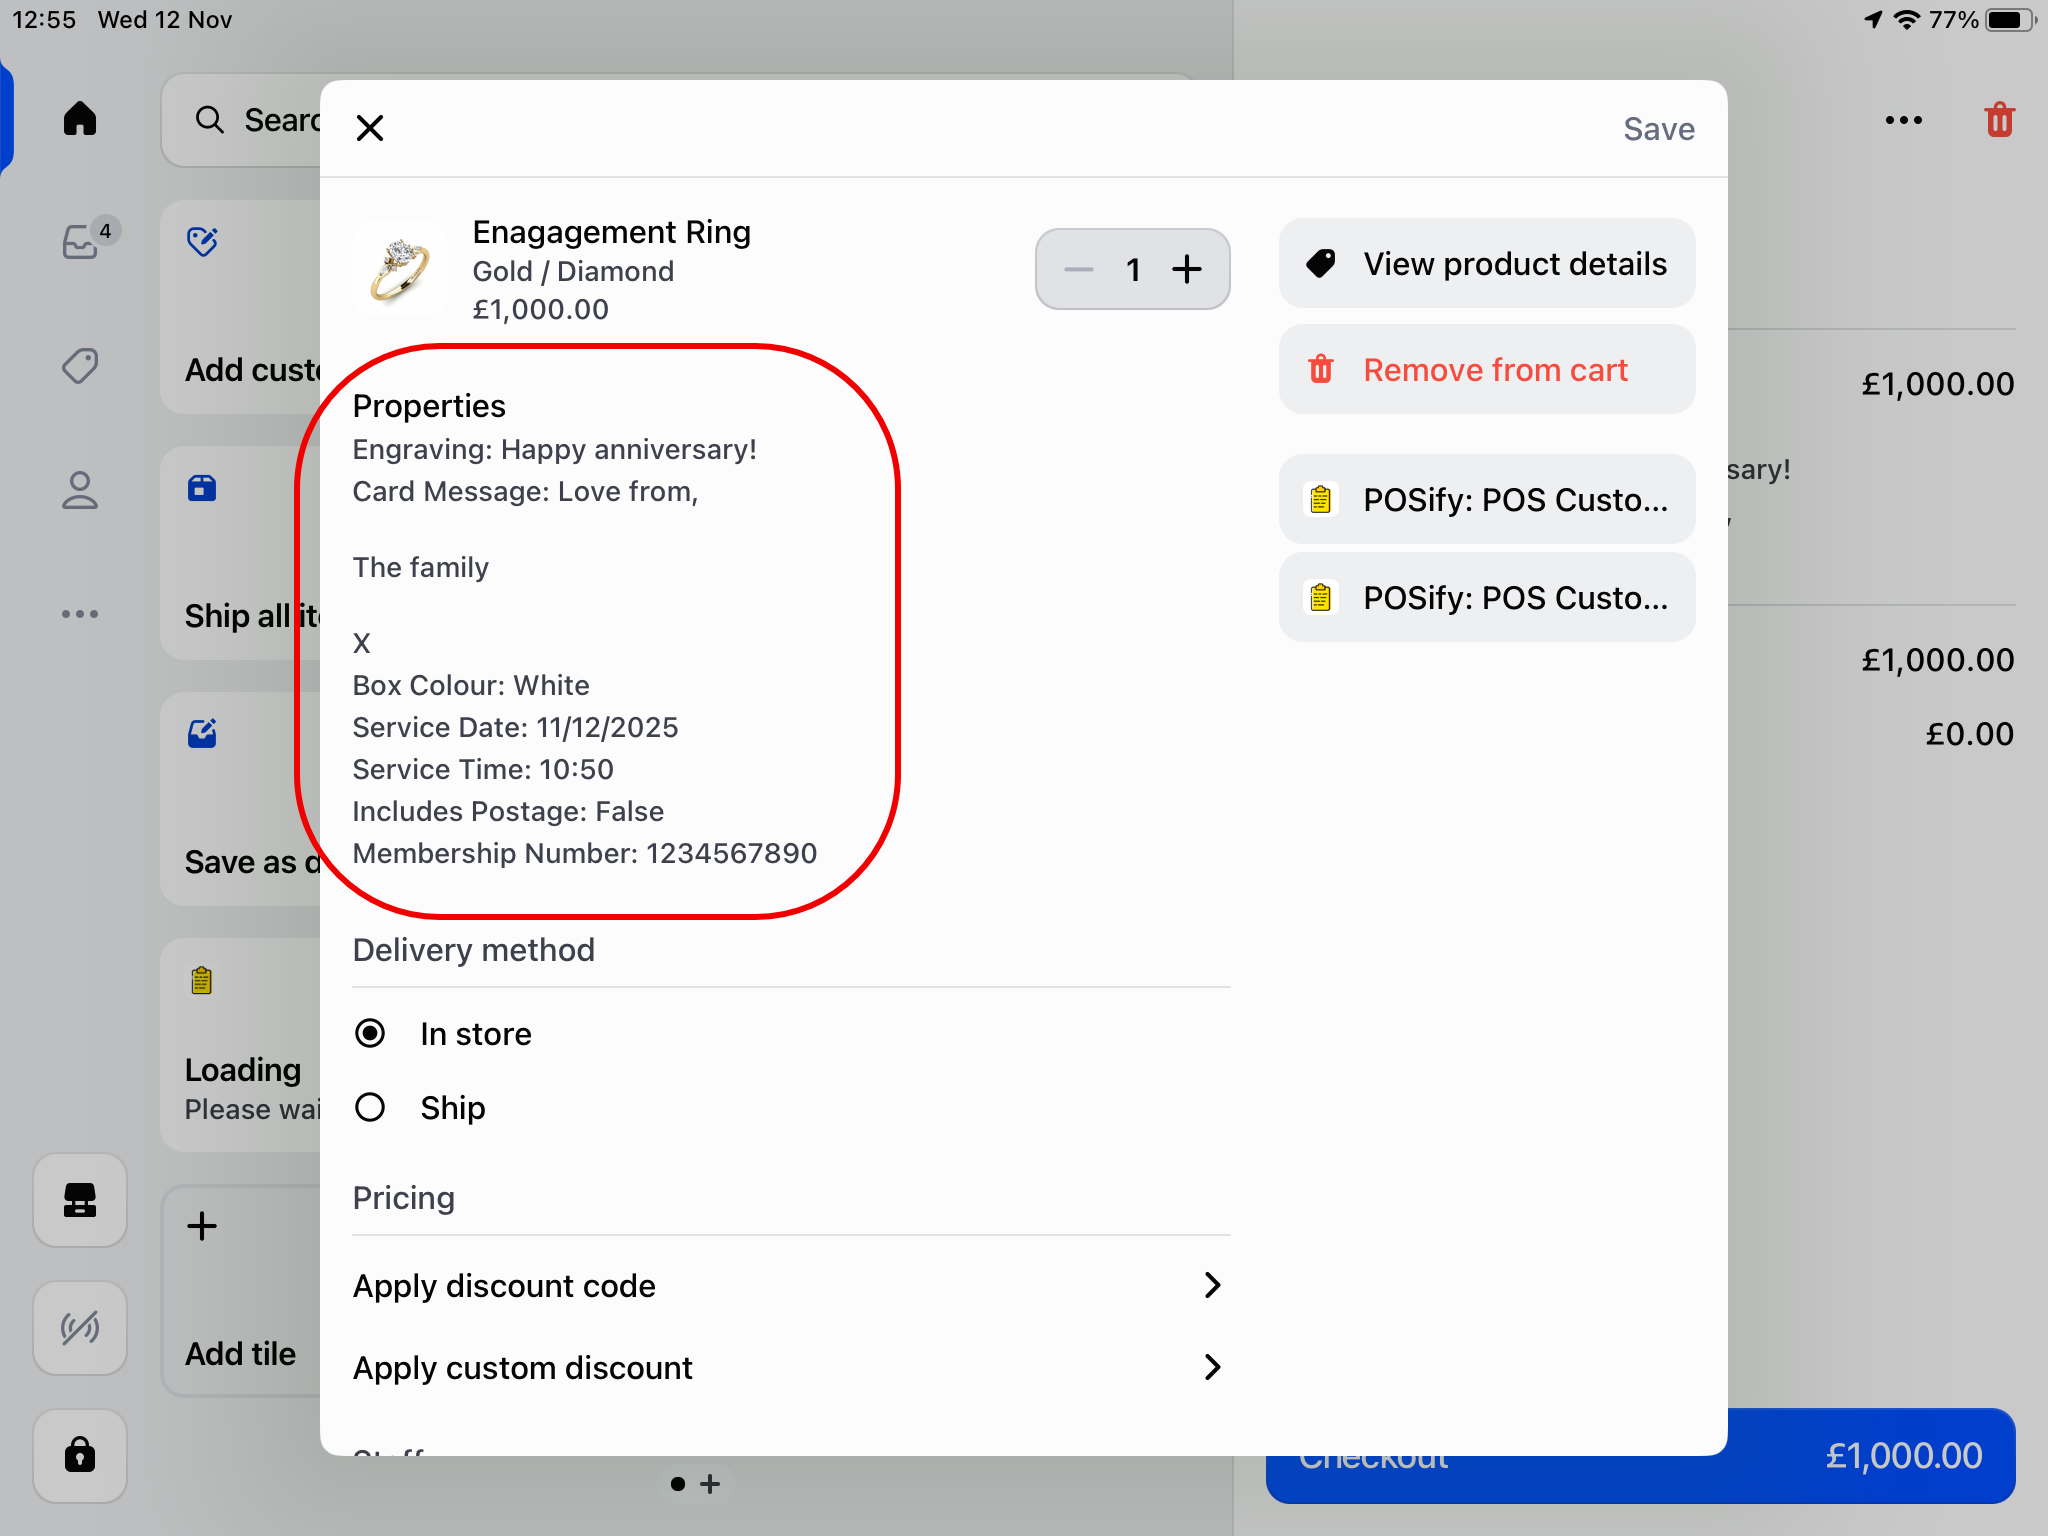
Once you have selected a product/variant, you can begin filling in your pre-defined customization fields:
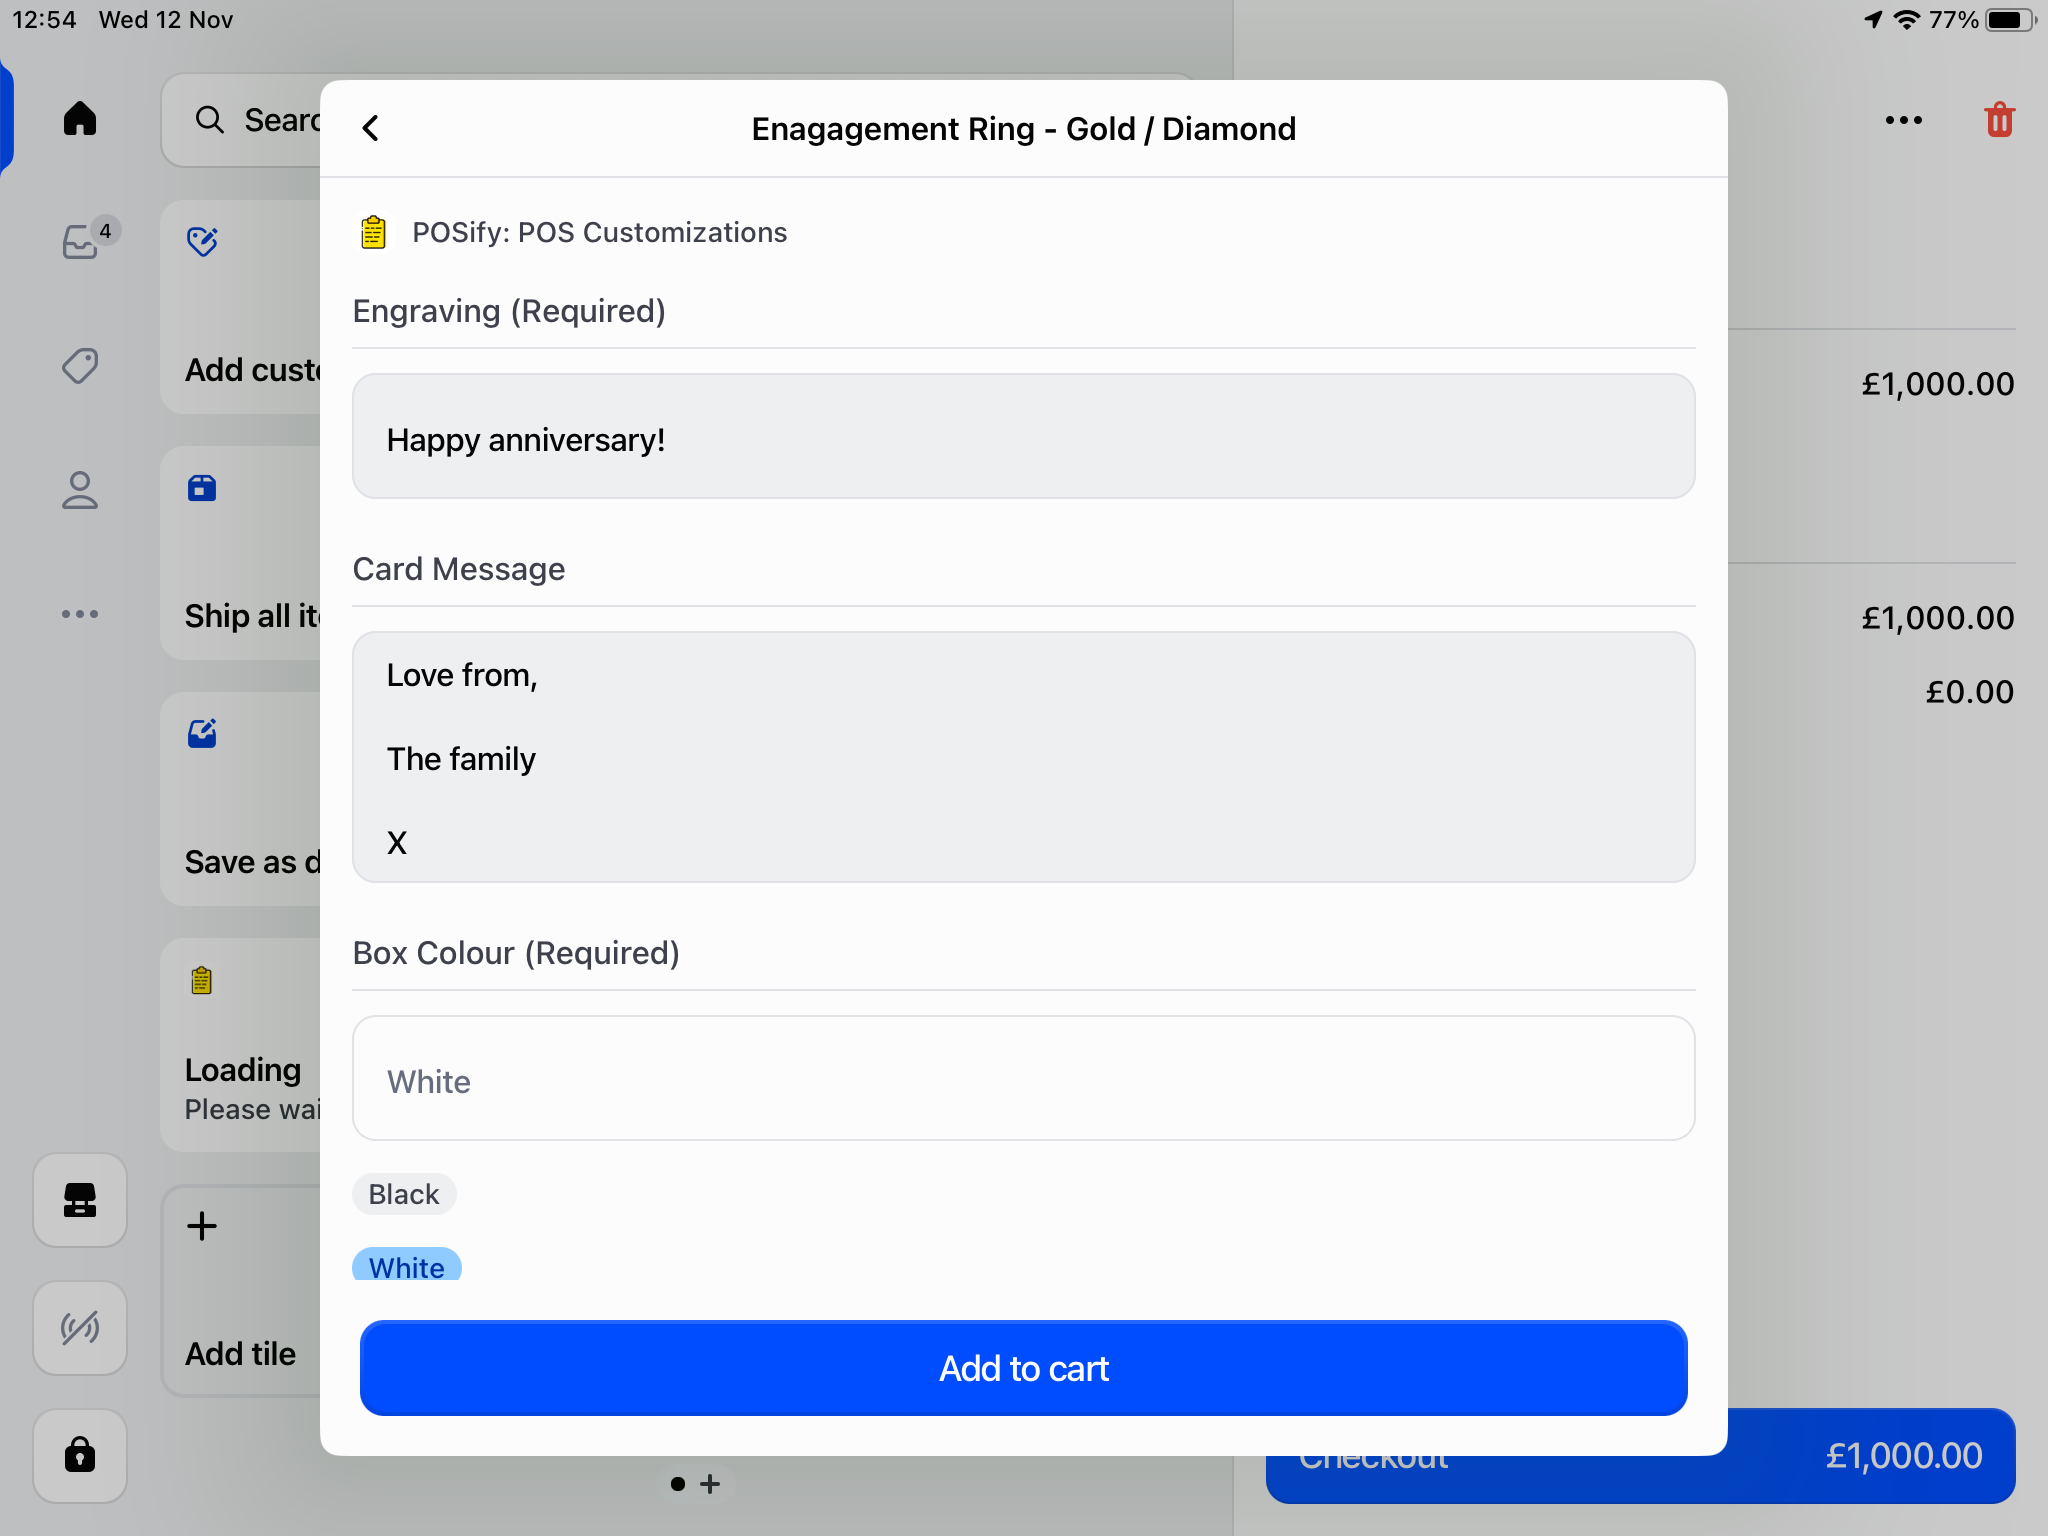
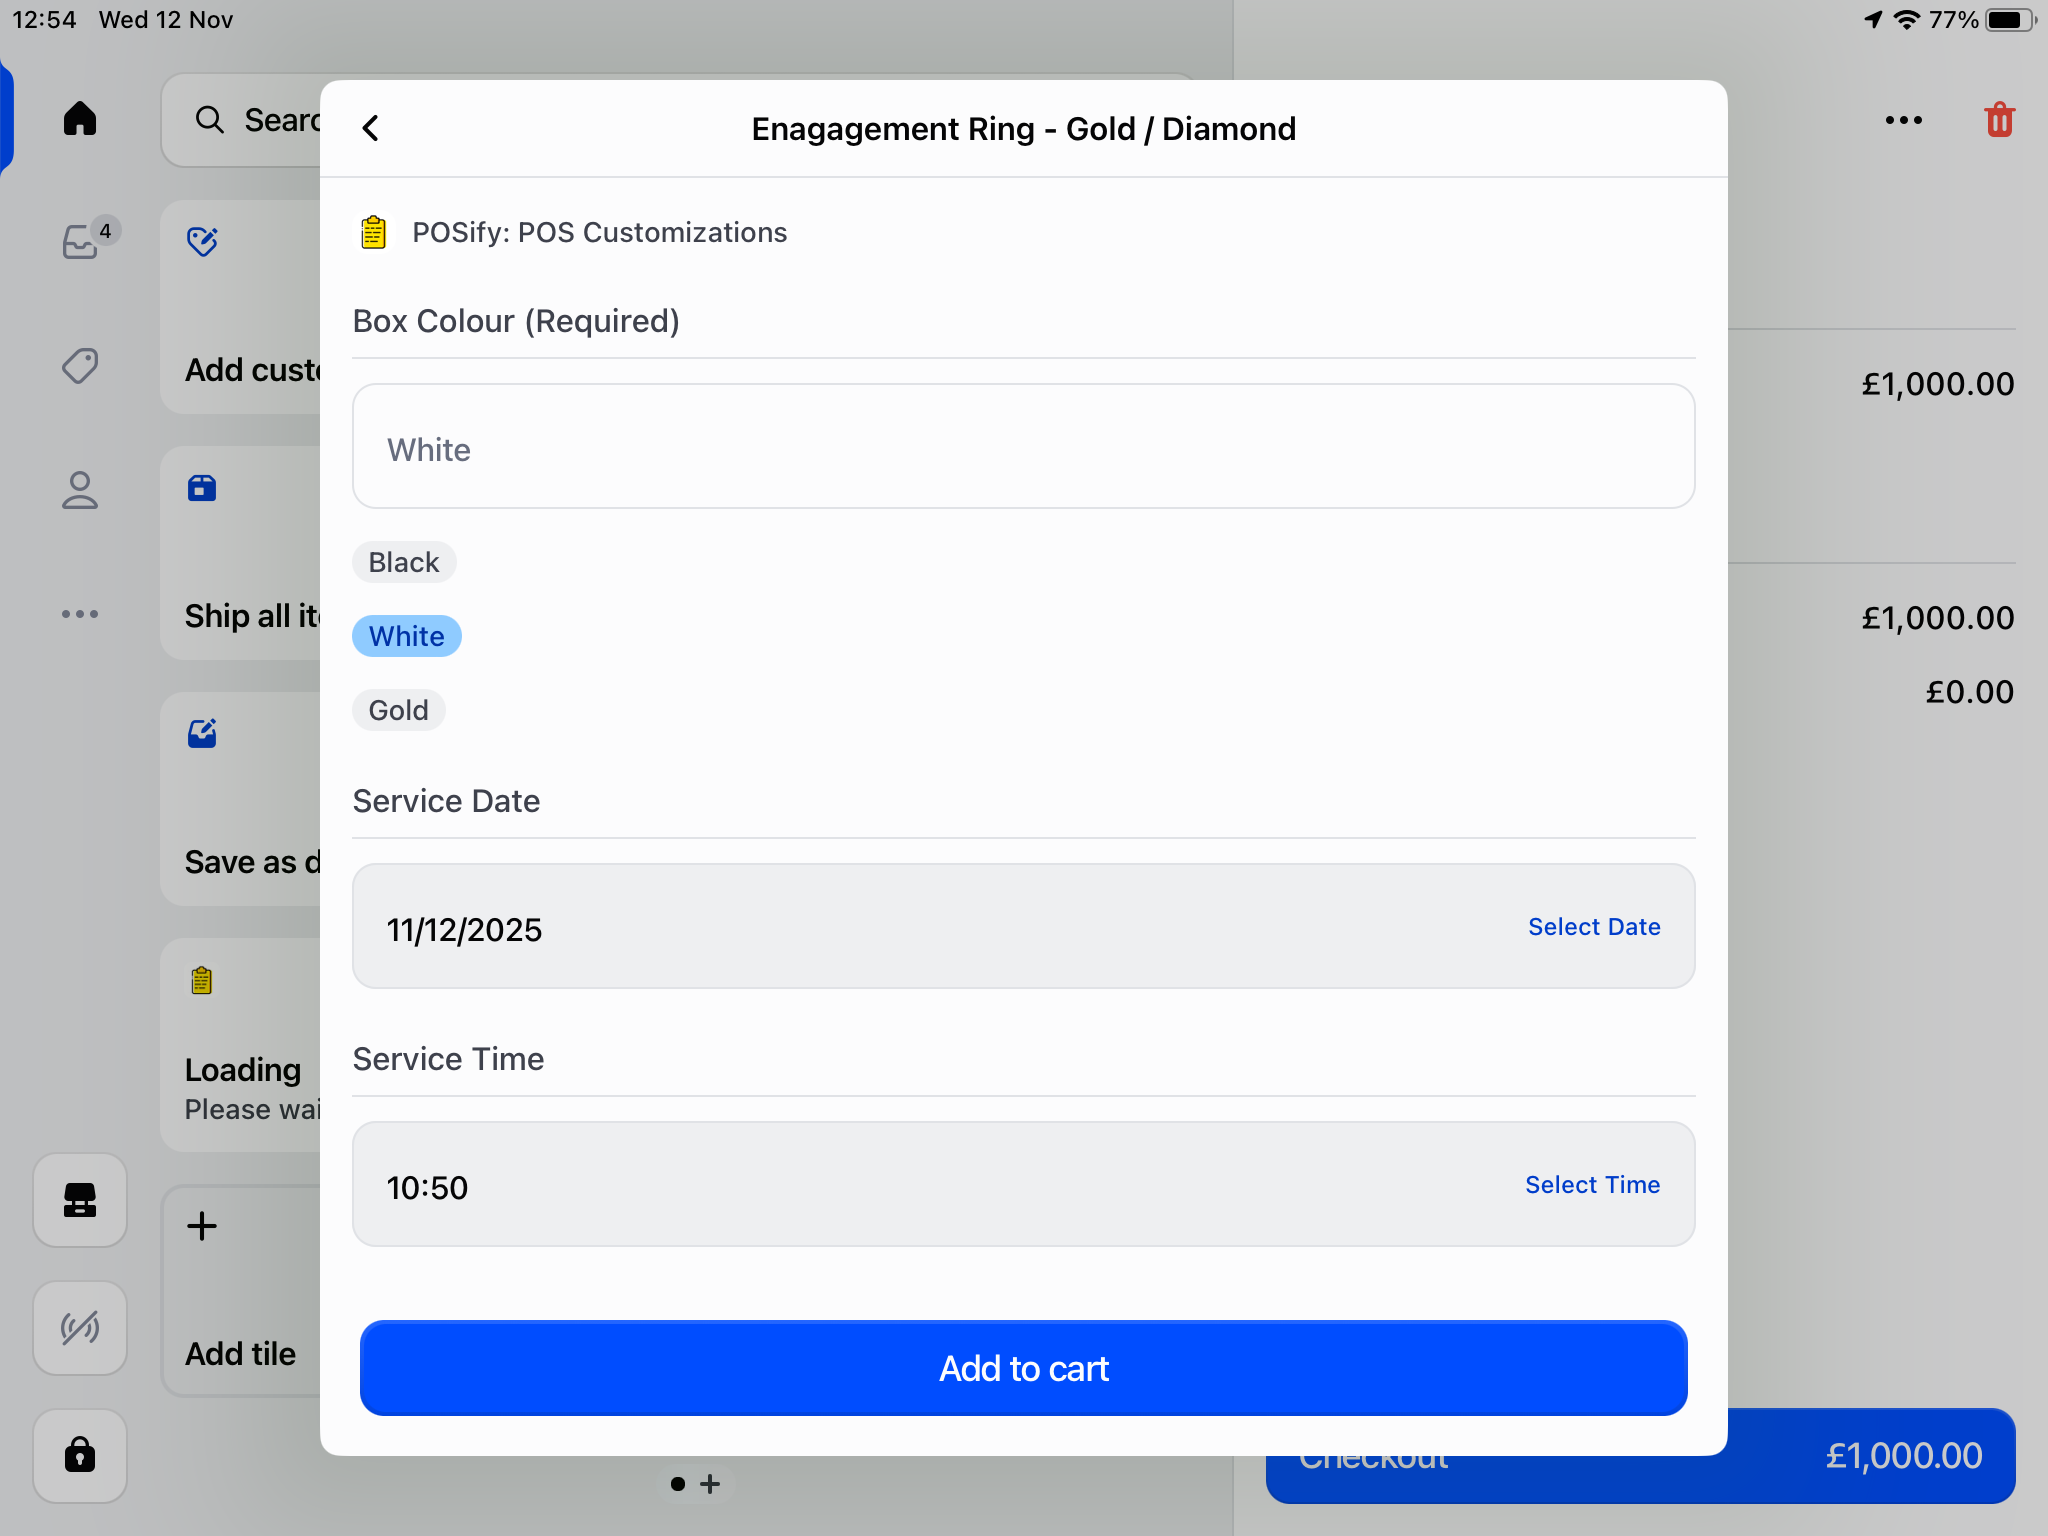
Click Add to cart - the customization values can then be seen on the product in the cart:
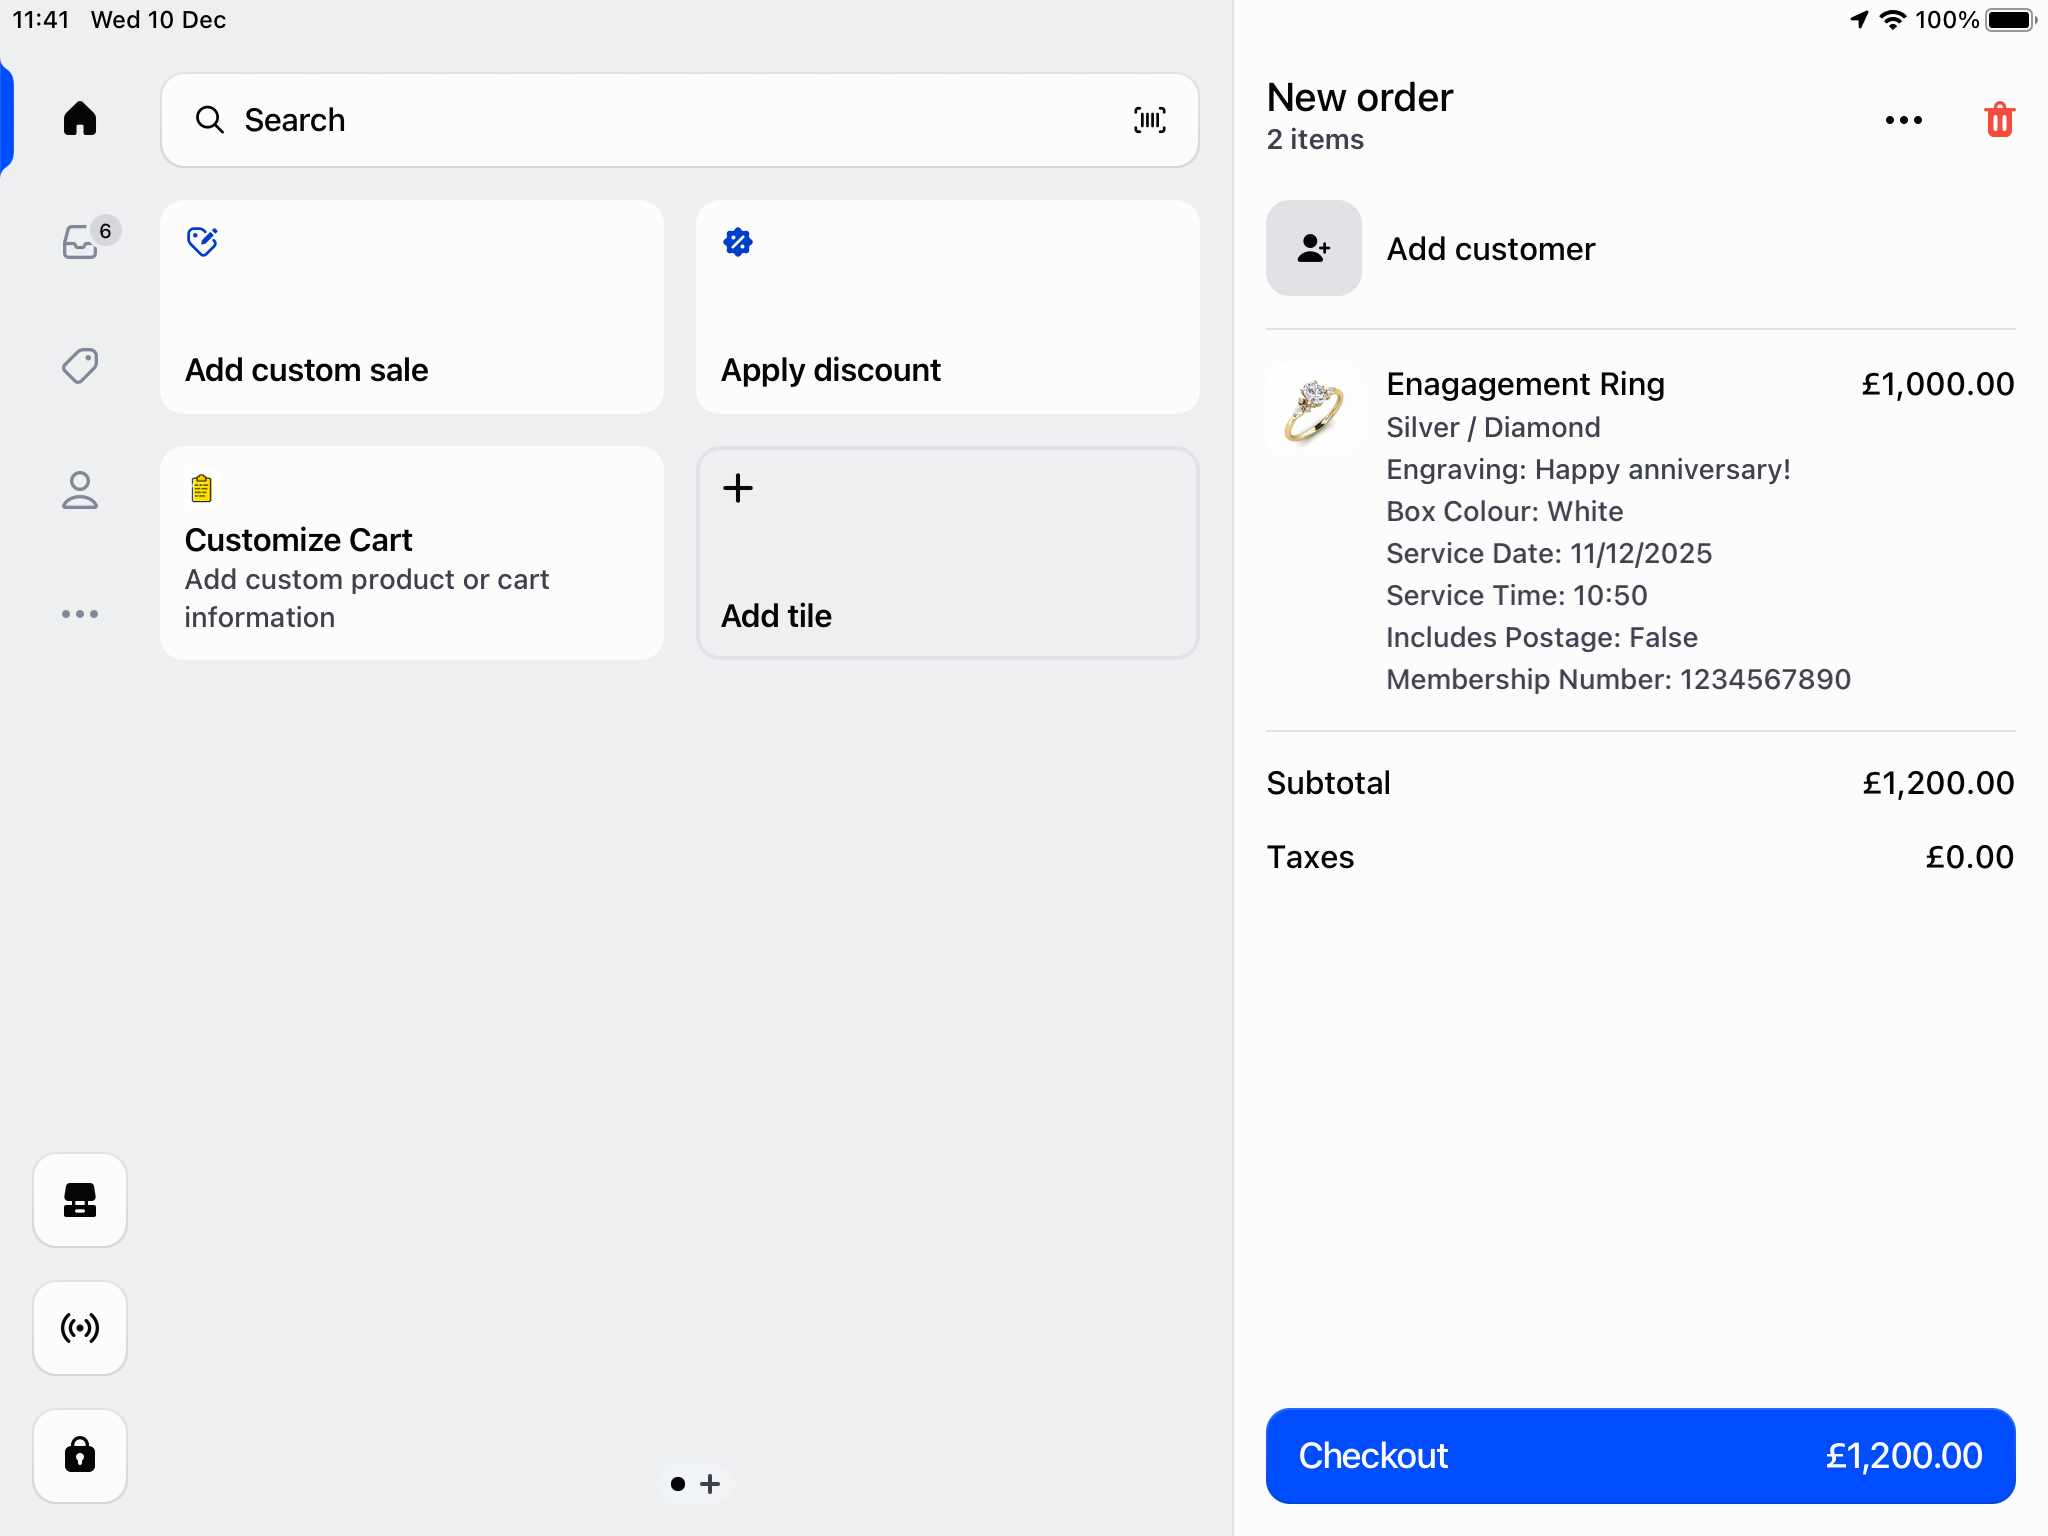
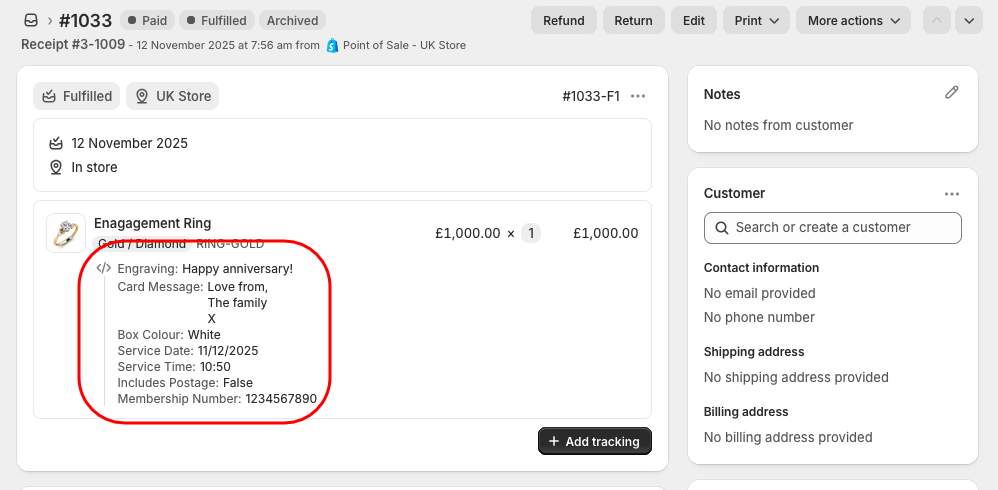
Accessing the values
The value of each field is stored as a property of the product in Shopify. These can be seen in both the POS app, and in Shopify Admin: