Setting up custom cart fields
POSify allows merchants to add customizations to the cart/order when selling via Shopify POS. These customization options must first be set up in Shopify Admin, as custom fields. You can save cart field values to the following places:
- Order attributes
- Order tags (see the Save to order as guide for more information)
- Order metafields (see the Save to order as guide for more information)
Creating a new cart field
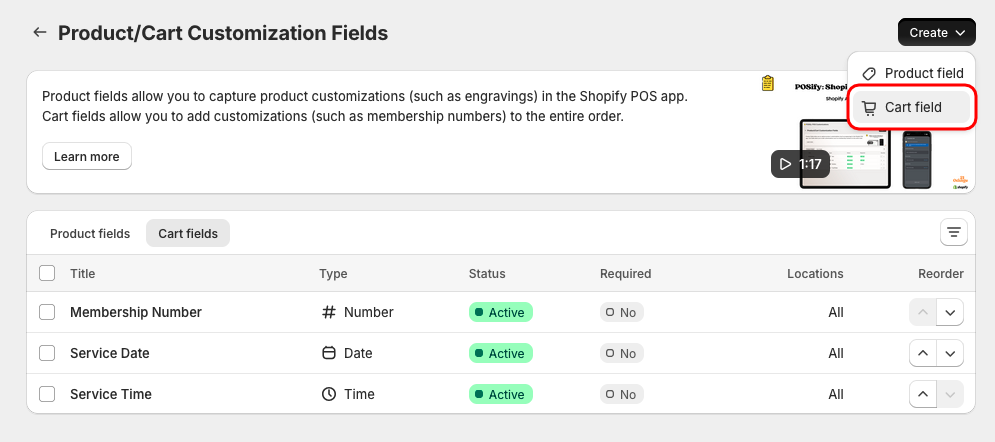
Head to the Product/cart fields page in the POSify Shopify Admin app and select the Cart fields filter at the top of the table to view all of your custom cart fields. To create a new field, click the Create button, then Cart field.
Field types
POSify allows the following field types to be created:
- Text: A simple text field
- Multi-line textbox: A text field with multiple lines
- Number: A text field that only allows numbers to be entered
- Date: A field that allows dates to be entered using the POS device's native date picker
- Time: A field that allows times to be entered using the POS device's native time picker
- True/false: A true or false selection
- List: A list containing multiple options, which can be set to single select or multi-select
- Photo: A field that allows a photo to be uploaded from the POS device
Field builder fields
Custom fields can have the following attributes, based on it's type:
- Title: The title of the custom field
- Placeholder: The helper text displayed inside the field before any text is entered, useful for prompting staff
- Options (list only): The options that will appear in the list - see the Importing list options guide for import instructions
- Default Value: The pre-selected value(s) that are set
- Images: A list of up to 15 images that can be used to visually display customization options to the customer at checkout - Images are ordered alphabetically by filename in POS
Field settings
Each custom field has the following settings options:
- Status: Whether the field should be displayed in the POS app
- Required: Whether this field needs to be filled in before adding it to the cart - see the Required fields alert guide to warn the user that they're missing required fields when checking out
- Fee/Price: The fee that should automatically be added to the cart when this field has a value (list field types can have a different fee for each individual option) - see the Adding customization fees guide for more information
- Available Locations: Which locations this field should be available at (only application for stores with multiple POS locations)
- Save To Order As: How the value of this field should be stored on the order - see the Save to order as guide for more information
- Metafield Definition (save as metafield only): The order metafield definition that the value of this field should be saved to
- Multi-choice (list only): Whether the list should allow multiple options to be selected
Field settings (advanced)
- Apply Automatically: Whether the default value for this field should be automatically applied to the cart - see the Automatically applying fields guide for more information
- Force POS App Popup: Whether the POSify POS app should be forced to open when this field is missing a value - see the Force opening the POS app guide for more information
- Date Format (date only): The format of the inputted date
- Excluded Dates (date only): Which dates won't be available for selection in the POS app
- Searchable (list only): Allows the list of options to be searchable in the POS app
- Hide from order/receipt if false (true/false only): Whether to hide this field on receipts if the value is set to false
Example fields in Shopify Admin & POS
True/False field example
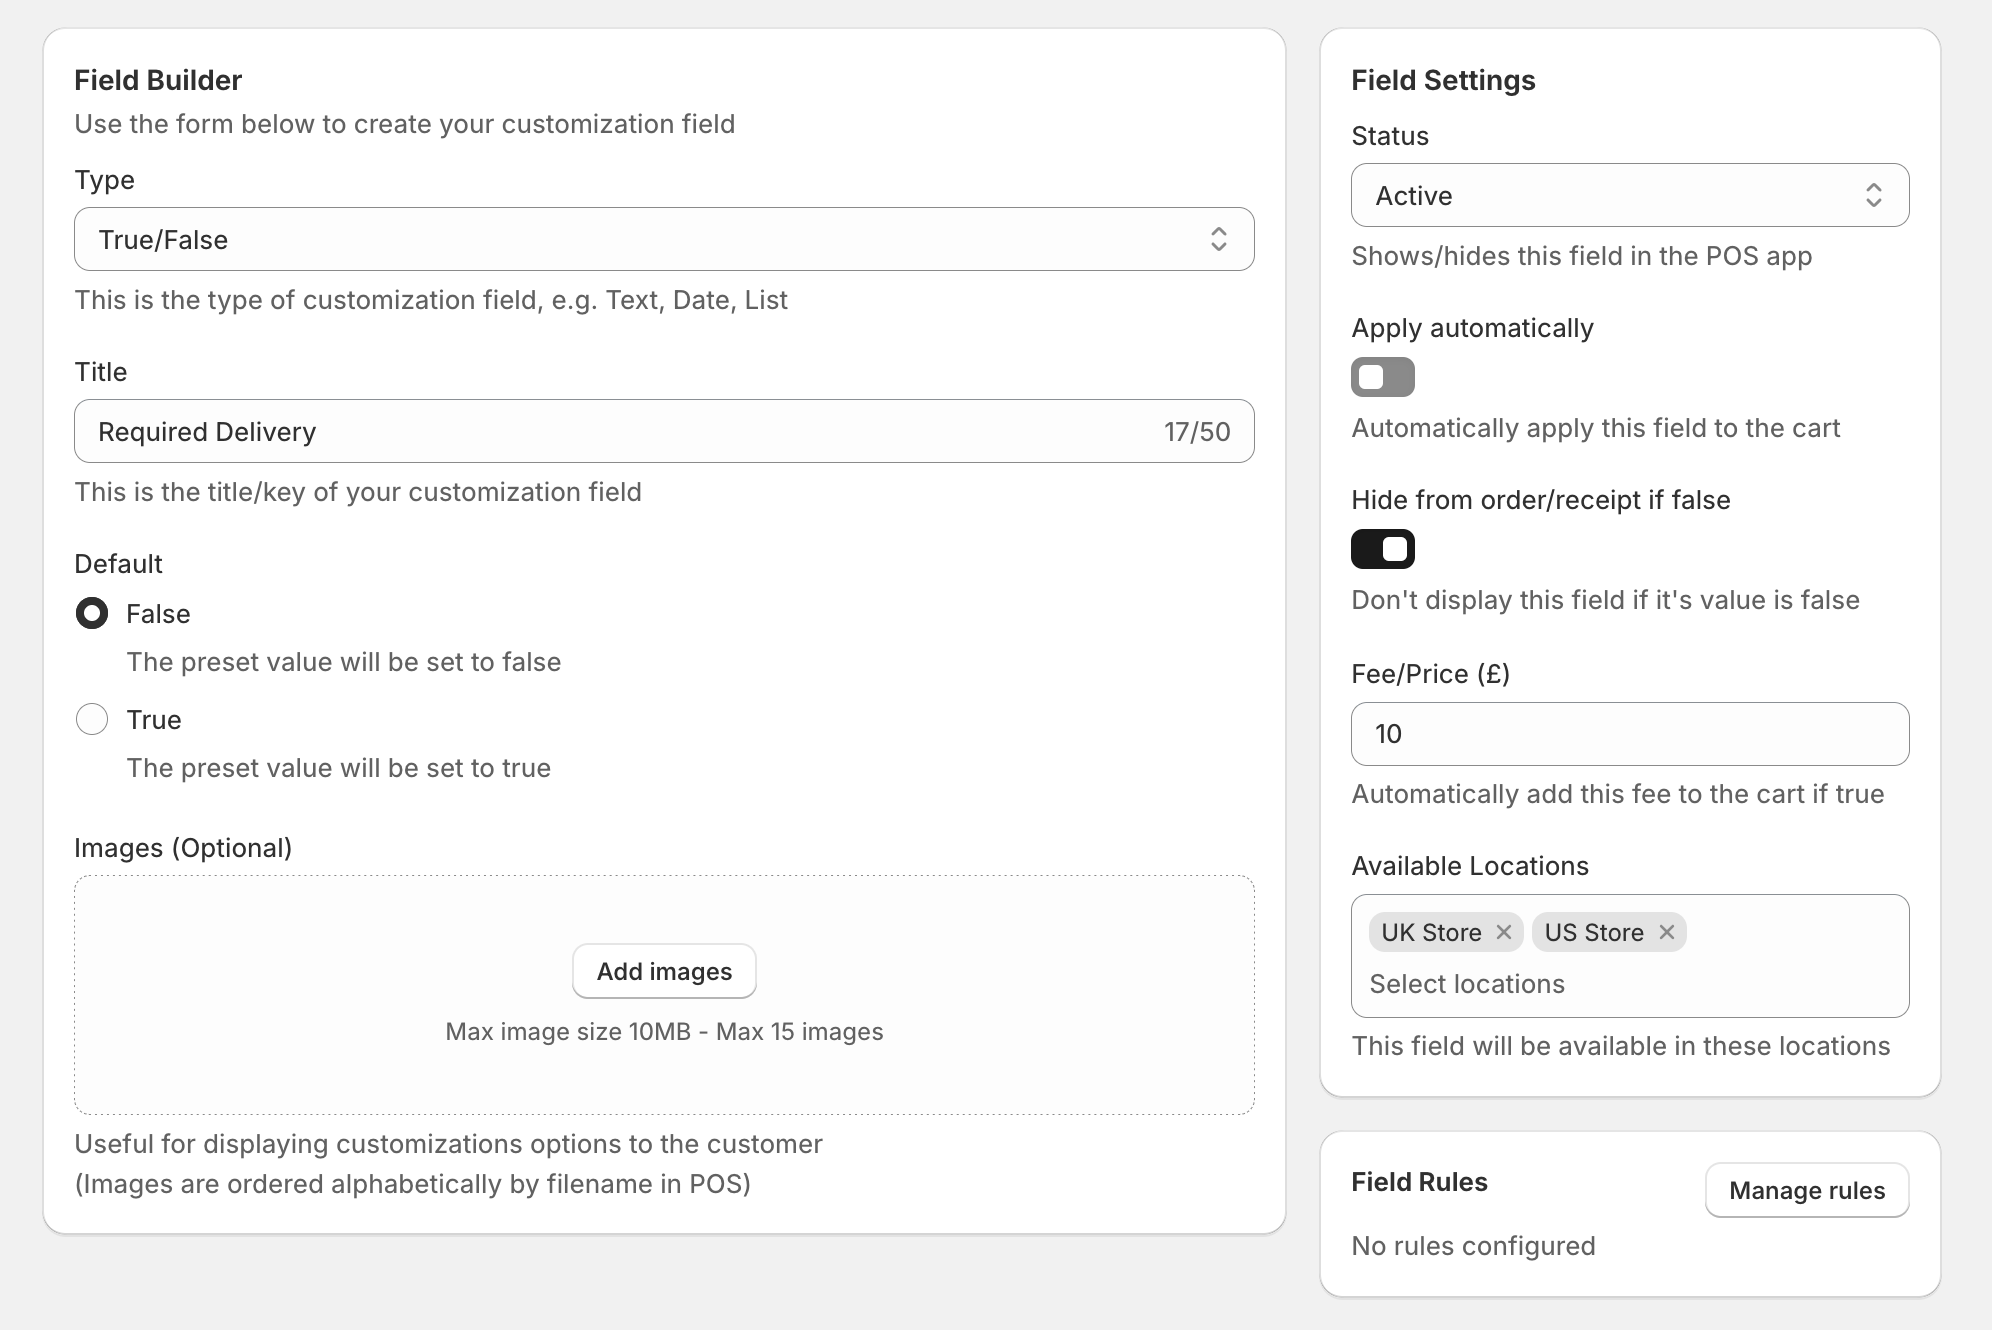
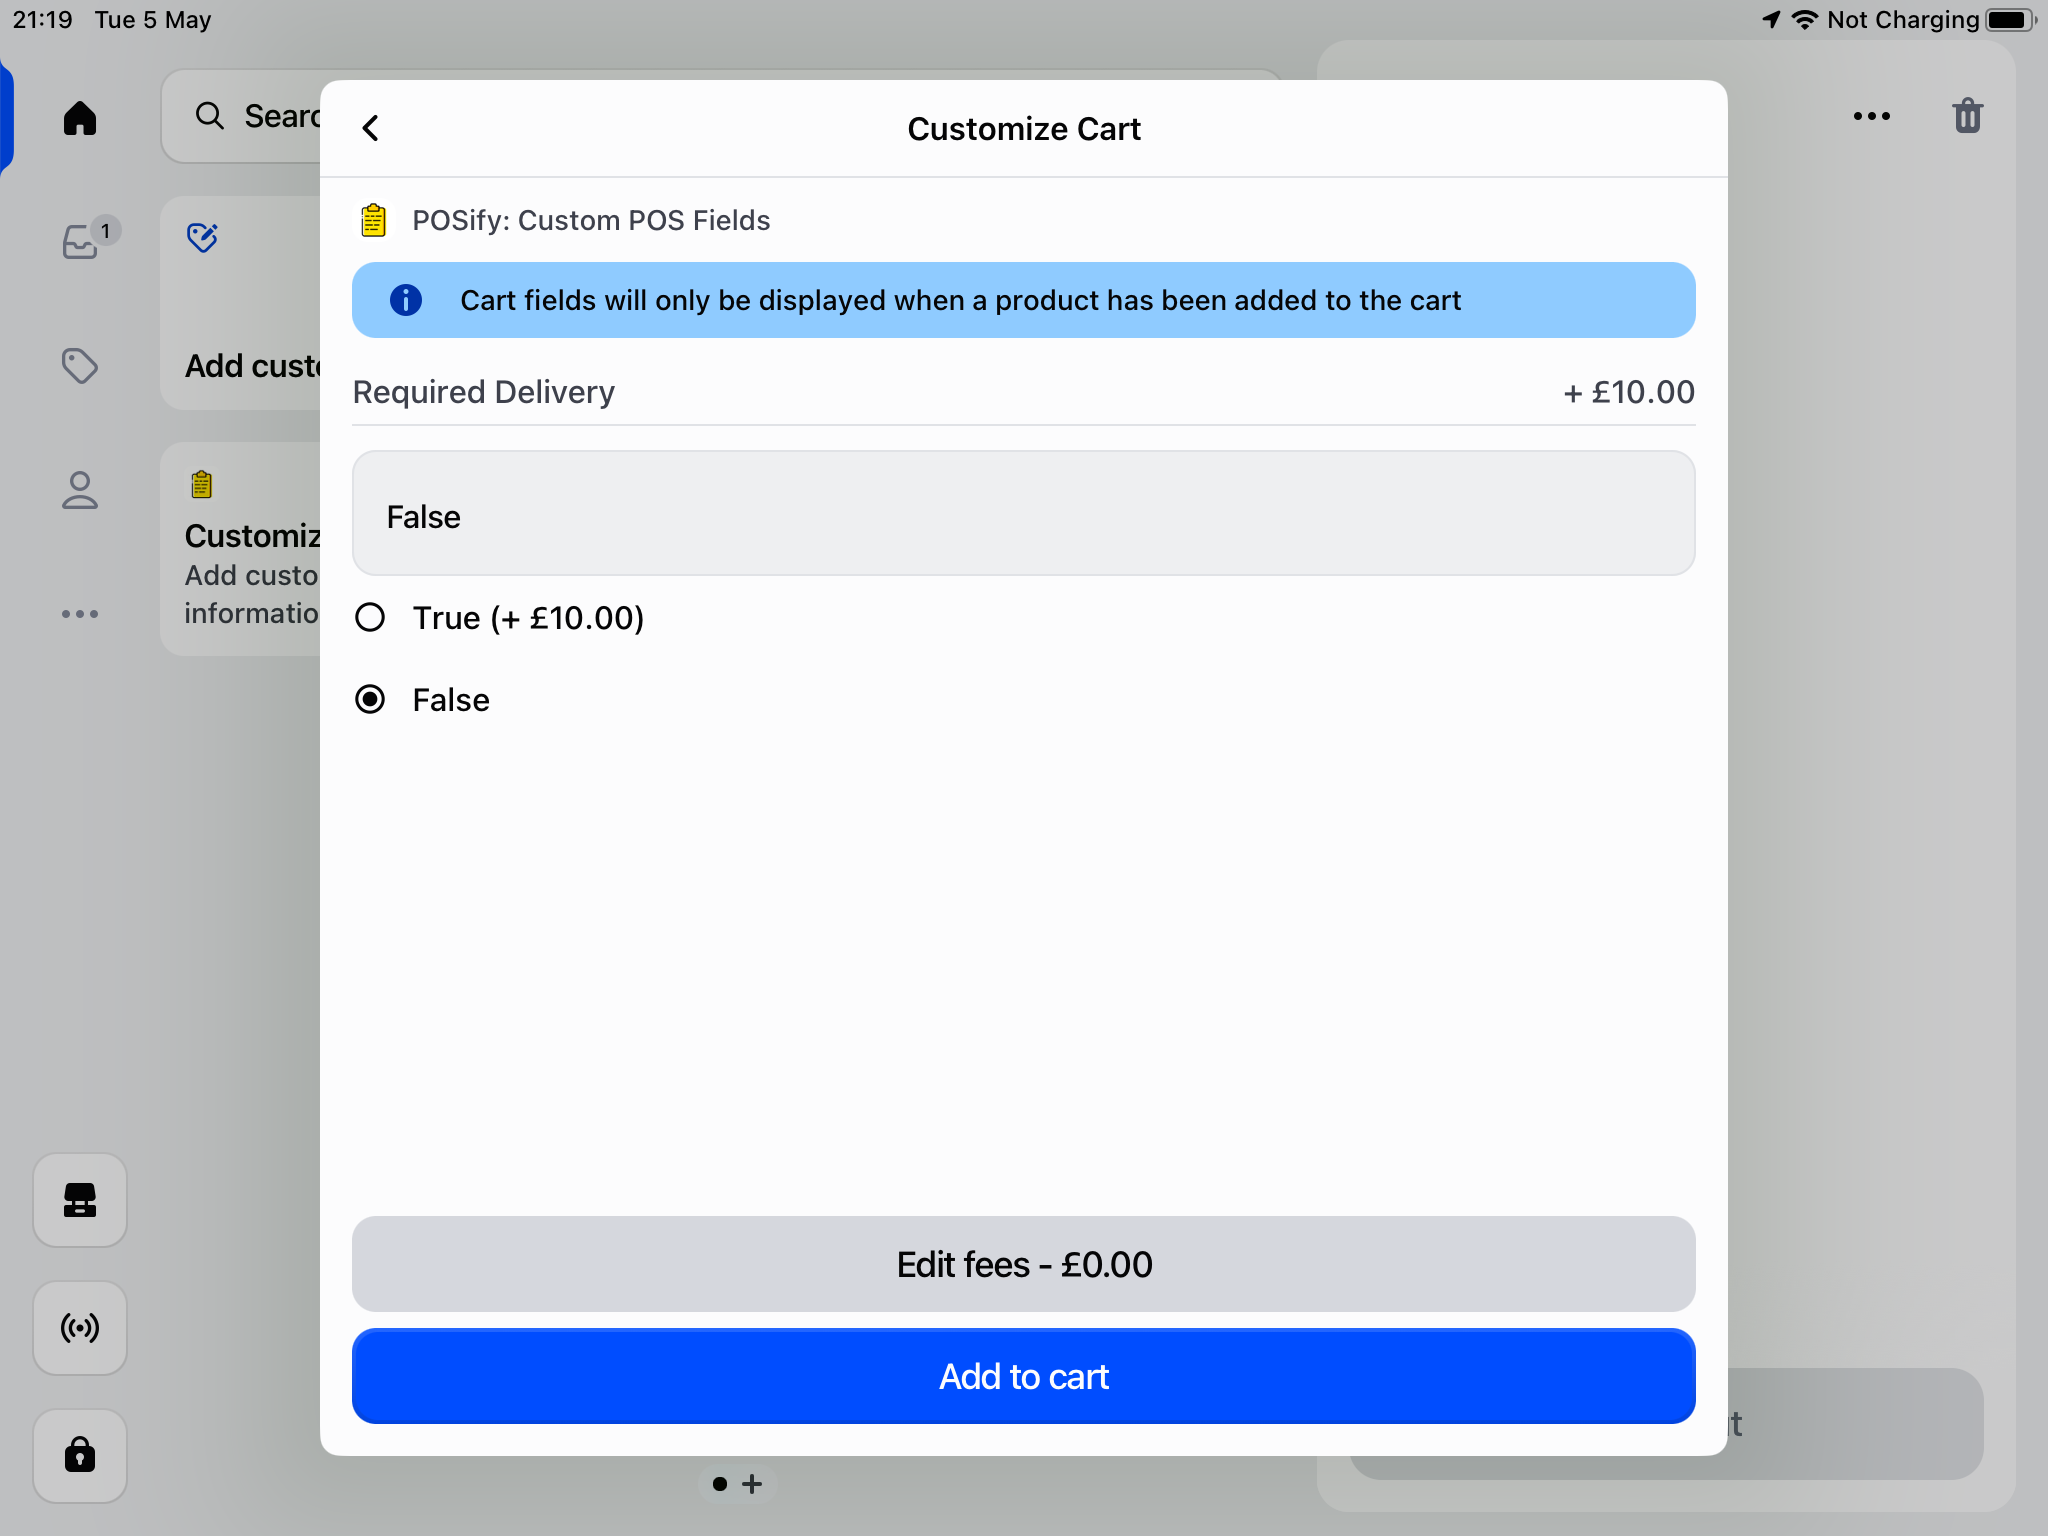
Below is an example of a true/false field created in POSify.
- Type: True/False
- Title: Required Delivery
- Default: False
- Fee: £10 (this fee will be applied automatically to the cart when this field is true)
- Available Locations: UK Store & US Store
- Hide from order/receipt if false: This field will not be be shown on the order or receipt unless the value is true
This is how the true/false field is displayed in the POSify POS app:
Date field example
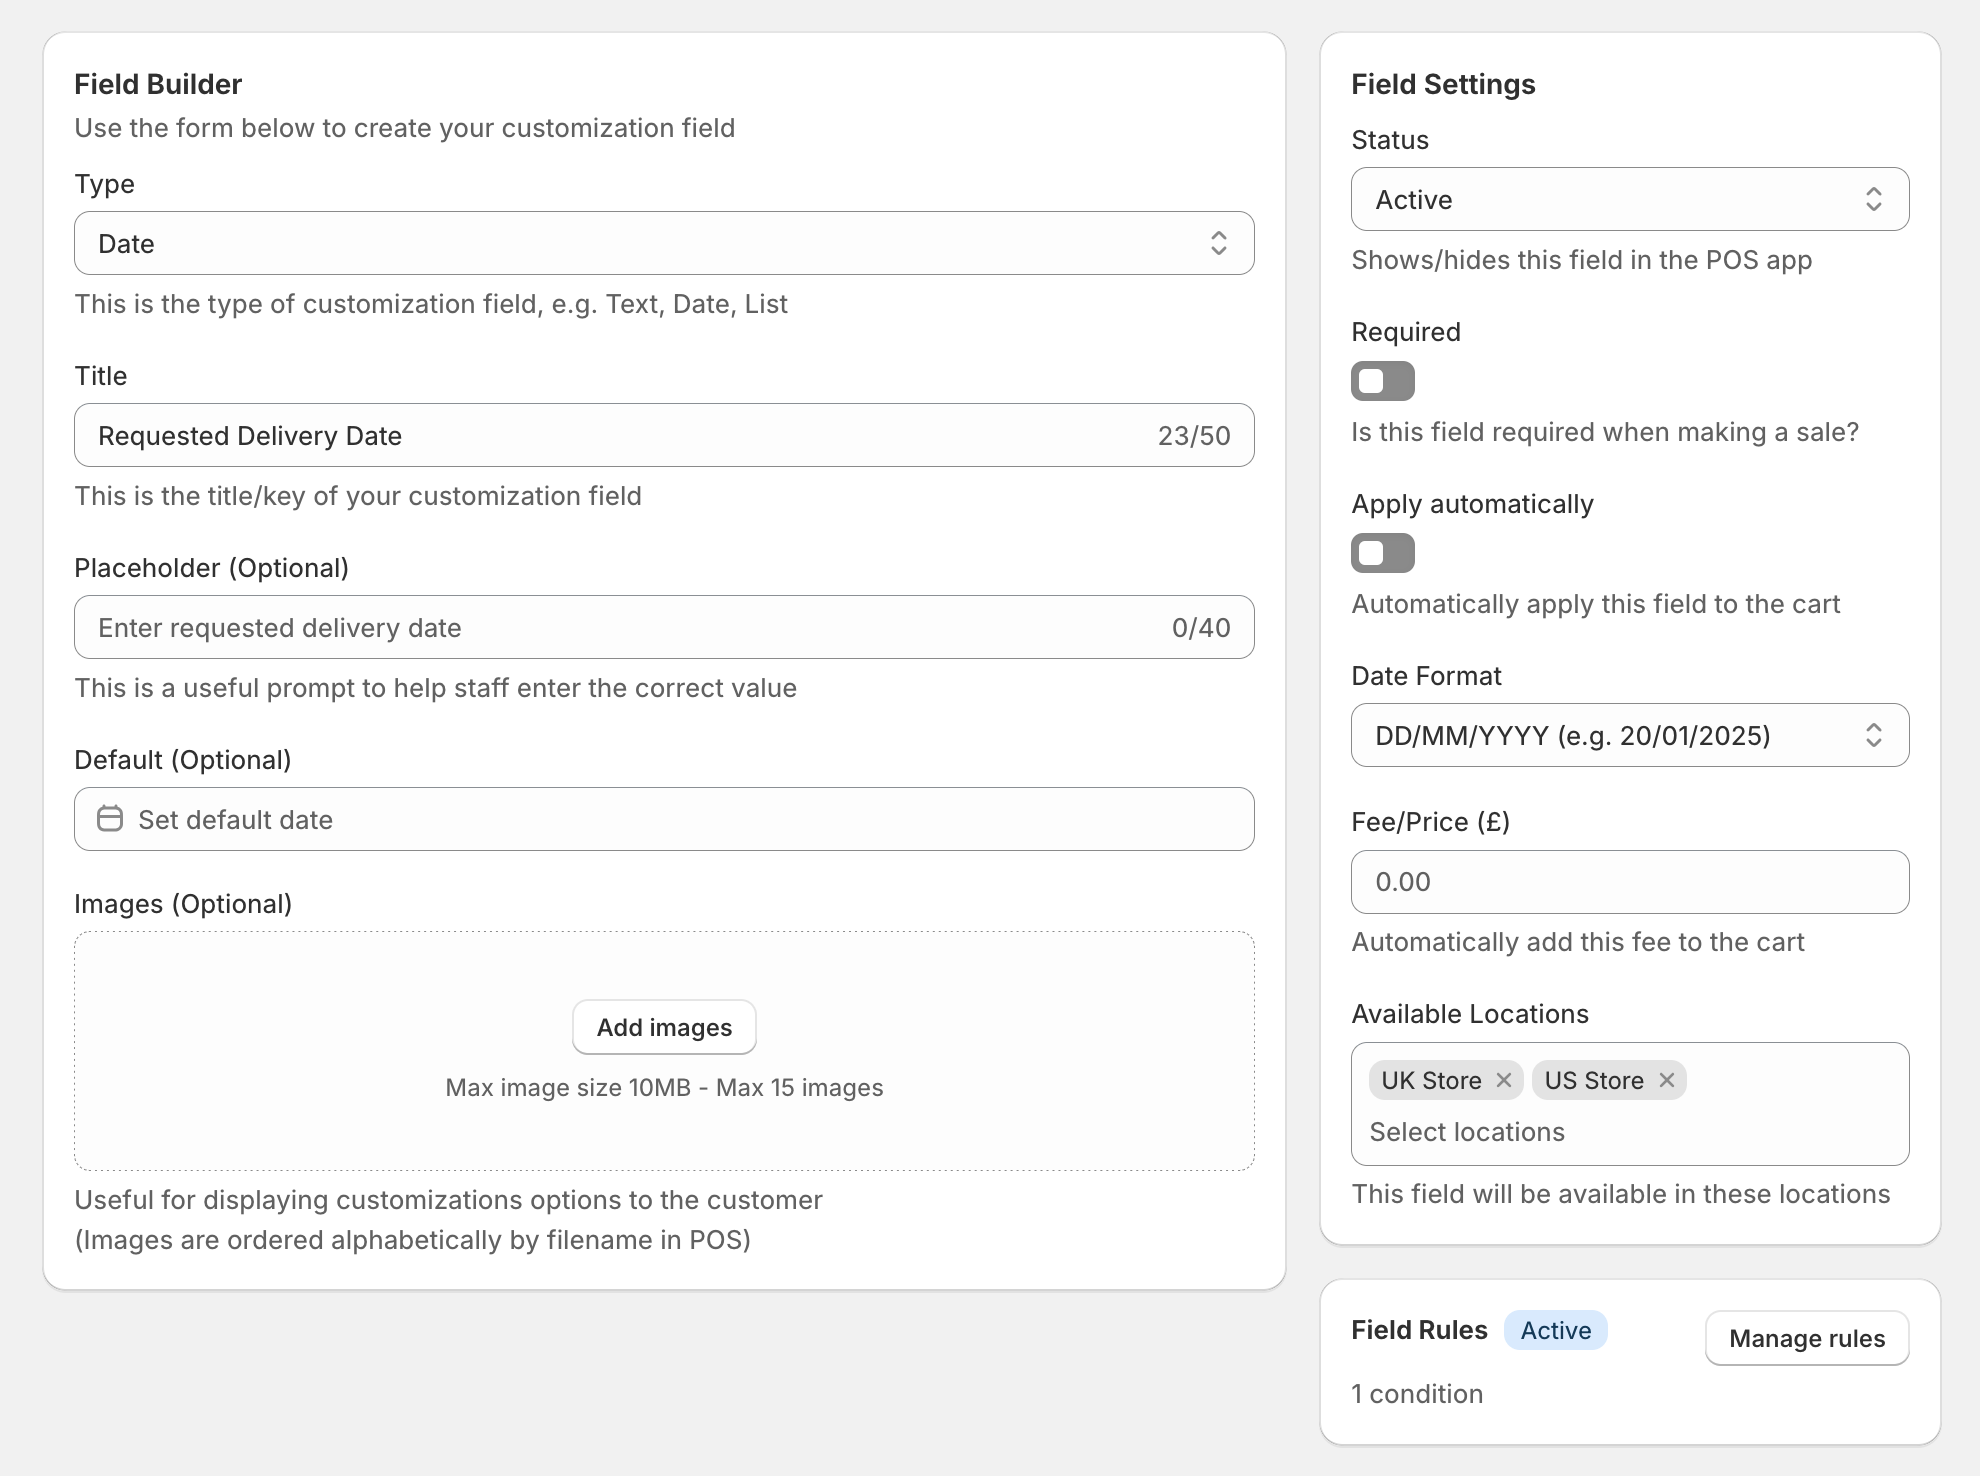
Below is an example of a date field created in POSify.
- Type: Date
- Title: Requested Delivery Date
- Date Format: DD/MM/YYYY
- Available Locations: UK Store & US Store
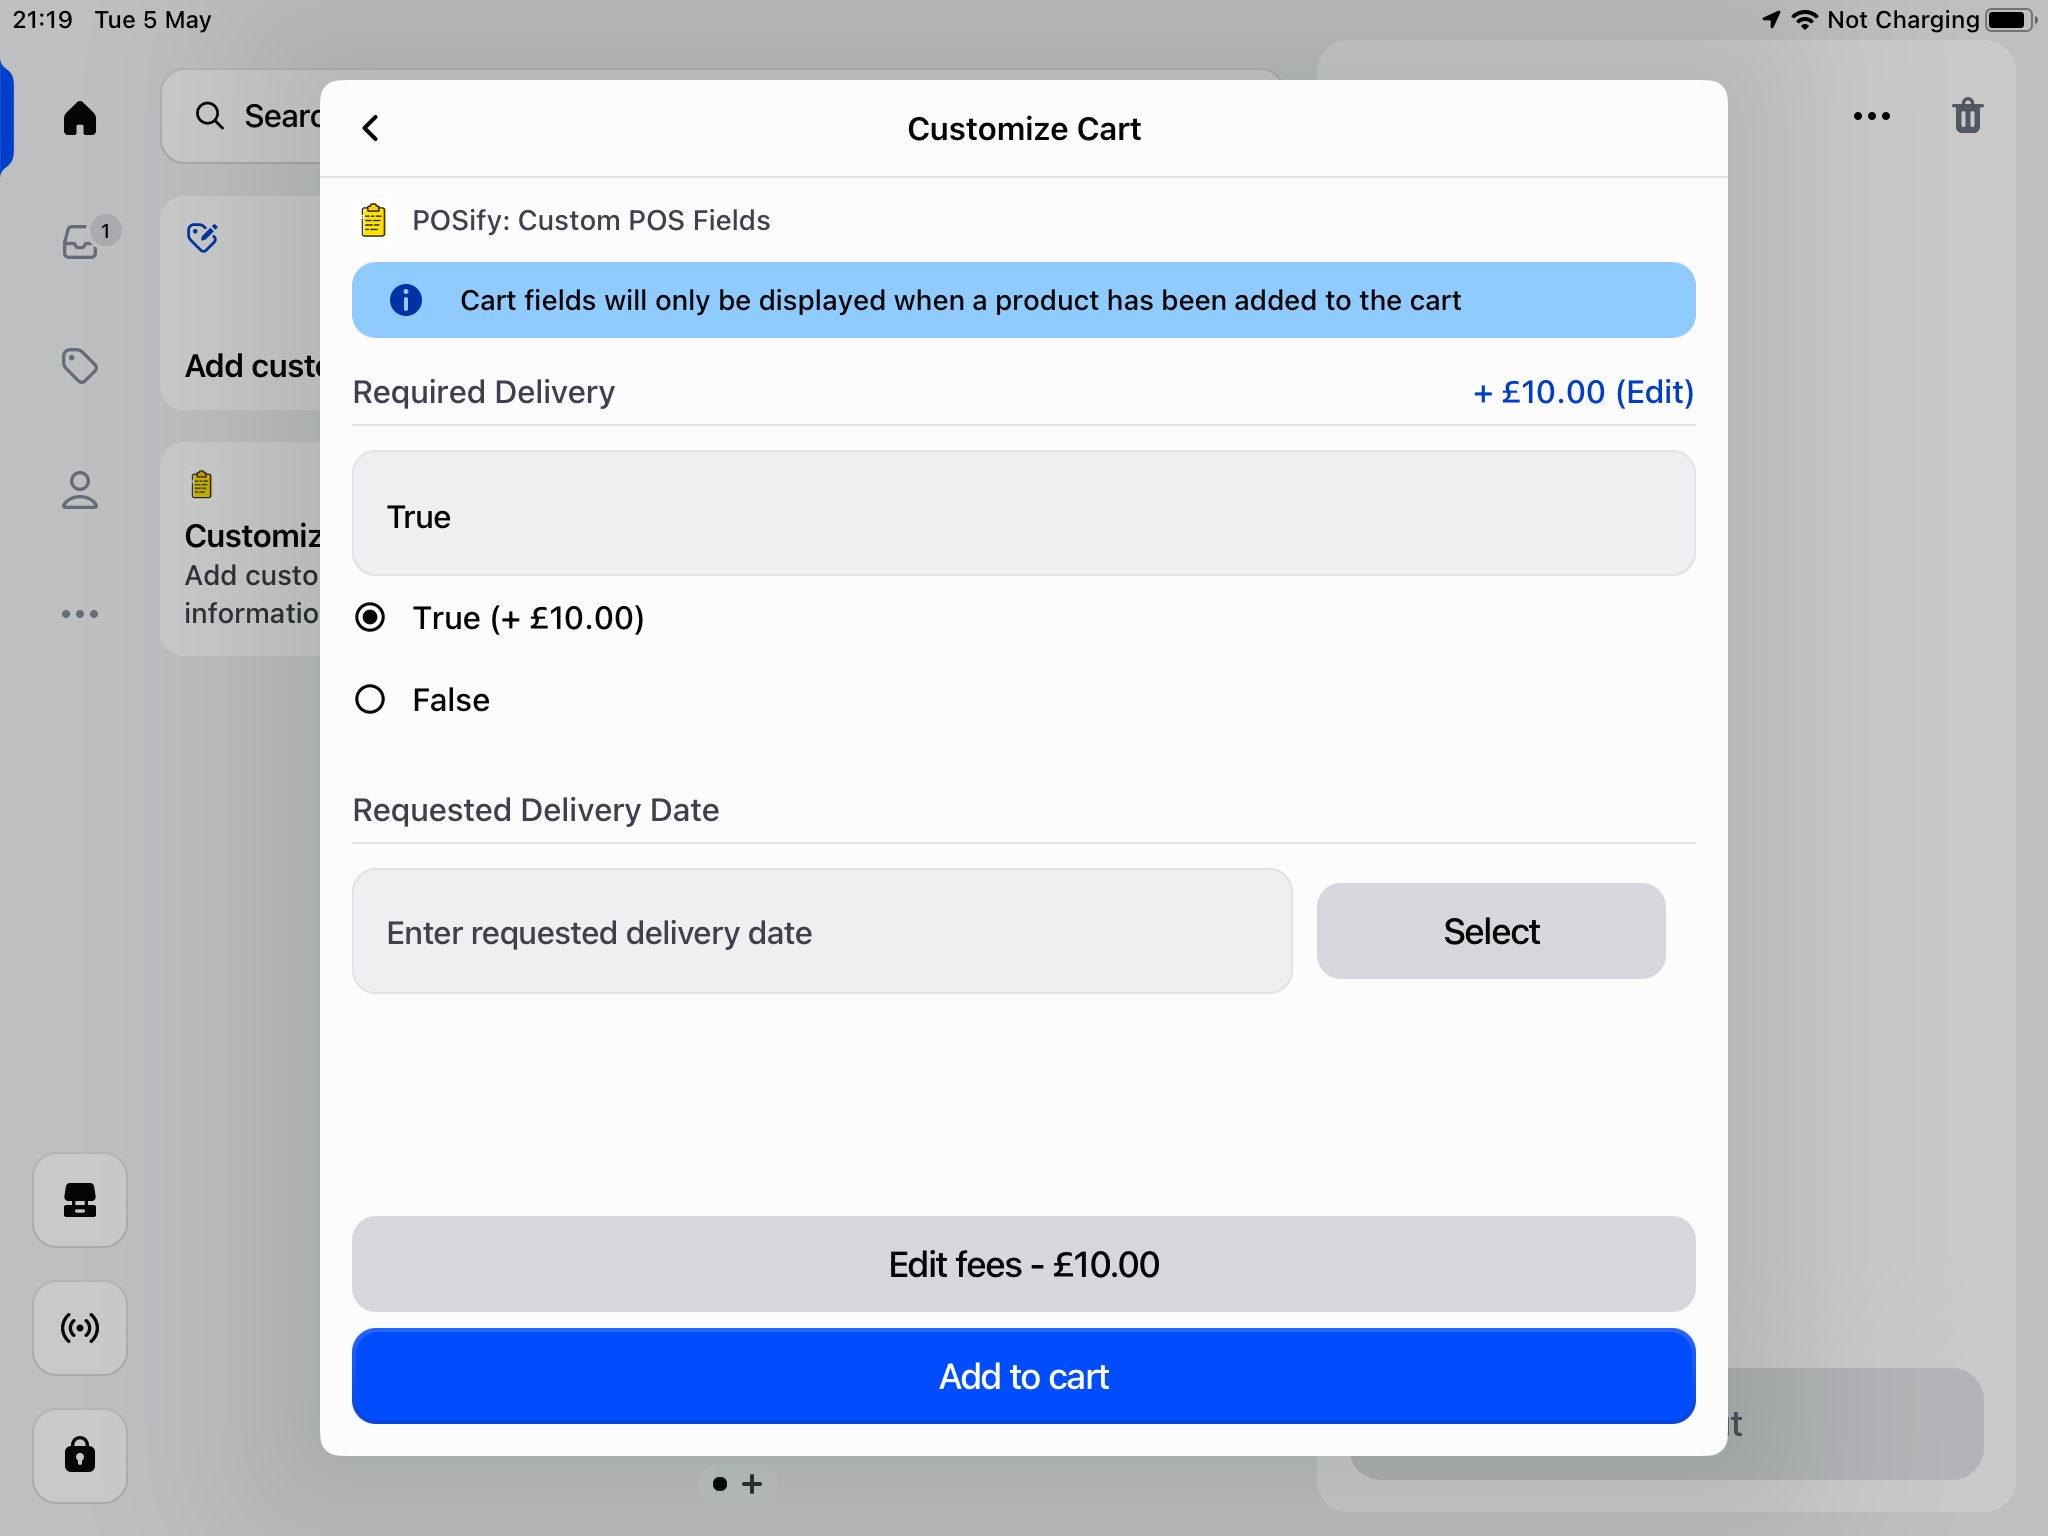
- Field Rules: 1 rule active (e.g. only show this field if the Required Delivery field is True)
This is how the date field is displayed in the POSify POS app:
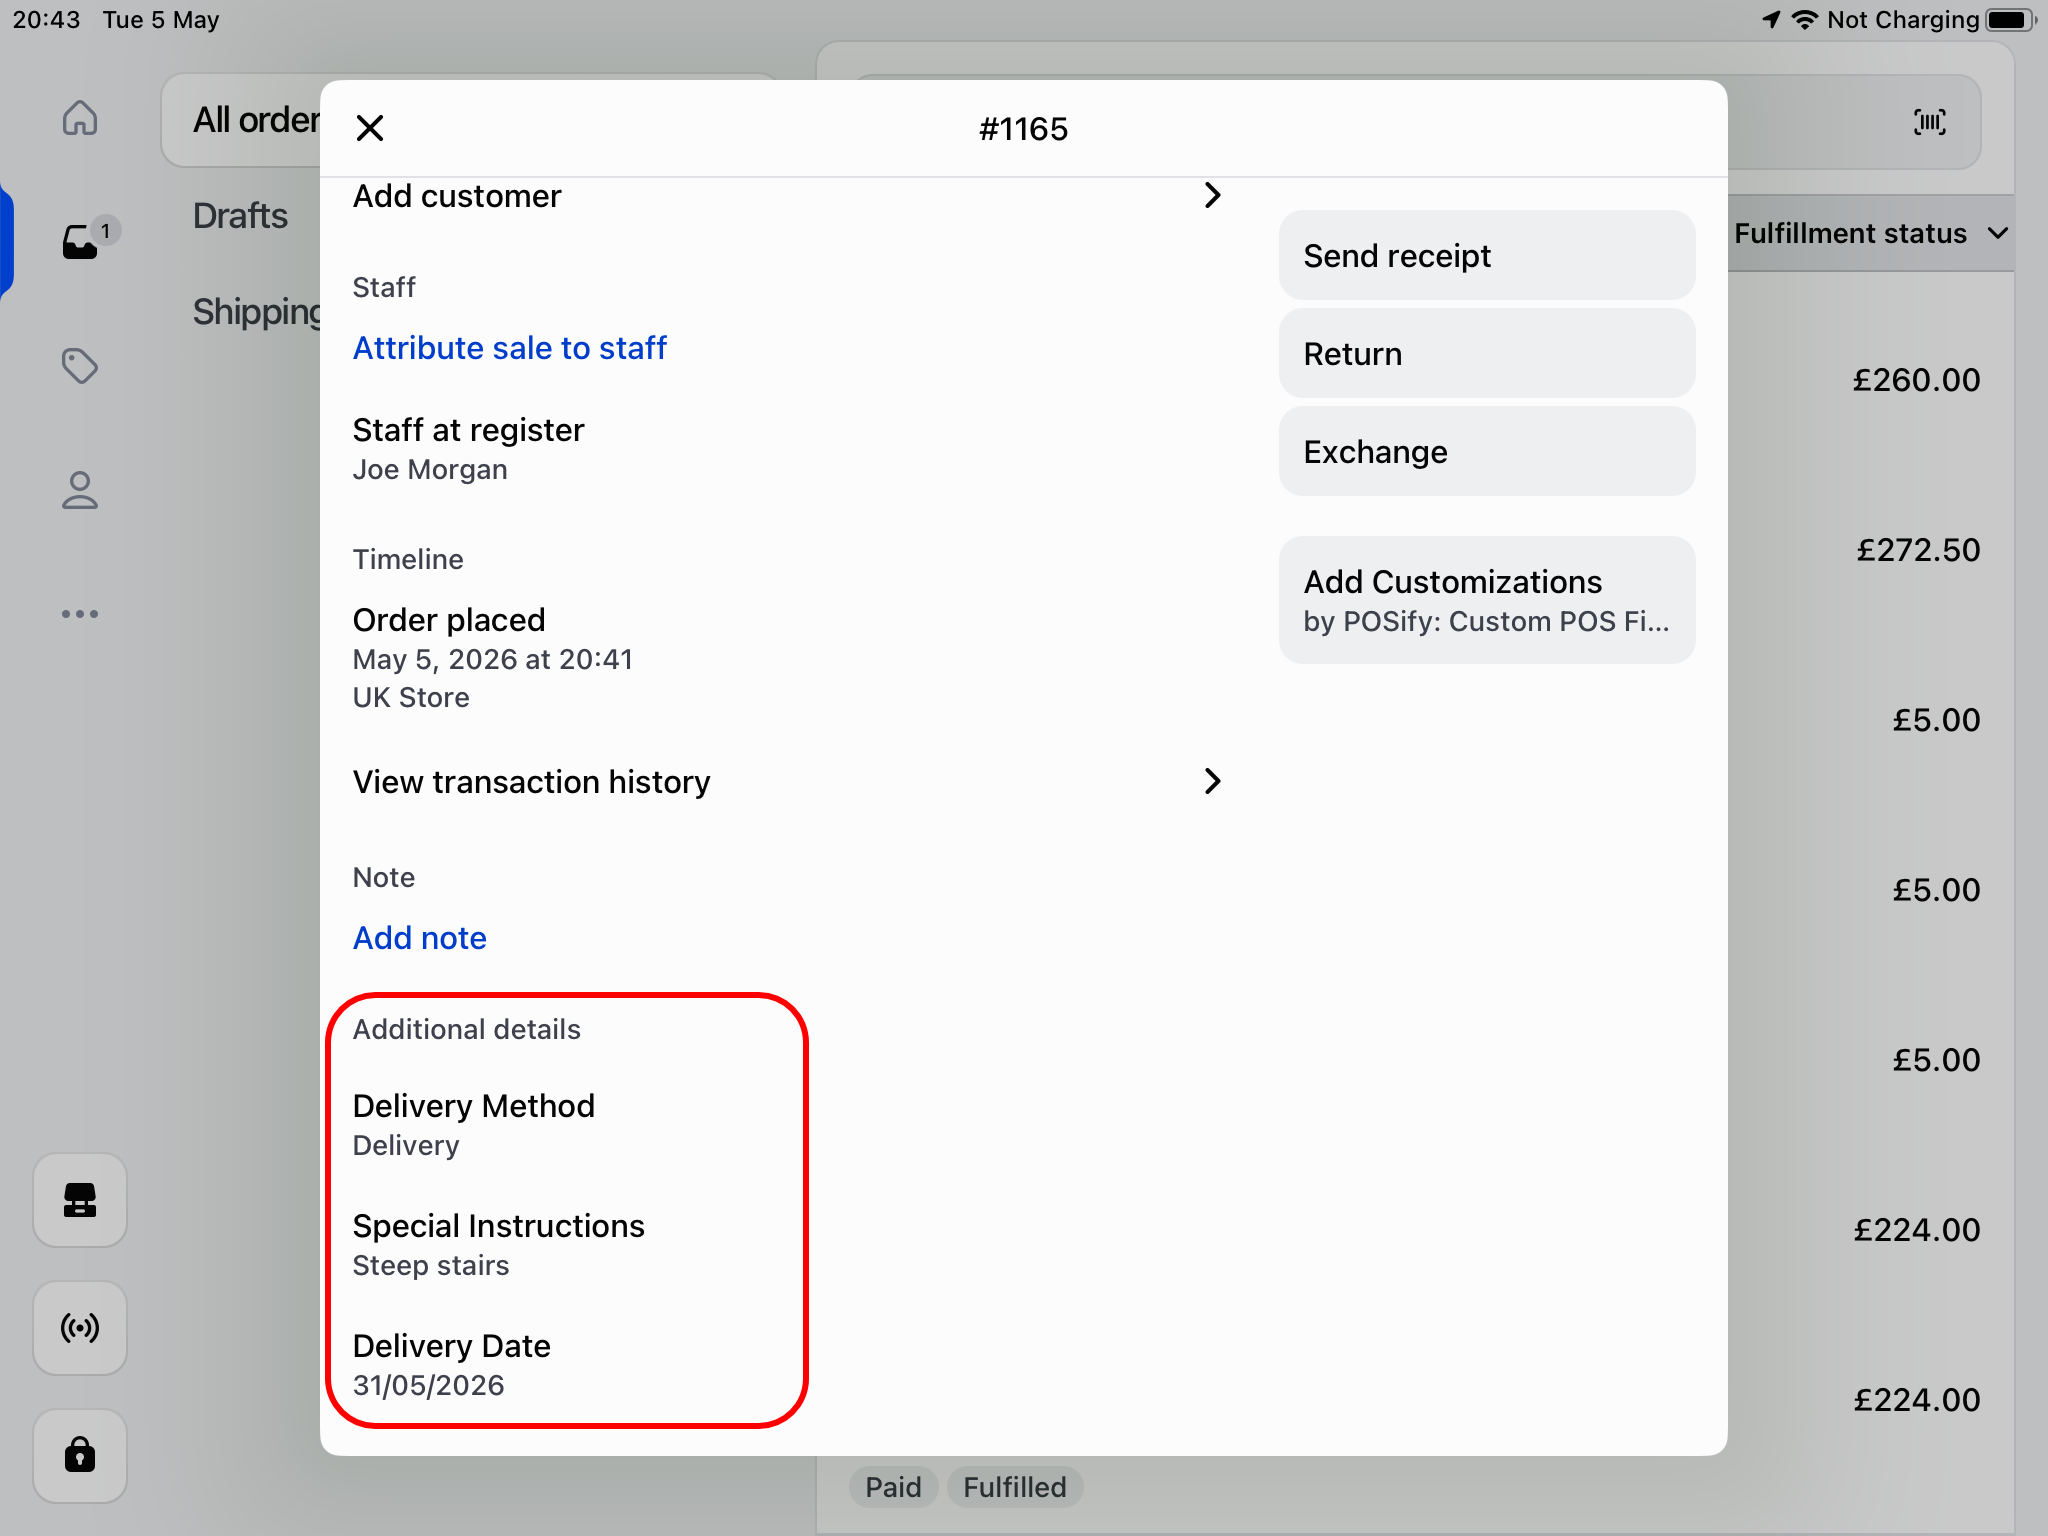
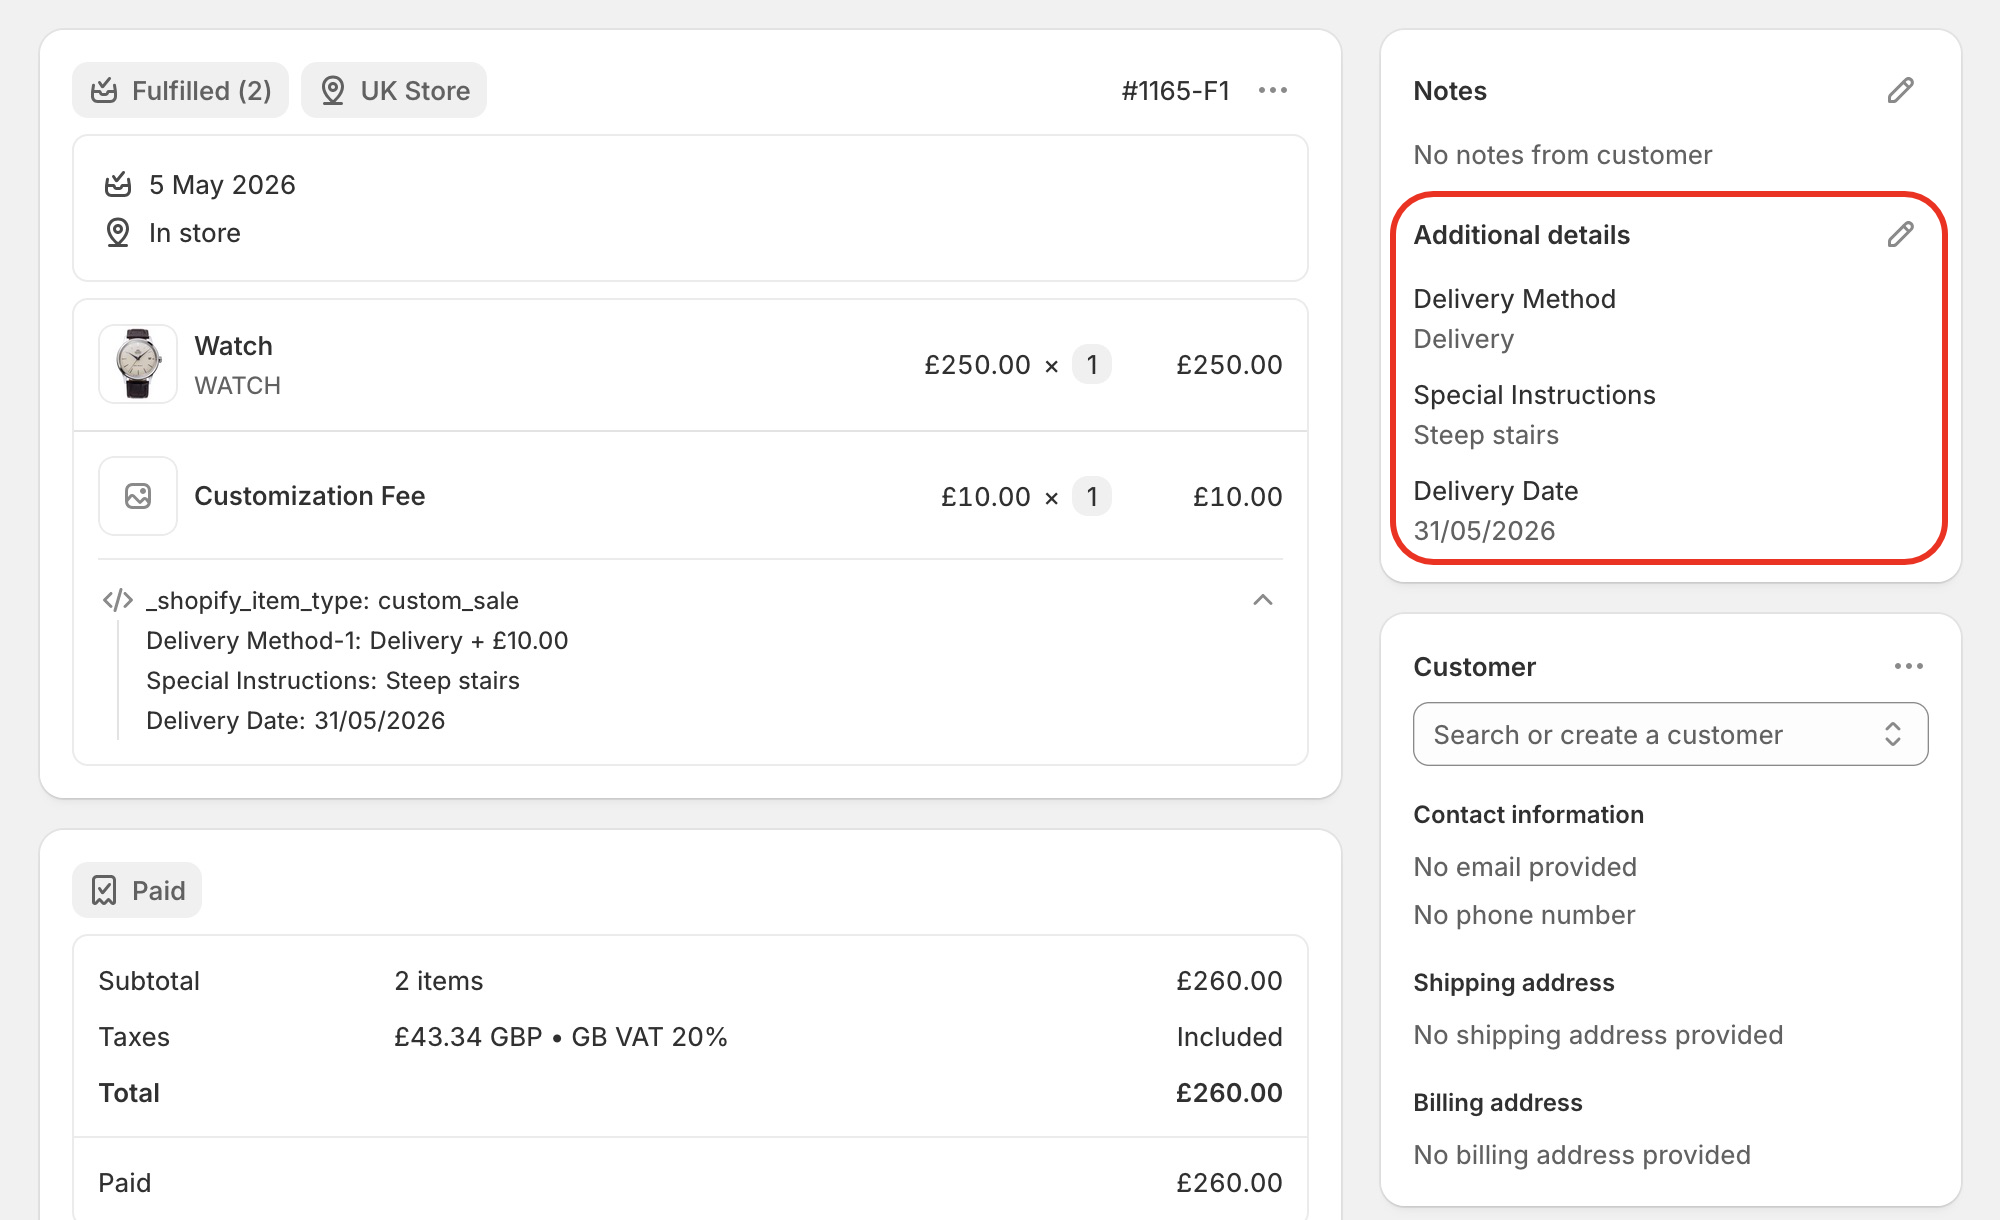
Accessing the values in Shopify Admin & POS
The value of each field is stored as additional details. These can be seen in both the POS app, and in Shopify Admin: